5
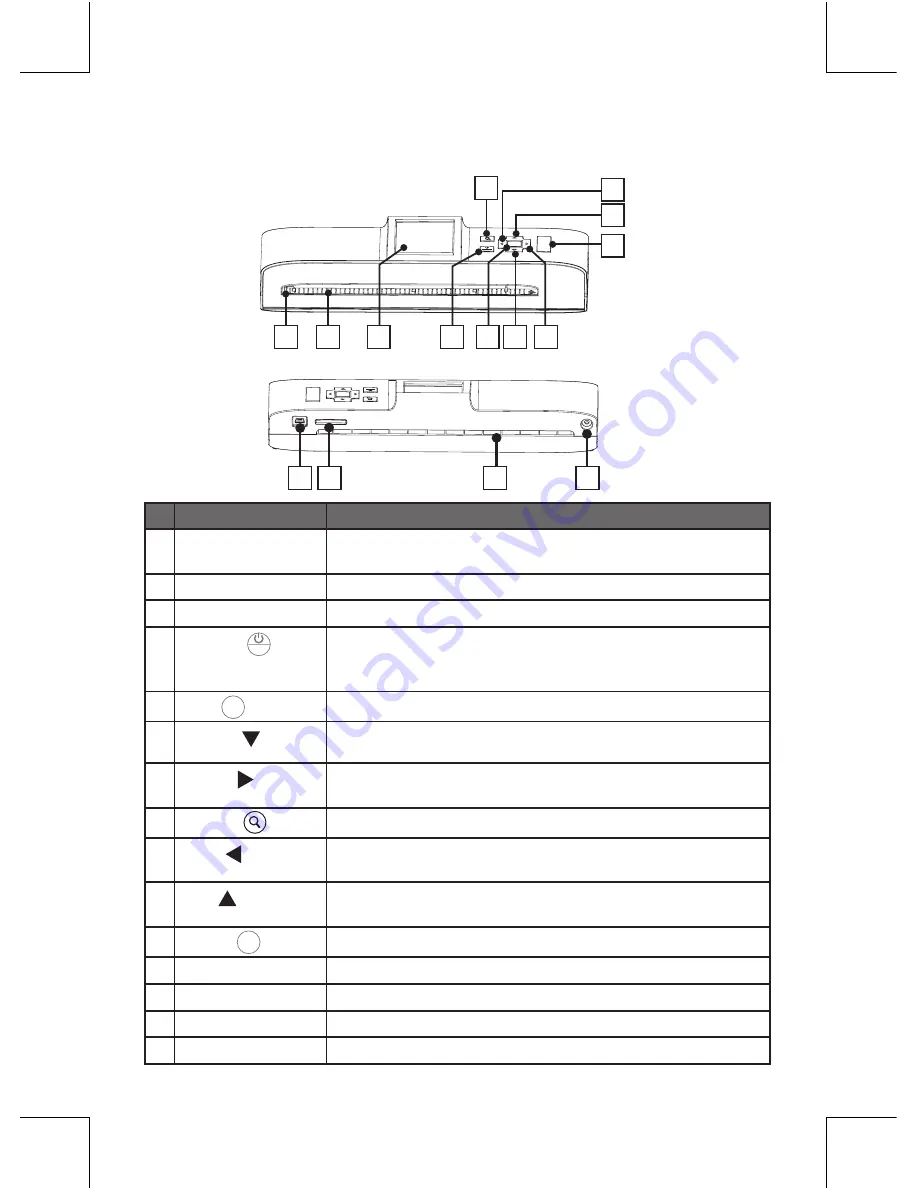
Scanner Parts
Top View
Rear View
Names
Descriptions
1
Paper guide
• Adjustable paper guide makes easy for guiding
paper.
2
Feed slot
• Feeds the paper or photo for scanning.
3
2.4” LCD screen • For viewing the scanned images.
4
Power (
MENU
) /
Menu
• Press to turn the power to on or off.
• Press for 3~5 seconds to turn off the scanner.
• Press to display the setting menu.
5
OK (
OK
)
• Press to make or con
fi
rm selections in the menus.
6
Down ( )
• Moves down in the menus.
• Moves down in the thumbnail mode.
7
Right ( )
• Moves right in the menus.
• Moves to the next scanned image.
8
Zoom (
)
• Zoom the scanned image.
9
Left ( )
• Moves left in the menus.
• Moves to the previous scanned image.
10
Up ( )
• Moves up in the menus.
• Moves up in the thumbnail mode.
11
Scan (
SCAN
)
• Press to enter the Scan mode.
12
Mini USB port
• Connects to PC for
fi
le transfer and power supply.
13
SD/MMC
• Accommodates a SD/MMC card.
14
Paper exit slot
• Outputs the paper after scanning.
15
DC-IN 5V jack
• Connects to the supplied AC power adapter.
1
5
7
6
4
2
3
8
9
10
11
MENU
OK
SCAN
A8
A4
A6
13
12
14
15
MENU
OK
SCAN


