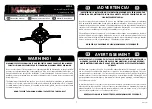
Mustang MPJ-3 Скачать руководство пользователя страница 4

4

Some projectors have only one attachment point.  In this case, attach directly to the 

universal plate.
Algunos proyectores tienen un solo punto de conexión. En este caso, se conectan 

directamente a la placa universal.
Certains projecteurs ont un seul point d’attache. Dans ce cas, se fixent directement 

sur la plaque universelle.

1-5

PREPARE PROJECTOR FOR MOUNTING

(E-H)

MPJ-3-0001

Using (X) to mark hole locations on middle of wood joist.

Usando (X) para marcar las ubicaciones de agujero en medio de viga de madera.

Utilisation (X) pour marquer les emplacements des trous sur le milieu de solives de 

bois.

INSTALL PROJECTOR BODY (WOOD JOIST)

2a-1

B

Screen

Use a 4mm - 5/32” wood bit to make a 65mm / 2.5” deep hole on marks.

Utilice un 4 mm - 5 / 32“ poco de madera para hacer un 65mm / 2.5” hoyo profundo 

en materia de marcas.

Utilisez un 4mm - 5 / 32” bits du bois pour faire un 65mm / 2.5” trou profond sur les 

marques. marques.

INSTALL PROJECTOR BODY (WOOD JOIST)

2a-2

Attach projector ceiling interface with wood screws (A).

Utilice los tornillos de madera (A) para fijar el límite máximo de interfaz del proyector 

a la viga de madera.

Utilisez des vis à bois (A) pour fixer la plaque de plafond à la poutre en bois.

INSTALL PROJECTOR BODY (WOOD JOIST)

2a-3

drill depth

65mm / 2.5”

drill diameter

4mm

5/32”

Screen

Arrow points to screen

(A)

Содержание MPJ-3

Страница 1: ...de l installation veuillez contacter le service client le de Mustang AV ou un installateur qualifi Mustang AV n est pas responsable des dommages ou des pr judices caus s par un montage un assemblage o...

Страница 2: ...um Weight Capacity Peso m ximo de pantalla Poids maximal de l cran 70lb 31kg CAUTION TOOLS REQUIRED Herramientas necesarias Outils n cessaires Wood bit 4mm 5 32 Hammer if necessary Madera poco 4mm 5 3...

Страница 3: ...de instalaci n Instructions d installation Adjust the levelers to clear obstructions and level all legs Ajuste los niveladores para limpiar las obstrucciones y el nivel de todas las patas R glez nive...

Страница 4: ...acements des trous sur le milieu de solives de bois INSTALL PROJECTOR BODY WOOD JOIST 2a 1 B Screen Use a 4mm 5 32 wood bit to make a 65mm 2 5 deep hole on marks Utilice un 4 mm 5 32 poco de madera pa...

Страница 5: ...rnillo de bloqueo Serrer la vis de blocage 2b 1 WARNING It is the responsibility of the customer and or installer to select the anchoring fasten ers that are rated for the weight of the installed proj...

Страница 6: ...ta a la pantalla Mantenga los cables para prevenir interferencias Glisser la plaque universelle dans le corps MPJ 3 de droite gauche en faisant face cran Maintenir les fils en place pour viter les int...

Страница 7: ...l derrape girando el bot n marcado gui ada R glez le lacet en tournant le bouton tiquet lacet 4 2 MAKE ADJUSTMENTS PITCH Adjust the pitch by turning the knob labeled pitch Ajuste el tono girando el bo...

Страница 8: ...h and roll knobs to micro adjust the image Apriete el tono de juego y los tornillos de segurida del rodillo y luego si es necesa rio utilice las perillas de inclinaci n y balancea el micro ajustemente...

Страница 9: ...TAILS DE LA GARANTIE APPLICABLE WARRANTY CONTINUED Congratulations on the purchase of this Mustang AV product The product you now have in your pos session is made of durable materials and is based on...

Отзывы: