Round Table Record Player
- 4 -
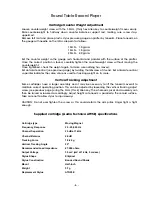
Supplied Cartridge Counter Weight Setup
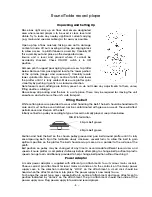
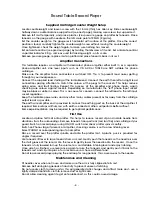
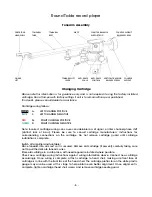
Locate counterweight and loosen screw with the 1.5mm (thin) hex Allen key. Slide counterweight
halfway down counter balance support rod (see next page), making sure screw stays uppermost.
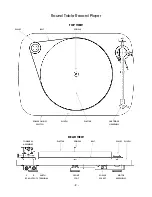
Remove felt mat temporarily, and place plastic stylus pressure gauge on platter by tonearm. Place
tonearm on the gauge with needle on the mN scale point at 20mN (2 grams).
Set the counter weight so the gauge rests horizontal with surface of the platter. Once the correct
position is found, carefully tighten the counterweight screw without moving the counterweight.
Once tightened, check the weight again, to make sure nothing has moved.
Set anti-skate control (see previous page) by twisting thumbscrew at its end. Set anti-skate control
so pointer indicates 2.0g – same as used for tracking weight - on its scale.
Remove pressure gauge, replace mat on platter and place tonearm back in its rest.
Amplifier Connections
This turntable requires an amplifier with dedicated phono amplifier either built in or a separate
phono amplifier unit. Line level inputs such as CD, AUX or TUNER are NOT suitable for phono
cartridges.
Make sure the amplifier to be connected is switched OFF. This is to prevent loud noises getting
through to your loudspeakers.
Connect the supplied lead starting at the turntable end. Connect the earth then left and right lead
connections paying attention to match the colours of the plugs to the sockets. This helps reduce
wiring errors and fault finding. Repeat this process at the amplifier end phono inputs, again
checking wire colours against sockets. Depending on manufacturer, the “left” phono input socket
may be black or white in colour. This is no cause for concern, connect the left lead to the left input
socket regardless.
Keep the turntable power wires and any other mains cables present as far away from the cartridge
output leads as possible.
The earth wire amplifier end is provided to connect to earthing post on the back of the amplifier, if
required. Some setups will hum less with earths connected, others will perform better without.
Some experimentation may be required to get optimal performance.
First Use
Locate and place felt mat onto platter. This helps to reduce record slip and isolate needle from
vibrations from the surroundings. Remove tonearm transport lock (red twist-tie) and cartridge stylus
guard. Switch on record player using ON/OFF switch and check platter spins smoothly.
Switch on Phono stage, if present, or amplifier, checking volume is set to a low listening level.
Select PHONO or corresponding input on amplifier,
Place a record over the platter spindle and onto the platter mat. A plastic puck is provided for
singles if required.
Use tonearm lift lever to raise tonearm from arm rest. Gently push the tonearm so the needle is over
the start groove of the record. Use the lever to gently lower the needle onto the record. Once the
tonearm is fully lowered turn up the volume to a comfortable listening level and enjoy listening.
Once side has finished, use lever once again to raise the tonearm and gently push it back to the
tonearm rest and clip into place. Turn record over or chose a different one.
Do not leave record player playing the end loop for long periods, this causes wear to the needle.
Maintenance And Cleaning
Fit needle cover when not in use and make sure the arm is fully clipped into its rest.
Remove belt during long periods of inactivity to prevent uneven stretching.
Do not use dry cloth to clean unit as this will generate static charges and attract more dust - use a
lightly damped antistatic cloth to remove dust or light marks.
Do not allow cleaning agents to get onto rubber belt, as this could cause damage.


