


Chapter 3 - Software Loading and Configuration
RF300E/RF310E
19
5
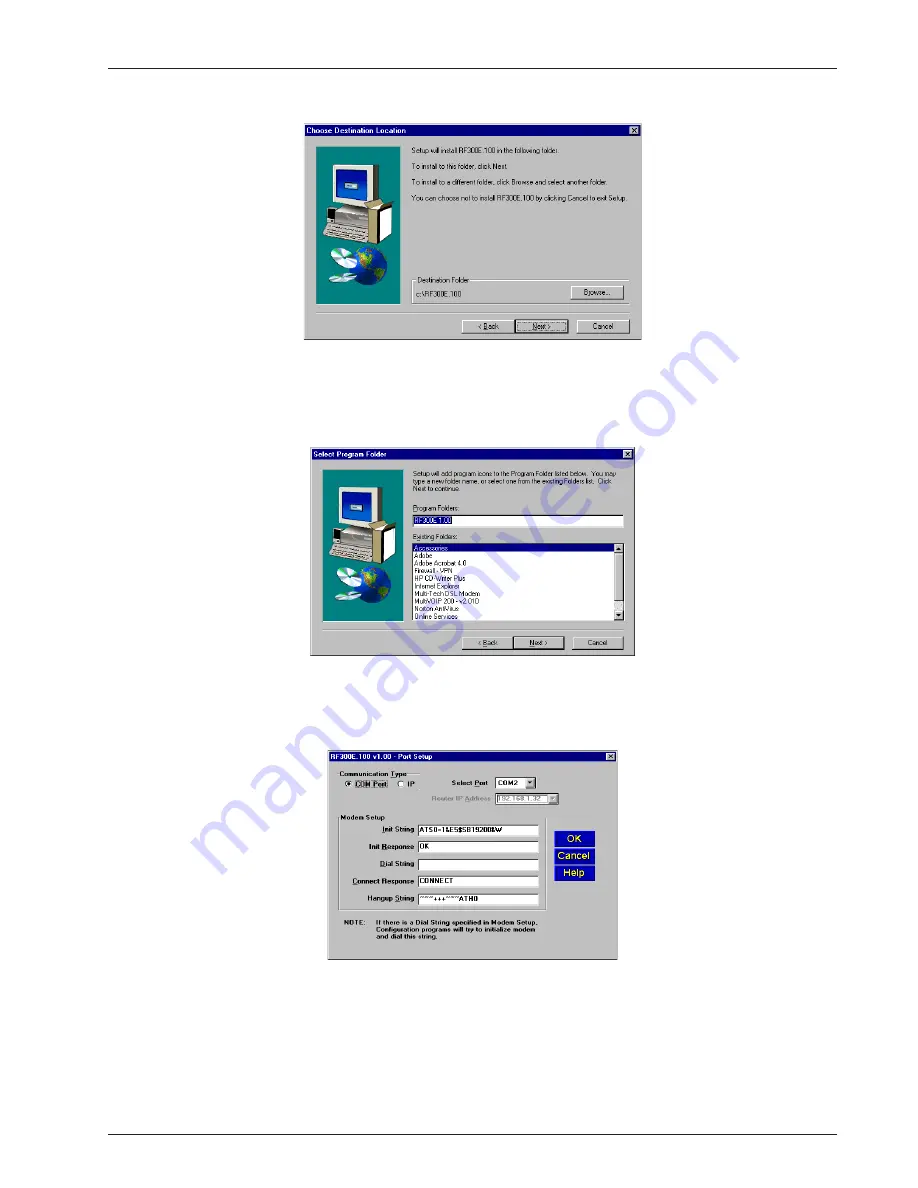
The Choose Destination Location dialog box is displayed. Follow the onscreen instructions to
install your RASFinder software.
You can either choose a different Destination Location for your RASFinder software by clicking
Browse, or select the default destination by clicking Next> or pressing Enter. It is recommended that
you accept to the default location, c:\RF300E.100.
6
When the Select Program Folder dialog box enables you to name the program group for the
RASFinder icons. You can either select the default name, RF300E 1.00 or name it anything you like.
Press Enter or click Next> to continue.
7
The next dialog box enables you to designate the COM port of the PC that is connected to the
RASFinder. On the Select Port field, click the down arrow and choose the COM port of your PC
(COM1 -- COM4) that is connected to the RASFinder.
Click OK to continue.
Содержание RASFinder RF300E
Страница 5: ...Remote Access Device Chapter 1 Introduction and Description ...
Страница 11: ...Remote Access Device Chapter 2 Installation ...
Страница 14: ...RASFinder RF300E RF310E User Guide RF300E RF310E 14 ...
Страница 15: ...Remote Access Device Chapter 3 Software Loading and Configuration ...
Страница 35: ...Remote Access Device Chapter 4 RASFinder Software ...
Страница 72: ...RASFinder RF300E RF310E User Guide RF300E RF310E 72 ...
Страница 73: ...Remote Access Device Chapter 5 Client Setup ...
Страница 90: ...RASFinder RF300E RF310E User Guide RF300E RF310E 90 ...
Страница 91: ...Remote Access Device Chapter 6 RAS Dial Out Redirector ...
Страница 99: ...Remote Access Device Chapter 7 Remote Configuration and Management ...
Страница 108: ...RASFinder RF300E RF310E User Guide RF300E RF310E 108 ...
Страница 109: ...Remote Access Device Chapter 8 Service Warranty and Tech Support ...
Страница 113: ...Remote Access Device Appendixes ...
Страница 183: ...Remote Access Device Glossary of Terms ...


