background image

6

• 

Lift out the collector tube while retaining the spring and rubber plug. 


• 

Remove the spring and separate the rubber plug and empty the collected solder 

waste.

• 

Replace the spring and the rubber plug. Replace the collection tube into the recess 

in the desoldering gun.

• 

Press on the end of the rear cover and slide it back into position. The latch will 

return to the locked position.

CALIBRATION

• 

Switch to the channel you wish to calibrate with the required tool connected and 

placed in the holder with a temperature measurement meter set up appropriately.

• 

Press and hold the LOCK/VACUUM button and Button 1 for 3 seconds to enter 

calibration mode.

• 

With a temperature set (e.g. 350

o

C), 

measure the actual tool tip then having 

calculated the difference between the actual 

temperature and the displayed temperature, 

use the UP or DOWN buttons to enter the 

value. 

(e.g. actual tip temp 350

o

C and display showing 335

o

C, enter a value of 15)

• 

Press Button 1 to store the setting for that channel and tool.

• 

The station will then enter sleep timer mode setting and if you do not wish to alter 

the sleep default time (zero) then press Button 1 again to exit.

• 

The method is the same for all channels.

XX-XXXX

335

Содержание MP740029

Страница 1: ...1 4 in 1 Rework Soldering Station Model MP740029...

Страница 2: ...arts before the soldering tip has cooled down completely Do not use the product near flammable items Turn the power off when this product is not in use The soldering iron must be placed on its stand w...

Страница 3: ...e Error Indicator Power Display Bar Indicator Mode Indicator Tool Indicator Air Volume Display Air Output indicator Power Switch Channel 1 Indicator Channel 1 Indicator Channel 3 Indicator Channel 1 L...

Страница 4: ...isplayed and the channel cannot be activated Channel 3 is used for the hot air gun tool only and has additional displays to indicate when the air fan is on and the airflow rate Temperature Adjustment...

Страница 5: ...lock the channel so settings cannot be changed press and hold the LOCK VACUUM button until the padlock display changes mode Key Beep Function To switch the key sound feature on or off press and hold...

Страница 6: ...ith a temperature measurement meter set up appropriately Press and hold the LOCK VACUUM button and Button 1 for 3 seconds to enter calibration mode With a temperature set e g 350o C measure the actual...

Страница 7: ...mperature Range 150 500o C 150 500o C 300 500o C 150 500o C Temp Stability 5o C 2o C 2o C 2o C Air Flow 5 23 litres min Heater Core Integrated Element Temperature Sensor Thermocouple Sleep Mode Switch...

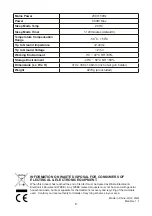
Страница 8: ...y and recycling of the materials used Contact your local authority for details of recycling schemes in your area Made in China LS12 2QQ Man Rev 1 1 Mains Power 230V 50Hz Power 900W Max Sleep Mode Temp...

Отзывы: