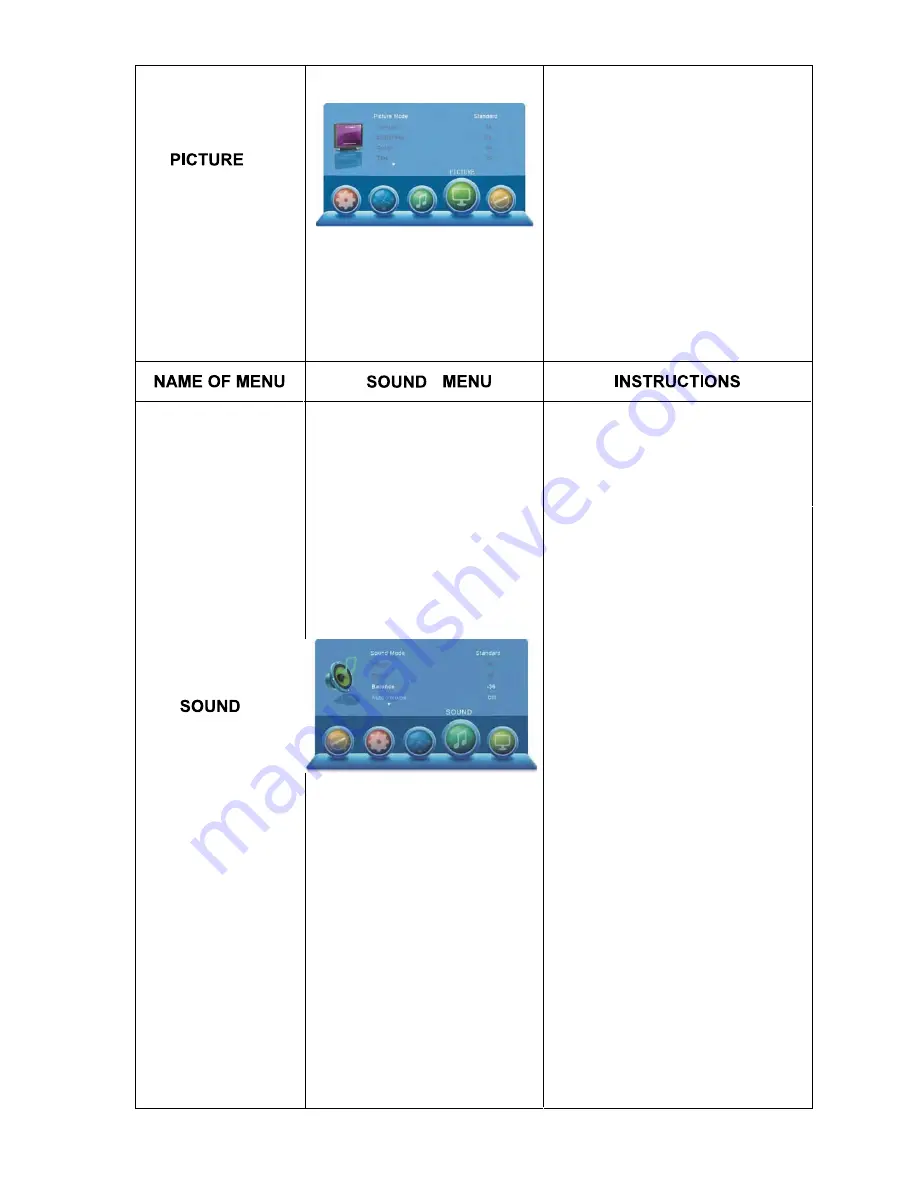
background image

E 28

Color Temperature

  1.Press the ▼ button to select Color 

   Temperature.

  2.Press ◄ or ► button to enter submenu.

   then press the ▲ or ▼ button to change 

       the colour temperature.(available Color 

   Temperature:Warm,Cool,Medium)

  3.Press the EXIT button to exit the PICTURE 

   MENU.

Noise Reduction

 1.Press the ▼ button to select Noise 

  Reduction.

  2.Press ◄ or ► button to enter submenu.then 

  press the ▲ or ▼ button to change the noise 

  reduction.(available noise reduction:Off,Low,

  Middle,High)

  3.Press the MENU button to exit the PICTURE 

  MENU

Sound Mode

 1.Press the ▼ button to select therequired 

   Sound Mode option.

  2.Press ◄ or ► button to enter submenu.then 

   press the ▲ or ▼  button to change the 

   sound effects you like, so that your TV sound 

   effects can match the type of the programme 

   you are watching.(Available Sound Mode:

   Standard,Music,Movie,Sports,User)

  3.Press the MENU button to exit the SOUND 

  MENU.

Treble

  1.Press the ▼ button to select Treble.

  2.Press the ◄ or ► button to change the 

  level of sound treble soprano, so that you can 

  hear higher sound tones more clearly.

  3.Press the MENU button to exit the SOUND 

  MENU.

Bass

  1.Press the ▼ button to select Bass.

  2.Press the ◄ or ► button to change the level 

  of deep or low-pitched sound tone, so that you 

  can hear the lower sound tones more clearly.

  3.Press the MENU button to exit the SOUND 

  MENU.

Balance

  1.Press the ▼ button to select Balance.

  2.Press the ◄  or ► button to change the 

  level of sound tone balance between 

  left & right speakers.

  3.Press the MENU button to exit the SOUND 

  MENU.

Auto Volume

  1.Press the ▼ button to select Auto volume.

  2.Press the ◄ or ► button to select the Auto 

  volume function on or off.

  3.Press the MENU button to exit the SOUND 

  MENU.

SPDIF Mode

  1.Press the ▼ button to select SPDIF Mode.

  2.Press the ◄ or ► button to select. 

  3.Press the MENU button to exit the SOUND 

  MENU.

Содержание LE-247006MT

Страница 1: ...Model Nr LE 247006MT GEBRUIKSHANDLEIDING INSTRUCTION MANUAL ...

Страница 2: ...teek geen voorwerpen metalen of brandbare voorwerpen in de tv deze kunnen elektrische schokken of brand veroorzaken Plaats de LED tv niet in de nabijheid van meubels bekleding of elektronische producten Het product is niet ontworpen voor inbouw en mag daarom niet in een omsloten ruimte worden geplaatst zonder deugdelijke ventilatie Plaats het apparaat niet in de nabijheid van direct zonlicht of wa...

Страница 3: ... 2 Geschikt voor CVBS signaal analoog videosignaal 3 Geschikt voor HDMI signaal 4 Geschikt voor ontvangst SCART signaal 5 Geschikt voor ontvangst tv signaal 6 Twee ingebouwde 5W luidsprekers twee sets audioaansluitingen 7 Infraroodafstandsbediening voor alle functies 8 Coax audio uitgang 9 Ondersteuning USB voor PVR harddisk videorecorder en Mediaspeler Onjuist gebruik van batterijen kan leiden to...

Страница 4: ...teren te verhitten of te verbranden 4 Als u gebruikte batterijen afdankt dient u daarbij de plaatselijk geldende voorschriften in acht te nemen Gooi batterijen niet weg bij het huishoudafval 1 Functies controlepaneel TV AV SCART YPbPr HDMI PC Media 6 SOURCE Selecteer het binnenkomend signaal 5 MENU Toegang tot het MENU 2 VOL Volume omlaag 1 VOL Volume omhoog 4 CH TV kanaal omlaag 3 CH TV kanaal om...

Страница 5: ...ier de audiokabel van uw pc op aan 4 DB15 VGA aansluiting 8 Coaxiale uitgang Verbinden met de coaxiale ingang van uw versterker 7 Uitgang voor hoofdtelefoon 9 YPbPr Componentingang Sluit hier uw AV systeem op aan 10 CVBS Composiet video ingang Sluit hier uw AV systeem op aan 11 Ingang rechter linker audiokanaal voor Composiet video en S Videomodus 12 Antenne uitgang 75 Ω Sluit een antennekabel of ...

Страница 6: ...odus 20 HOLD 21 REVEAL Huidige pagina bevriezen en weer vervolgen Indrukken om het USB afspelen te stoppen Verborgen woorden onthullen of verbergen Indrukken om achtereenvolgens verschillende snelheden te selecteren 22 SUBPAGE 25 SIZE Subp agina s openen Indrukken om achtereenvolgens verschillende snelheden te selecteren Indexpagina openen Indrukken om de vorige Titel Hoofdstuk Track af te spelen ...

Страница 7: ...gangssignalen A Verbinden met een pc signaal U kunt uw LED tv gebruiken als monitor voor uw pc met behulp van een VGA kabel niet bijgeleverd D 6 1 VGA ingang vergeet niet de schroeven aan te draaien 2 PC Audio ingang 3 Stroomaansluiting SOURCE ...

Страница 8: ...nsluiten met behulp van de Composiet ingangen 1 Linker en rechteraudio ingang 2 CVBS composiet video ingang 3 YPbPr Component ingang 4 Stroomaansluiting C Aansluiting voor tv signaal 1 Ingang kabel antenne 75 Ω 2 Stroomaansluiting D 7 SOURCE ...

Страница 9: ...zenders zijn geprogrammeerd verschijnt een blauw scherm met een rondgaand wit scherm met de tekst NO SIGNAL tv geen signaal In het MENU kunt u lezen hoe de zenders kunnen worden geprogrammeerd via automatisch of handmatig zoeken Het is aan te bevelen om de zenders eerst automatisch te laten zoeken Met behulp van de CH CH toetsen of de numerieke toetsen op de afstandsbediening kunt u het gewenste k...

Страница 10: ...e interfaceconnector aan de achterkant van de LED tv Druk op de SOURCE toets om de video ingangsmodus van de LED TV in te stellen op Media modus Stappen voor het aansluiten Lees de bij uw externe apparaat geleverde gebruikershandleiding door en vergewis u ervan dat deze apparatuur een HDMI aansluiting heeft Vergewis U ervan dat de stroomtoevoer van de LED TV is uitgeschakeld Verbind een HDMI kabel...

Страница 11: ...nergie besparing In verband met energie besparing is er standaard een stand by timer van 4 uur ingesteld Wij raden u aan deze timer niet uit te zetten mocht u deze toch uit willen zetten dan kan dit via het tijd menu Schakelen tussen verschillende bronnen Als u op de SOURCE toets drukt wordt het menu voor de inputmodus weergegeven In het menu kunt u vervolgens op drukken om een inputbron te kiezen...

Страница 12: ...de afstandsbediening gebruiken om rechtstreeks tv kanalen te selecteren De LED tv biedt de mogelijkheid om maximaal 99 kanalen 1 tot en met 99 op te slaan en u kunt via de toetsen op de afstandsbediening of het bedieningspaneel een selectie maken 1 Druk op de desbetreffende toets op de afstandsbediening 2 Als u een kanaal groter dan 9 kiezen drukt u op de twee cijfers van het kanaal dat u wilt bek...

Страница 13: ... in het hoofdmenu druk daarna op OK toets Druk op de menutoets om terug te gaan naar het vorige menu en verlaat het menu om te stoppen Druk op de toets om de drive disk te kiezen die u wilt bekijken druk daarna op OK toets Druk op de toets om de return optie te kiezen om terug te gaan naar het vorige menu Druk op de toets om het bestand te kiezen in het bestandskeuzemenu druk daarna op de Media to...

Страница 14: ...uziek af te spelen Info Druk op de toets om de optie Info te selecteren en druk op de OK toets om gedetailleerde beeldinformatie te bekijken Draaien Druk op de toets om de optie Draaien te selecteren en het beeld vervolgens linksom of rechtsom te draaien Zoom In Zoom Uit Gebruik deze optie om het beeld te vergroten of verkleinen Beeld Bewegen Als de afbeelding groter is dan het scherm kunt u deze ...

Страница 15: ...nu Wanneer u een te selecteren optie markeert zal de bestandinformatie rechtsonder in de hoek verschijnen met een voorbeschouwing van de muziek in de hoek rechtsboven Druk op de toets om het af te spelen bestand in het bestandmenu te selecteren en druk vervolgens op de OK toets om af te spelen Druk op de toets om onderin het scherm het te openen menu te selecteren en druk vervolgens op de OK toets...

Страница 16: ...e geselecteerde film af te spelen Druk op de Display toets om onderin het scherm het te openen menu te selecteren en druk vervolgens op de OK toets om te gebruiken Druk op de Exit toets om terug te keren naar het vorige menu Algemene Functies A B Herhalen Selecteer deze functie om een segment tussen punten A en B te herhalen Vertraagd Vooruit Indrukken om trager af te spelen Stap Indrukken om de f...

Страница 17: ...ets opnieuw in om terug te keren naar automatisch verversen van de pagina Index toets Druk op de Index toets om naar de hoofdindexpagina te gaan Afhankelijk van de manier waarop informatie wordt uitgezonden moet u wellicht meerdere malen op deze toets drukken om naar de hoofdindexpagina terug te gaan Subpage toets Subpagina Wanneer de teletekstinformatie op meerdere pagina s wordt weergegeven kan ...

Страница 18: ...EXIT toets om het OPTIEMENU te verlaten Horizontale Pos 1 Druk op de toets om de modus Horizontale Pos te selecteren 2 Druk op de of toets om de horizontale positie van het scherm aan te passen 3 Druk op de EXIT toets om het OPTIEMENU te verlaten Verticale Pos 1 Druk op de toets om de modus Verticale Pos te selecteren 2 Druk op de of toets om de verticale positie van het scherm aan te passen 3 Dru...

Страница 19: ...ELD te verlaten Helderheid 1 Druk op de toets om de optie Helderheid te selecteren 2 Druk op de of toets om de helderheid te wijzigen 3 Druk op de MENU toets om het MENU BEELD te verlaten Kleur 1 Druk op de toets om de optie Kleur te selecteren 2 Druk op de of toets om de kleur te wijzigen 3 Druk op de MENU toets om het MENU BEELD te verlaten Tint alleen in NTSC afspeelmodus 1 Druk op de toets om ...

Страница 20: ...op de toets om Hoge Tonen te selecteren 2 Druk op de of toets om het niveau van de hoge tonen aan te passen zodat u hoge geluiden duidelijker kunt horen 3 Druk op de MENU toets om het MENU GELUID te verlaten Lage Tonen 1 Druk op de toets om Lage Tonen te selecteren 2 Druk op de of toets om het niveau van de lage tonen aan te passen zodat u lage geluiden duidelijker kunt horen 3 Druk op de MENU toe...

Страница 21: ...m het submenu te openen en gebruik vervolgens de of toets om de tijd in uren te selecteren waarop de TV ingeschakeld moet blijven vanaf uw laatst gemaakte actie Annuleer deze instelling door het op Uit te zetten beschikbare Auto Slaap tijden Uit 3U 4U 5U 3 Druk op de MENU toets om het OPTIEMENU te verlaten OSD Timer 1 Druk op de toets om de optie OSD Timer te selecteren 2 Druk op de of toets om he...

Страница 22: ...erlaten Blauw Scherm 1 Druk op de of toets om Blauw Scherm aan uit te selecteren 2 Druk op de EXIT toets om het MENU OPTIE te verlaten Toetsvergrendeling 1 Druk op de toets om de optie Toetsvergrendeling te selecteren 2 Gebruik de of toets om Toetsvergrendeling aan uit te selecteren 3 Druk op de EXIT toets om het MENU OPTIE te verlaten Fabrieksinstellingen 1 Druk op de toets om de optie Fabrieksin...

Страница 23: ... de optie Contrast te selecteren 2 Druk op de of toets om het contrast te wijzigen 3 Druk op de MENU toets om het MENU BEELD te verlaten Helderheid 1 Druk op de toets om de optie Helderheid te selecteren 2 Druk op de of toets om de helderheid te wijzigen 3 Druk op de MENU toets om het MENU BEELD te verlaten Kleur 1 Druk op de toets om de optie Kleur te selecteren 2 Druk op de of toets om de kleur ...

Страница 24: ...t u momenteel bekijkt beschikbare Geluidsmodi Standaard Muziek Film Sport Gebruiker 3 Druk op de MENU toets om het MENU GELUID te verlaten Hoge Tonen 1 Druk op de toets om Hoge Tonen te selecteren 2 Druk op de of toets om het niveau van de hoge tonen aan te passen zodat u hoge geluiden duidelijker kunt horen 3 Druk op de MENU toets om het MENU GELUID te verlaten Lage Tonen 1 Druk op de toets om La...

Страница 25: ...m het submenu te openen en gebruik vervolgens de of toets om de tijd in uren te selecteren waarop de TV ingeschakeld moet blijven vanaf uw laatst gemaakte actie Annuleer deze instelling door het op Uit te zetten beschikbare Auto Slaap tijden Uit 3U 4U 5U 3 Druk op de MENU toets om het OPTIEMENU te verlaten OSD Timer 1 Druk op de toets om de optie OSD Timer te selecteren 2 Druk op de of toets om he...

Страница 26: ...erlaten Blauw Scherm 1 Druk op de of toets om Blauw Scherm aan uit te selecteren 2 Druk op de EXIT toets om het MENU OPTIE te verlaten Toetsvergrendeling 1 Druk op de toets om de optie Toetsvergrendeling te selecteren 2 Gebruik de of toets om Toetsvergrendeling aan uit te selecteren 3 Druk op de EXIT toets om het MENU OPTIE te verlaten Fabrieksinstellingen 1 Druk op de toets om de optie Fabrieksin...

Страница 27: ... bekijken TV via uw antenne Programmabewerking U kunt u programmalijst bewerken zodat de lijst alleen de kanalen bevat die u wilt bekijken U kunt de lijst alleen bewerken na een kanaalscan te hebben uitgevoerd 1 Druk op de toets om de optie Programmabewerking te selecteren 2 Druk op de of toets om de te bewerken of wissen programma s te selecteren Druk vervolgens op de rode toets op de afstandsbed...

Страница 28: ...ELD te verlaten Helderheid 1 Druk op de toets om de optie Helderheid te selecteren 2 Druk op de of toets om de helderheid te wijzigen 3 Druk op de MENU toets om het MENU BEELD te verlaten Kleur 1 Druk op de toets om de optie Kleur te selecteren 2 Druk op de of toets om de kleur te wijzigen 3 Druk op de MENU toets om het MENU BEELD te verlaten Tint alleen in NTSC afspeelmodus 1 Druk op de toets om ...

Страница 29: ...t u momenteel bekijkt beschikbare Geluidsmodi Standaard Muziek Film Sport Gebruiker 3 Druk op de MENU toets om het MENU GELUID te verlaten Hoge Tonen 1 Druk op de toets om Hoge Tonen te selecteren 2 Druk op de of toets om het niveau van de hoge tonen aan te passen zodat u hoge geluiden duidelijker kunt horen 3 Druk op de MENU toets om het MENU GELUID te verlaten Lage Tonen 1 Druk op de toets om La...

Страница 30: ...m het submenu te openen en gebruik vervolgens de of toets om de tijd in uren te selecteren waarop de TV ingeschakeld moet blijven vanaf uw laatst gemaakte actie Annuleer deze instelling door het op Uit te zetten beschikbare Auto Slaap tijden Uit 3U 4U 5U 3 Druk op de MENU toets om het OPTIEMENU te verlaten OSD Timer 1 Druk op de toets om de optie OSD Timer te selecteren 2 Druk op de of toets om he...

Страница 31: ...erlaten Blauw Scherm 1 Druk op de of toets om Blauw Scherm aan uit te selecteren 2 Druk op de EXIT toets om het MENU OPTIE te verlaten Toetsvergrendeling 1 Druk op de toets om de optie Toetsvergrendeling te selecteren 2 Gebruik de of toets om Toetsvergrendeling aan uit te selecteren 3 Druk op de EXIT toets om het MENU OPTIE te verlaten Fabrieksinstellingen 1 Druk op de toets om de optie Fabrieksin...

Страница 32: ... Afstandsbediening twee AAA batterijen instructiehandle Schroevendraaier met schroeven 4 stuks TV voet iding Audio 1 links rechts audio ingang Audio 2 links rechts audio ingang 42W AUTO 100 100 240V 50 60Hz 12 hoofdtelefoon Hoofdtelefoon uitgang ...

Страница 33: ...voet Om de stand te bevestigen Eerst de plastic houder A in de TV standaard B plaatsen vervolgens draait u de vier schroeven vast met een schroevendraaier 2 Wandmontage Vier schroefgaten voor bevestiging aan de wand Draai de vier schroeven los om de standaard te verwijderen A B ...

Страница 34: ... wijze waarop het product moet worden weggegooid De materialen zijn recycleerbaar zoals door de desbetreffende markeringen wordt aangeduid Door recyclen het recyclen van materialen of andere vormen van hergebruik van oude apparatuur levert u een belangrijke bijdrage aan de bescherming van het milieu Raadpleeg de lokale instanties voor meer informatie over de officiële locatie waar het apparaat kan...

Страница 35: ...se overheating and or shorten the life of the product Do not insert any foreign objects metals or flammable objects into the TV which may cause electric shock or fire Do not place the LED TV close to other furniture furnishing or electronic products This product is not designed for built in installation do not place in an enclosed place without proper ventilation Keep this product away from direct...

Страница 36: ...USB for PVR and Media play The remote unit is operated with 2 x AAA size batteries 1 Push and hold the hook the battery cover is opened 2 Insert batteries according to the polarity marks 3 Replace the cover Remarks Battery replacement is necessary when the remote control fails to operate the TV set Battery Cautions Incorrect use of batteries can cause chemical leakage which will corrode the Remote...

Страница 37: ...cording to your local authorities guidelines Do not put it into your household waste 4 Product Overview 5 Control Panel Overview E 3 1 Control Panel Functions 1 VOL Volume up Right orientation TV AV SCART YPbPr HDMI PC Media 2 VOL Volume down Left orientation 3 CH TV channel up 4 CH TV channel down 5 MENU Enter into MENU 6 SOURCE Select the input signals 7 STANDBY Switches the TV to standby and on...

Страница 38: ...tem 10 CVBS Composite video inputs connects your AV system 11 Right Left Audio Channel input for Composite video component mode 5 Audio input for VGA mode connects to your PC audio output 13 ON OFF Switch 12 connector or aerial interface here to receive cable aerial signal Indicator Light Status When the unit is on the indicator light turns blue The indicator light is red when the TV is in standby...

Страница 39: ...AUDIO AUDIO AUDIO OK Enter SOURCE GOTO FAV FAV FAV REPEAT REPEAT Repeat the program Press this button to start playing the device program in ATV mode Repeat play point A and B in teletext in media 28 GOTO A B ...

Страница 40: ...cable not supplied to the VGA video interface connector on the PC Then connect the other end to the VGA video interface connector on the back of the LED TV Tighten the screws on the VGA connectors once they are firmly connected Connect the main power input with the power cord come with your LED TV Turn on the power of the LED TV first and then turn on the power of the PC Press the SOURCE button to...

Страница 41: ...LED TV and the AV device are off connector input on the back of the LED TV Now insert the other end of the composite AV device to the YPBPR connector on the back of the LED TV Now insert the other end of the AV device Connect the RCA AV devices RCA audio output connectors to the RCA audio input connectors on the back Turn on the power of the LED TV first and then turn on the power of the AV device...

Страница 42: ... appear with go around white screen with the text NO SIGNAL On the MENU you can read how the channels can be programmed auto search or manual search It is recommended first to let the channels automatically to be searched You can use key CH CH button or the number keys on the remote control to select the channel you want to watch D Connect with SCART signal 1 Scart input 2 Main power input Connect...

Страница 43: ...n power input Connection steps Read the user guide supplied with your AV devices and ensure that it has a HDMI connector Make sure that the power of the LED TV is off Connect a HDMI cable to the corresponding interface connector on the back of the LED TV Turn on the power of the LED TV Press the button to set the video input mode of the LED TV to HDMI mode LED LED SOURCE SOURCE 1 2 1 2 ...

Страница 44: ...DBY button the LED TV will go into standby mode and the indicator light turns red Switch Among Different Inputs Press the SOURCE button to display the inputs mode menu then press key to select a input source and press OK key to confirm Audio control 1 Press the VOL button to increase the volume A number will appear on screen indicating the volume level 2 Press the VOL button to decrease the volume...

Страница 45: ...control to directly select TV channels The LED TV can store up to 99 channels 1 to 199 and you can press the keys on the remote control or on the panel to make a selection 1 Press the relevant key on the remote control if you want to choose any channel from 1 to 9 For example if you want to choose channel 8 just press the key number 8 E 11 MUTE 2 If you want to choose a channel bigger than 9 pleas...

Страница 46: ...s button to select PHOTO in the main menu then press OK button to enter Press exit button to return back to the previous menu Press button to select drive disk you want to watch then press OK button to enter Press button to select return option to Press button to select the file you want to watch in the file selecting menu the press OK button to display picture When highlighting the option you sel...

Страница 47: ...E 13 ...

Страница 48: ...tton to select the file you want to listen in the file selecting menu then press OK button to play Press button to select menu in the buttom you want to run then press OK button to aperate Press exit button to return back to the previous menu Goto Time Music Basic Function Press to choose the play time The most of the Music function are the same as the PICTURE When highlighting the option you sele...

Страница 49: ...or and movie will be previewed in the upper right cornor A B Repeat Cloose this function you can repeat the play in the time of A to B Slow Forward Press to play slower Step Press to play the movie step by step frame by frame Goto Time Press to choose the play time The most of the Movie function are the same as the PICTURE Press OK button to play the selected movie Press display button to select m...

Страница 50: ...E 16 10 ...

Страница 51: ... the picture 3 Press the EXIT button to exit the OPTION MENU Vertical Pos 1 Press the button to select the Vertical Pos mode 2 Press the or button to adjust the Vertical position of the picture 3 Press the EXIT button to exit the OPTION MENU Clock 1 Press the button to select the Clock mode 2 Press the or button to adjust clock in the screen image 3 Press the EXIT button to exit the OPTION MENU Ph...

Страница 52: ...MENU Brightness 1 Press the button to select the Brightness option 2 Press the or button to change the brightness 3 Press the MENU button to exit the PICTURE MENU Color 1 Press the button to select the Color option 2 Press the or button to change the color 3 Press the MENU button to exit the PICTURE MENU Tint NTSC playback only 1 Press the button to select the tint option 2 Press the or button to ...

Страница 53: ...s the or button to change the level of sound treble soprano so that you can hear higher sound tones more clearly 3 Press the MENU button to exit the SOUND MENU Bass 1 Press the button to select Bass 2 Press the or button to change the level of deep or low pitched sound tone so that you can hear the lower sound tones more clearly 3 Press the MENU button to exit the SOUND MENU Balance 1 Press the bu...

Страница 54: ...eep 2 Press or button to enter submenu then press the or button to select the time in hours that you want the TV to remain on after your last operation Cancel by setting it to off Available Auto Sleep Off 3H 4H 5H 3 Press the MENU button to exit the OPTION MENU OSD Timer 1 Press the button to select the OSD Timer option 2 Press or button to enter submenu then press the or button to select the time...

Страница 55: ...button to exit the OPTION MENU Blue Screen 1 Press the or button to select the blue screen on off 2 Press the EXIT button to exit the OPTION MENU Key Lock 1 Press button to select Key lock option 2 Press the or button to select the Key lock on off 3 Press the EXIT button to exit the OPTION MENU Reset 1 Press the button to select the Reset option 2 Press the button to enter the factory default then...

Страница 56: ...on to exit the PICTURE MENU Brightness 1 Press the button to select the Brightness option 2 Press the or button to change the brightness 3 Press the MENU button to exit the PICTURE MENU Color 1 Press the button to select the Color option 2 Press the or button to change the color 3 Press the MENU button to exit the PICTURE MENU Tint NTSC playback only 1 Press the button to select the tint option 2 ...

Страница 57: ...rd Music Movie Sports User 3 Press the MENU button to exit the SOUND MENU Treble 1 Press the button to select Treble 2 Press the or button to change the level of sound treble soprano so that you can hear higher sound tones more clearly 3 Press the MENU button to exit the SOUND MENU Bass 1 Press the button to select Bass 2 Press the or button to change the level of deep or low pitched sound tone so...

Страница 58: ...eep 2 Press or button to enter submenu then press the or button to select the time in hours that you want the TV to remain on after your last operation Cancel by setting it to off Available Auto Sleep Off 3H 4H 5H 3 Press the MENU button to exit the OPTION MENU OSD Timer 1 Press the button to select the OSD Timer option 2 Press or button to enter submenu then press the or button to select the time...

Страница 59: ...button to exit the OPTION MENU Blue Screen 1 Press the or button to select the blue screen on off 2 Press the EXIT button to exit the OPTION MENU Key Lock 1 Press button to select Key lock option 2 Press the or button to select the Key lock on off 3 Press the EXIT button to exit the OPTION MENU Reset 1 Press the button to select the Reset option 2 Press the button to enter the factory default then...

Страница 60: ...en press OK button to start auto search ATV Manual Tuning You can only search for analog TV channels when you are in analogue TV mode 1 Press the button to select ATV Manual Tuning option 2 Press the or button to start the search for analogueTV signal channels 3 Press the EXIT button to leave the CHANNEL MENU page and watch analog signal TV channels TV through your aerial Programme Edit You can ed...

Страница 61: ...MENU Brightness 1 Press the button to select the Brightness option 2 Press the or button to change the brightness 3 Press the MENU button to exit the PICTURE MENU Color 1 Press the button to select the Color option 2 Press the or button to change the color 3 Press the MENU button to exit the PICTURE MENU Tint NTSC playback only 1 Press the button to select the tint option 2 Press the or button to ...

Страница 62: ...rd Music Movie Sports User 3 Press the MENU button to exit the SOUND MENU Treble 1 Press the button to select Treble 2 Press the or button to change the level of sound treble soprano so that you can hear higher sound tones more clearly 3 Press the MENU button to exit the SOUND MENU Bass 1 Press the button to select Bass 2 Press the or button to change the level of deep or low pitched sound tone so...

Страница 63: ...eep 2 Press or button to enter submenu then press the or button to select the time in hours that you want the TV to remain on after your last operation Cancel by setting it to off Available Auto Sleep Off 3H 4H 5H 3 Press the MENU button to exit the OPTION MENU OSD Timer 1 Press the button to select the OSD Timer option 2 Press or button to enter submenu then press the or button to select the time...

Страница 64: ...button to exit the OPTION MENU Blue Screen 1 Press the or button to select the blue screen on off 2 Press the EXIT button to exit the OPTION MENU Key Lock 1 Press button to select Key lock option 2 Press the or button to select the Key lock on off 3 Press the EXIT button to exit the OPTION MENU Reset 1 Press the button to select the Reset option 2 Press the button to enter the factory default then...

Страница 65: ...eatures Input interface Left right audio input interface Headphone Output Accessories Audio 1 Left right audio input interface Audio 2 High Quality PAL B G AUTO SECAM L Audio Video input socket for connecting an external device fitted with an HDMI output 60 42 W 4 100 240V 50 60Hz 100 Rated power consumption Portuguese 5 ...

Страница 66: ...1 Attaching the TV Stand To attach the stand first the plastic A into the TV stand B then insert and tighten the 4 screws with the screwdriver 2 Wall Mount instructions Screw taps x 4 for wall mounting Remove the stand by taking out the 4 screws A B ...

Страница 67: ...he instructions for use or the packing will inform about methods for disposal The materials are recyclable as mentioned in its marking By recycling material recycling or other forms of re utilization of old appliances you are making an important contribution to protect our environment Please inquire at the community administration for the authorized disposal location Instructions on environment pr...

Отзывы: