background image

Introduction

Congratulations  for  choosing  MT  HELMETS.  This  helmet 

combines the latest technology, design and engineering 

available and you have made an excellent investment in 

comfort and protection. Although most helmets are proven 

to  significantly  reduce  the  risk  of  injury  and  damage,  please 

remember that no helmet can protect you from all possible 

or potential impacts. The following information will assist you 

with the proper use and maintenance of your helmet.

Environmental sustainability

At MT HELMETS we are committed to creating helmets that 

respect the environment as much as possible. For this reason, 

we apply technology that allows for easy replacement of helmet 

parts, extending its useful life. 

Functionality

The main function of a helmet is to protect your head from 

impact in the event of an accident. To achieve this, the helmet 

surrounds your head with a set of materials designed to absorb 

and cushion the impact force. The helmet is also designed 

to provide comfort while riding at certain speeds and in 

various weather conditions. However, every helmet has some 

drawbacks: The helmet decreases your hearing sensitivity, 

peripheral vision and mobility to some extent while providing 

protection and comfort.

Adjustment

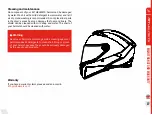
For maximum safety, it is vital that your MT HELMETS helmet 

fits  on  your  head  correctly  and  securely  fastened  by  the 

retention strap. With your head held firmly in place, grasp the 

back of the helmet with both hands and try to roll the helmet 

forward. If you can move the helmet toward your eyes, the size 

is not correct, try a smaller one.

Shields

MT helmet shields provide protection against weather, small 

flying objects and wind. Tinted shields are available to protect 

your eyes from excessive sunlight. In addition, the helmet's 

internal sunscreen allows for immediate regulation of light 

intensity.

Attention! 

Never use a smoked or dark screen in low 

visibility conditions. Not only is it unsafe, it is also illegal in 

several countries.
Never use a visor that is scratched or that is wet with 

condensation. The MT HELMETS are supplied with an 

anti-scratch treatment.

Ventilation system

Ventilation systems are designed and engineered to maximize 

your comfort in a wide range of temperatures. Familiarize 

yourself with the ventilation openings on your helmet. Some 

vents have multiple positions, allowing partial opening and 

partial closing, thus providing you with a high degree of airflow 

control. Helmet ventilation systems should be kept in perfect 

condition and free of dirt, insects or other elements that 

may  interfere  with  proper  airflow.  Ventilation  systems  play 

an important role, especially during physical effort or in hot 

weather. Optimal ventilation also helps to reduce the possibility 

of the visor fogging up.

17

ESPECIFICA

TIONS

Содержание MT FF118SV

Страница 1: ...ECO conscious M T HELMETS since 1968 LARGERLIFETIME Manual de propietario Owner s Manual Helmet instruction MANUAL THUNDER 4 SV ...

Страница 2: ... de nuca 7 Funcionamiento ventilaciones 8 Pantalla del casco 10 Alerón 13 Advertencias 14 Mantenimiento y garantía 15 Specifications 16 Retention System 18 Disassembly of Neck Support 19 Ventilation Operation 20 Helmet Shield 22 Spoiler 25 Warnings 26 Maintenance and Warranty 27 2 ...

Страница 3: ...3 ...

Страница 4: ...celente evacuación del aire caliente 3 Visor MT V 28 El sistema de mecánismo pivotante del visor MT V 28 garanti za un cierre uniforme en todo el contorno de la pantalla Este mecanismo permite la sustitución de la pantalla de una forma rápida y facil pudiendo liberarla con una sola mano 4 Liner Liner con tejido hipoalergénico que le mantiene fresco y seco en primavera verano y caliente con tempera...

Страница 5: ...n correctamente y firmemente ajustada Con la barbilla firmemente sujetada agarre la parte posterior del casco con ambas manos e intente rodar el casco hacia adelante Si usted puede mover el casco hacia sus ojos la talla no es correcta por lo que pruebe una talla más pequeña de casco Pantallas Las pantallas de los cascos MT proporcionan protección contra el clima pequeños objetos voladores y el vie...

Страница 6: ...e que la tensión y por lo tanto el posicionamiento del casco sean correctos para todas las posiciones Como quitarse el casco Libere el sistema de retención mantenga las dos secciones ligeramente separadas como se explica en el apartado anterior y quítese el casco Como ajustar el sistema de cierre micrométrico El cierre micrométrico metálico permite un fácil y preciso ajuste de la longitud de la co...

Страница 7: ...illa lateral por su centro y tire suavemente de la correa de la barbilla Instalación de las almohadillas laterales 1 Pase la correa por la abertura de la almohadilla al nivel de la mejilla 2 Alinee y deslice completamente la placa de plástico de la almohadilla entre la calota y el EPS 3 Sujete los 3 broches macho de la almohadilla lateral a los 3 broches hembra fijados en el interior de la calota ...

Страница 8: ...ecanismo de bloqueo de entrada de aire para des activar el flujo de aire entrante Funcionamiento entrada de aire superior 1 Deslizar suavemente hacia atrás la pestaña del mecanismo de bloqueo de entrada de aire para activar el flujo de aire entrante 2 Deslizar suavemente hacia delante hasta escuchar un clic la pestaña del mecanismo de bloqueo de entrada de aire para des activar el flujo de aire en...

Страница 9: ...s 2 tornillos con una llave de Allen del nº 2 para finalmente poder liberar el mecanismo Desmontar ventilación frontal 1 Desatornillar con una llave de Allen nº 2 los 2 tornillos que se encuentran en la parte frontal interna del casco 2 Empujar la pieza de la ventilación desde la parte exterior del casco para liberarla del anclaje 1 1 2 2 9 FUNcionamiento ventilaciones ...

Страница 10: ...era tiene la característica de cerrarse con un sellado anti entrada de aire óptimo 1 Empuje hacía arriba la pantalla para que quede abierta 2 Baje la pantalla hasta escuchar un click para dejarla nuevamente cerrada 10 Pantalla del casco ...

Страница 11: ...la hasta su posición elevada máxima 2 Presione el botón central para que la pantalla se libere Montaje de pantalla 1 Alinee la pantalla con la posición de montaje 2 Presione el botón central hasta que oiga un clic 1 1 2 2 11 Pantalla del casco ...

Страница 12: ...iba la pestaña lateral que en contrara en el lado izquierdo del casco para que aparezca la pantalla solar 2 Empuje hacia abajo la pestaña lateral que encontrara en el lado izquier do del casco para esconder la pantalla solar 1 2 12 Pantalla del casco ...

Страница 13: ...Desmontaje de alerón 1 Desatornillar los 2 tornillos de llave Allen nº2 de tal manera que ell alerón quedará liberado 2 Empuje para desaclarlo del casco 1 2 13 Alerón ...

Страница 14: ...ar fácilmente y golpear el suelo causando un daño irreparable Lo más adecuado es colocar el casco en una superficie plana o en su defecto sobre el suelo para que no pueda rodar ni caer No utilizar su casco si la pantalla está rayada Esto puede afec tar su visión especialmente durante una conducción nocturna No modifique ninguna parte de su casco no taladre la calota ni corte o presione el revestim...

Страница 15: ... mano No coloque piezas de revestimiento en la secadora el exceso de calor puede dañar la espuma y los revestimientos La pantalla puede limpiarse conn jabón suave y agua La calota de su cas co debe limpiarse con agua Advertencia Nunca utilice productos químicos disolventes gasolina agentes de limpieza o adhesivos basados en petróleo para limpiar la calota los revestimientos o la pantalla de su cas...

Страница 16: ... spoiler allows excellent venting of hot air 3 Shield MT V 28 The pivoting mechanism of the MT V 28 shield ensures a uni form seal all around it This mechanism allows the shield to be replaced quickly and easily being able to release it with only one hand 4 Liner The hypoallergenic fabric liner keeps you cool and dry in spring summer and warm in cooler temperatures The interior is re movable and w...

Страница 17: ...TS helmet fits on your head correctly and securely fastened by the retention strap With your head held firmly in place grasp the back of the helmet with both hands and try to roll the helmet forward If you can move the helmet toward your eyes the size is not correct try a smaller one Shields MT helmet shields provide protection against weather small flying objects and wind Tinted shields are avail...

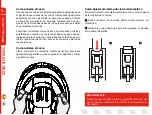
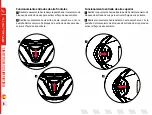
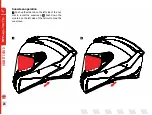
Страница 18: ...heck that the tension and therefore the posi tioning of the helmet is correct in all positions How to take the helmet off Release the retention system hold the two sections slightly apart as explained in the previous section and remove the helmet How to adjust the micrometric closing system The micrometric metal clasp allows for easy and precise ad justment of the strap length 1 Pass the end of th...

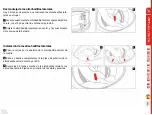
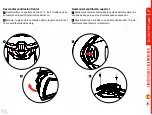
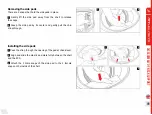
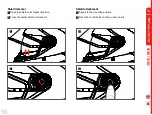
Страница 19: ...ide pad by its center and gently pull the chin strap through Installing the side pads 1 Pass the strap through the opening of the pad at cheek level 2 Align and slide the plastic pad plate fully between the shell and the EPS 3 Attach the 3 male snaps of the side pad to the 3 female snaps on the inside of the shell 1 1 2 3 2 19 Disassembly of neck support ...

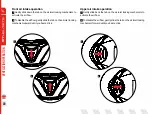
Страница 20: ...ntly slide the tab on the air inlet locking mechanism upward until you hear a click Upper air intake operation 1 Gently slide back the tab on the air inlet locking mechanism to activate the air flow 2 To disable the air flow gently slide the tab on the air inlet locking mechanism forward until you hear a click 1 1 2 2 20 Ventilation operation ...

Страница 21: ...posed 2 Unscrew the 2 screws with a No 2 Allen wrench to free the mechanism Disassembly of front ventilation 1 Unscrew with a No 2 Allen wrench the 2 screws located on the internal front part of the helmet 2 Push the vent unit from the outside of the helmet to release it from the anchor 1 1 2 2 21 Ventilation operation ...

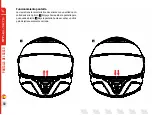
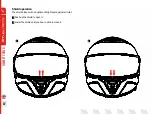
Страница 22: ...1 2 Shield operation The shield closes with an optimal airtight seal against air inlet 1 Push up the shield to open it 2 Lower the shield until you hear a click to close it 22 HELMET SHIELD ...

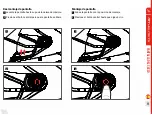
Страница 23: ...al 1 Raise the shield to its highest position 2 Press the center button to release it Shield attachment 1 Align it to the mounting position 2 Press the center button until you hear a click 1 1 2 2 23 HELMET SHIELD ...

Страница 24: ...Sunscreen operation 1 Push up the side tab on the left side of the hel met to reveal the sunscreen 2 Push down the side tab on the left side of the helmet to hide the sunscreen 1 2 24 HELMET SHIELD ...

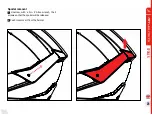
Страница 25: ...Spoiler removal 1 Unscrew with a No 2 Allen wrench the 2 screws so that the spoiler will be released 2 Push to remove it from the helmet 1 2 25 SPOILER ...

Страница 26: ...uel tank It could easily roll off and hit the ground causing irrepara ble damage It is best to place the helmet on a flat surface or failing that on the ground so that it cannot roll or fall off Do not use your helmet if the shield is scratched This can affect your vision especially during night riding Do not alter any part of your helmet drill holes in the shell or cut or press on the shock absor...

Страница 27: ...shing is recommended Do not place liner parts in the dryer excess heat can damage the foam and liners The shield can be cleaned with mild soap and water The shell of your helmet should be cleaned with water Warning Never use chemicals solvents gasoline cleaning agents or petroleum based detergents to clean shell lining or screen of your helmet because they could be seriously damaged by the use of ...

Страница 28: ...DESIGNED TO PROTECT WWW mthelmets com ...

Отзывы: