

Connecting the Weighscale (Item Nos. 6 & 7 on previous page)
(See the User’s Guide)
1. Remove the scale from the packaging and place close to the JET+ 250.
2. Locate the scale cable, connect the round plug to the scale and the square
plug to the socket marked
at the back of the JET+ 250.
Connecting the Modem Cable (Item No. 8 on previous page)
(See the User’s Guide)
1. Locate the modem cable, this has a standard telephone connector on one end.
2. Insert the telephone connector into the telephone wall socket and the small square
plug into the socket marked at the back of the JET+ 250.
Connecting to the Power Supply (Item No. 3 on previous page)
(See the User’s Guide)
The D.C. power unit connects directly to the main power supply socket and is intended
to serve as the device for isolation of the power supply. The JET+ 250 is designed to be
continually powered.
1. Connect to your power supply socket.
2. Insert the round plug into the socket marked
at the back of the JET+ 250.
3. Turn the switch on your power supply socket to the ON position.
4. Press
to unlock the JET+ 250. This is the factory set PIN, which
can be changed. (see the User’s Guide)
The CARTRIDGE INSTALL display will now be observed:
Fitting the ink cartridge (see the User’s Guide)
Please follow these instructions carefully otherwise your JET+ 250 will
display an error message.
1.
Raise the JET+ 250 front cover.
2.
Open fully the Blue Latch to the right.
Remove the ink cartridge from its box and
peel off the Blue Tape seal that protects the
Print Head.
3.
Insert the cartridge into the JET+ 250
pressing fully home as illustrated, close the
Blue Latch locking the cartridge in place.
Close the top cover and press
.
The following display will now be observed
- The ink charging process may take a short while to complete, during this
time the JET+ 250 may produce some mechanical sounds, this is normal.
- Once installed, do not open the blue latch again until you need to fit a new
cartridge.
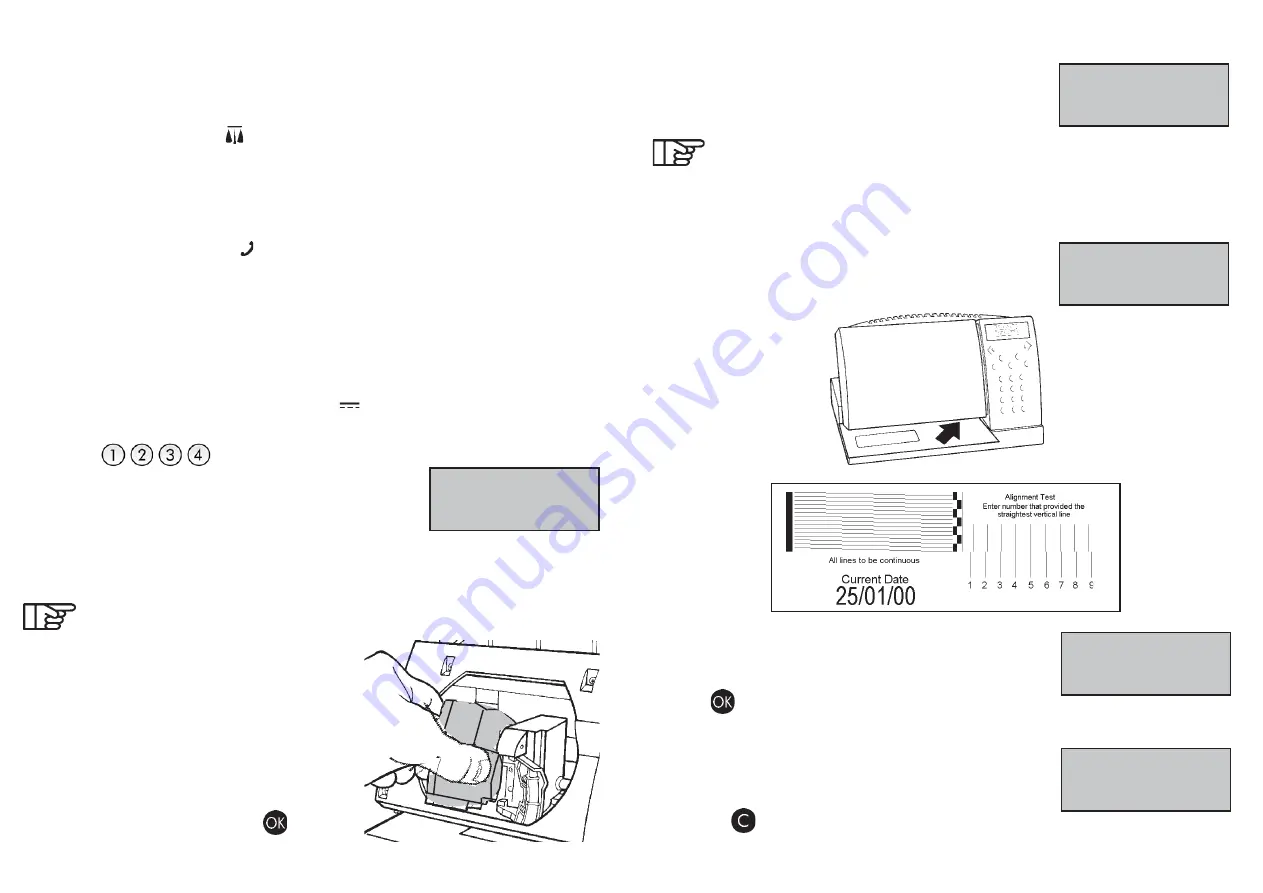
4. You will now have to produce a test print by inserting
a blank envelope or card, as illustrated.
The following display will now be observed:
Enter the number that corresponds to the straightest vertical
line (for the example above: line 5).
Press
.
The message WARNING INSPECTION REQD will now be
observed. This message is displayed because your JET+ 250
requires a crediting transaction.
Press the
key.
PREPARING YOUR JET+ 250 FOR USE
CARTRIDGE
INSTALL?
INSERT ITEM
PLEASE WAIT
ALIGNMENT
5
WARNING
INSPECTION REQD


