


24
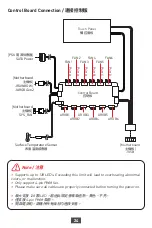
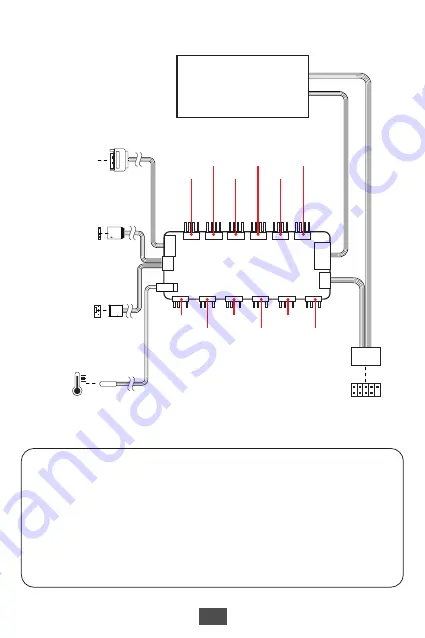
Control Board Connection / 連接控制版
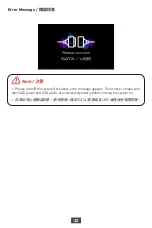
⚠
Note / 注意
∙
Supports up to 128 LEDs. Exceeding this limit will lead to overheating, abnormal
colors, or malfunction.
∙
Only support 4-pin PWM fan.
∙
Please make sure all cables are properly connected before turning the power on.
∙
最大支援 128 顆 LED,超過此限定會導致過熱、異色、不亮。
∙
僅支援 4-pin PWM 風扇。
∙
開啟電源前,請確保所有線材均連接妥善。
[Motherboard
主機板]
JRAINBOW /
JARGB Gen2
[PSU 電源供應器]
SATA Power
[Motherboard
主機板
]
JUSB
Control Board
控制板
[Motherboard
主機板]
SYS_FAN
FAN1
ARGB1
ARGB2
FAN2
FAN3
FAN4
FAN5
FAN6
ARGB3
ARGB4
ARGB5
ARGB6
P
ort A
P
ort A
P
ort A
P
ort B
P
ort C
P
ort D
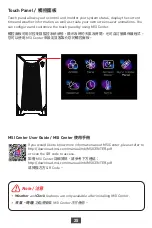
Surface Temperature Sensor
表面溫度感應器
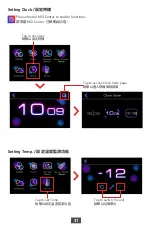
Touch Panel
觸控面板
Содержание MEG PROSPECT 700R
Страница 1: ...MEG PROSPECT 700R PC Case User Guide...
Страница 6: ...6 Case Features...
Страница 7: ...7 585mm 257mm Side Front View 537mm 500mm...
Страница 9: ...9 SSD HDD Installation SSD 45...
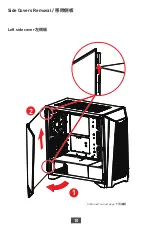
Страница 10: ...10 Side Covers Removal Continued on next page Left side cover 1 2...
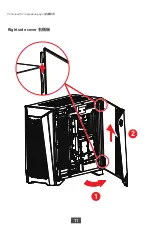
Страница 11: ...11 Continued from previous page Right side cover 1 2...
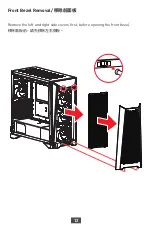
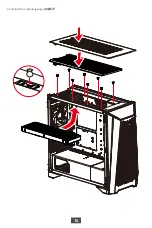
Страница 12: ...12 Front Bezel Removal Remove the left and right side covers first before opening the front bezel...
Страница 14: ...14 Continued from previous page...
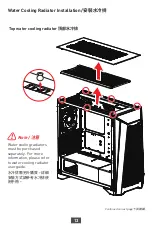
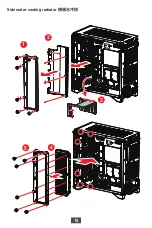
Страница 15: ...15 Side water cooling radiator 2 1 3 4 5...
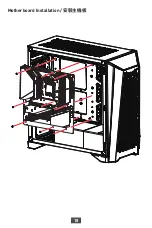
Страница 18: ...18 Motherboard Installation...
Страница 19: ...19 Horizontal Graphics Card Installation...
Страница 20: ...20 1 2 3 3 Vertical Graphics Card Installation Continued on next page...
Страница 22: ...22 PSU Installation 1 2...
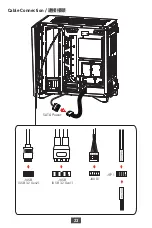
Страница 23: ...23 Cable Connection SATA Power JAUD1 HDAUDIO JUSB USB 3 2 Gen2 JUSB USB 3 2 Gen1 JFP1...


