


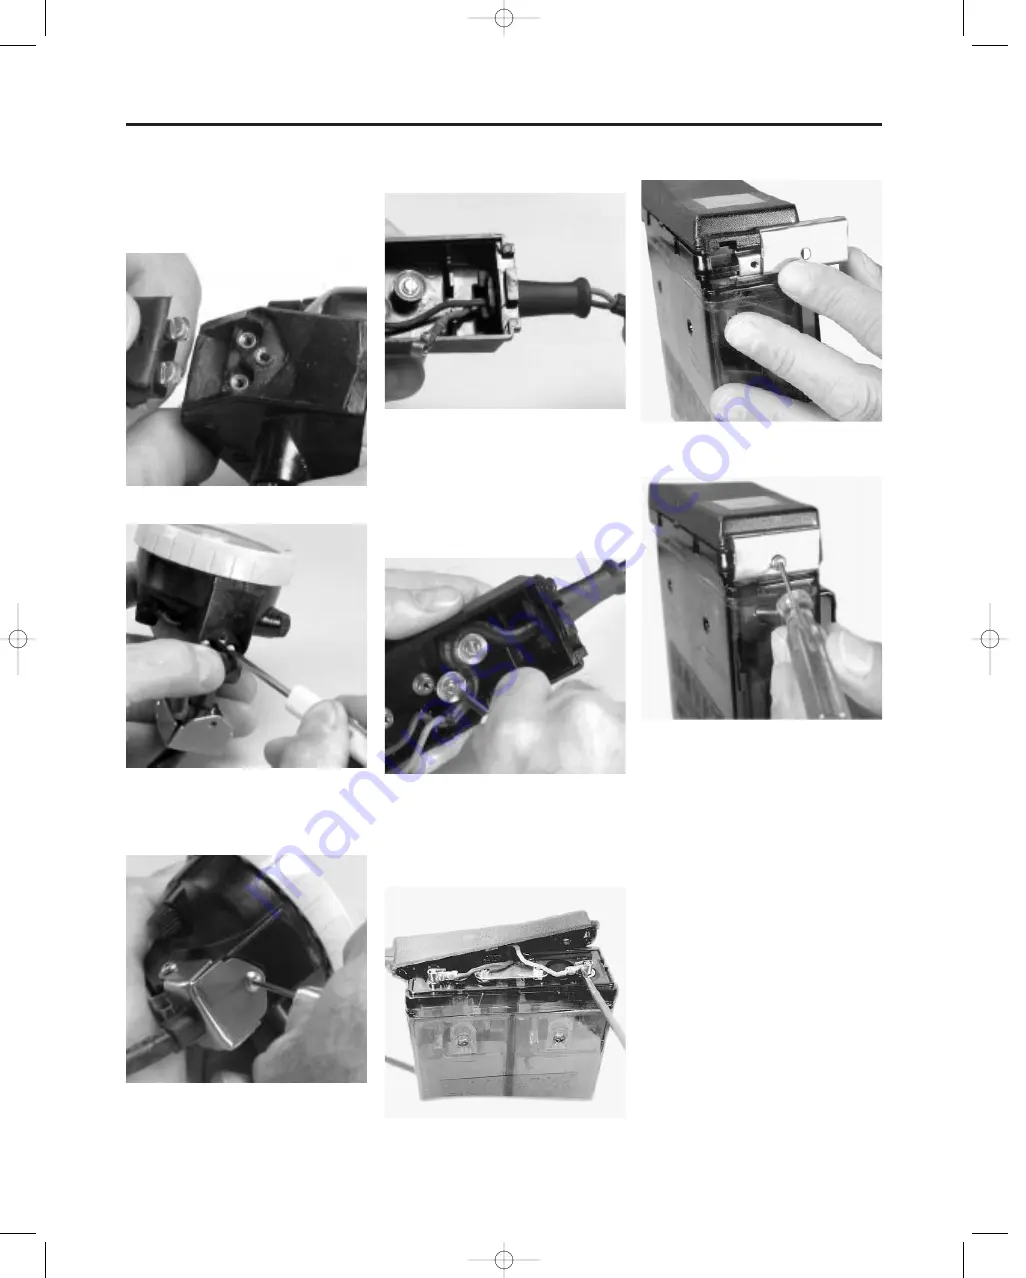
5. Fold back the rubber flap on the
molded end of the new cable, insert
headpiece cable screws through the
exposed terminals and thread them
into the threaded inserts at the top
rear of headpiece housing.
Tighten screws securely.
6. Slide cap hook into place over the
molded end of the cable and fas-
ten to the headpiece by inserting
three cap hook locking screws.
7. Lubricate approximately 6” length
of other end of new cable with
soapy water and insert it into the
cover by pushing each terminated
conductor, one at a time, through
the cable protector.
Continue pushing cable until 3-1/4”
of cable sheath is exposed inside
the cover. Wrap cable around and
through circular bosses molded in
the cover and press firmly to inside
top of cover. Secure in place by
assembling cable retaining wash-
ers and screws.
8. Clean any foreign matter form
each battery pole.
9. Fasten red conductor to positive
battery pole and black conductor to
negative pole to insure correct
polarity.
Tighten in a position so that cover
will sit squarely on battery top.
10. Slide on cover clamps.
Lock in place with cover clamp
screws.
TAL 998 (L) Rev. 2 - 817184
13
Maintenance
817184 8/13/99 9:44 AM Page 15
Содержание 817169
Страница 11: ...817184 8 13 99 9 43 AM Page 11 ...
Страница 12: ...817184 8 13 99 9 43 AM Page 12 ...
Страница 16: ...14 TAL 998 L Rev 2 817184 ML 2 Cap Lamp System Expanded Parts Diagram Notes 817184 8 13 99 9 44 AM Page 16 ...
Страница 17: ...817184 8 13 99 9 44 AM Page 17 ...
Страница 18: ...817184 8 13 99 9 44 AM Page 18 ...
Страница 20: ...PITTSBURGH PENNSYLVANIA U S A 15230 Manufactured by 817184 8 13 99 9 44 AM Page 20 ...