Page 3 v5.5 H2
Mr Volcano® Hero 2 Double Burner -
PREP/ASSEMBLY INSTRUCTIONS
CRITICAL: Using only one burner?
Remove the second burner from the forge. Failure to do so will
result in the heat entering the unused burner and damaging the
ball valve and hose components
THINGS YOU’LL NEED
Mr Volcano Hero Double Burner Forge Kit
Personal Protection Equipment
2 Spray Bottles
Paint Brush
❶
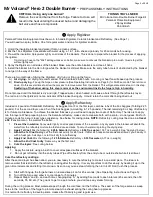
Apply Rigidizer
Personal Protection Equipment must be worn to handle Rigidizer, Ceramic blanket and Refractory. (See Page 1).
You will need two spray bottles: One for regular water, and one for rigidizer solution.
1. Unroll the insulation blanket and place it flat on a clean surface.
2. Mix the 16oz Rigidizer Concentrate with water using a 1 to 1 ratio, shake vigorously for 45 seconds before using.
3. Pre-wet the insulation: Spray water lightly on all sides of the blankets. This is done to prepare the blanket for the process of applying
the rigidizer.
Tip: Using a hose on the “Mist” setting works even better, make sure to not soak the blanket up too much. Goal is to get the
surface lightly wet.
4. Spray the Rigidizer on all sides of the blanket. Make sure the entire blanket is red. Use all 32oz.
5. Install the blanket into the Hero forge while the blanket is still wet. Make sure the entry tube hole isn’t obstructed by the blanket
to not get in the way of the flame.
There are two methods of drying the Rigidizer: Air drying or firing up the forge.
A)
Air drying -
Air drying is recommended. This could take 24-48 hours. A cooling or heat fan will speed up the process.
B)
Fired up drying -
Fire up the forge on low pressure (See Operating Instructions on Page 5) for 30-60 seconds. Then let it cool
down. Do this several times to allow the process to remove water from the blanket. This will generate some steam in this step.
Sputtering of the burner during this step is normal, as the environment inside the forge is high in humidity.
Do not proceed until the blanket is dry and rigid. Trapped water, when heated, will cause a burst through the refractory layer.
The red color in the rigidizer is not an indicator of the blanket being dry. It could retain the color after being dried out.
❷
Apply Refractory
Included is 4 pounds of Satanite® Refractory. 8x baggies total. For the first layer, combine 4.5x of the 8oz baggies (Totaling 2.25
pounds). For the second layer, use 2.5x of the 8oz baggies (amounting to 1.25 pounds). The last remaining 8 oz bag of refractory
is for future maintenance. To achieve the desired thickness, you will need to apply two coats of Refractory. The idea is to apply
two thin layers. When preparing to mix the Satanite refractory, make sure to measure both with a scale – do not guess. Mix for 5
minutes. Look for a sour cream type consistency. See below for mixing ratios.
NOTE:
Refractory curing must be done in
at least
a 50 F
environment - the warmer the better.
1.
Pre-wet the insulation
: Spray water lightly on all exposed areas of the insulation. Any dry spots in the blanket will absorb the
water from the refractory mixture too fast and cause cracks. Too much water will prolong the drying step
2.
Apply 1st Coat
: Mix the following:
2.25 lb Satanite
Refractory
+ 9.94 fl oz water
(10.37 oz in weight). See “Applying” below)
3.
Allow the 1st Coat to dry
: Let the first coat air dry for 24 hours. If after 24 hours some areas are still wet, you can dry it
with a heat gun, hair dryer, or let it air dry for another day.
4.
Apply 2nd Coat
: Mix the following:
1.25 lb Satanite
Refr
5.53 fl oz water
(5.77 oz in weight).
5.
Allow the 2nd Coat to dry
: Same way as the first coat.
6.
Cure the layers
: See curing below.
.
Applying
:
1. Apply the mixture using a brush to cover all exposed surfaces of the blanket.
2. Do not get refractory into the entry tubes. Wipe off refractory from the entry tube or outside shell while it is still wet.
Cure the refractory coatings:
After the second layer has been dried, you are now ready to cure the refractory to make it a one solid piece. The idea is to
remove water that is still left in the refractory coating after the drying. It is very important to do this slowly, by heating it up in the
given time increments and letting it cool down. As soon as you see steam forming then turn it off. Don’t rush this process.
A. Start with firing up the forge burners on low and keep it on for 45 seconds. (See Operating Instructions on Page 5)
B. Turn off the forge and allow it to cool down for 5 minutes.
C. Repeat Step A and B – and each time changing step ”A” by adding 5 seconds to each interval. (45 seconds, then 50
seconds, 55, 60, etc.) The goal is to get to a point where you don’t see any steam forming.
During the curing process: Most water escapes through the cold face, not the hot face. The seams of the forge serve as weep
holes to the cold face of the forge to promote steam to exhaust during the curing heat up process.
It is normal for refractory to develop some cracks after final drying and regular use.


