background image

Using the Menu Features

45

English

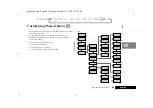
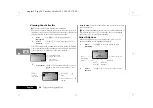
Customizing Phone Options 

P

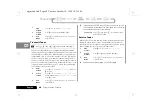
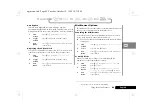
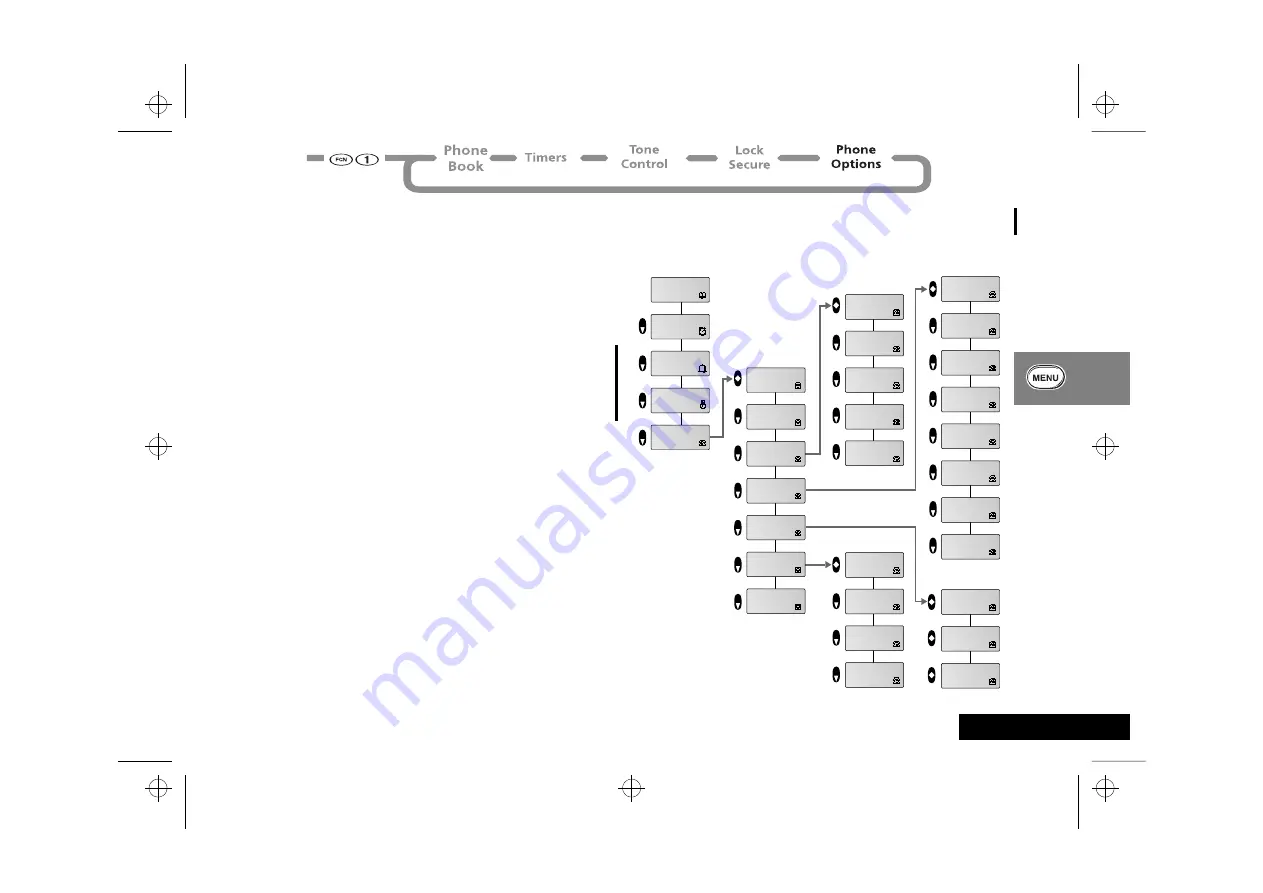
The Phone Options menu lets you customize the way your phone 
sends and receives calls. 

You can tune your phone for optimal performance, view 
information about the phone, and choose from a number of 
convenient features.

In this section you will learn how to:

switch phone numbers.

review your phone’s settings.

select a variety of system specific settings.

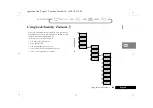
Start: 

Phone
Book

Timers

Lock
Secure

Tone
Control

Phone
Options

Phone
Info

Feature
Review

Call
Options

System
Options

To Main
Menu

To Main
Menu

To Main
Menu

Multi Key
Answer Off

Open To
Answer Off

Auto
Answer Off

Instant
Redial Off

Display 
System ID

Select
SystemMode

Roam List 
Version

Display
Options

MiniBrowser
Options

To Main
Menu

Quick 
Menu On

Change
Language

Change
Banner

Backlight
Select

Auto
Hyphen On

24 Hour
Clock Off

Service
Light On

Launch
MiniBrowse

Power Up
Mode

To Main
Menu

opt_menu.fm5  Page 45  Tuesday, October 19, 1999  10:31 PM

Содержание T56ZV1

Страница 1: ...APPLICANT MOTOROLA INC FCC ID IHDT56ZV1 EXHIBIT 8 INSTRUCTION MANUAL A preliminary draft copy of the Users Manual follows ...

Страница 2: ...and world class quality standards During development our laboratory testing team took your cellular phone through rigorous durability tests including temperature humidity shock dust vibration and drop tests and the phone still worked We are confident that the phone you purchased will meet your own exacting standards Enjoy your Motorola phone PHONE GRAPHIC TO BE SUPPLIED OR ON INSIDE OF FRONT COVER...

Страница 3: ...Ä followed by â 7 and then C in sequence not simultaneously Prompts and Messages Your phone responds to key presses by displaying either easy to understand prompts that guide you to the next action or simple messages confirming that your action is complete Prompts and messages are represented in this manual in LCD style for example Enter 1st Letter or Location __ Other Symbols You will find the fo...

Страница 4: ...the parent menu being on one level and its sub menus being on a lower level Navigating the Menus You can navigate through the menu system using the three keys located on the left side of the phone Use the upper and lower volume keys to scroll to sub menus and to control volume Use the middle Smart Button to choose menus and functions Follow these symbols as a guide for using the keys on the side o...

Страница 5: ...2 Germany 0180 35050 Greece 00800 441 28150 Italy 02 696 333 16 Jordan 06 863750 Kuwait 484 2000 Ext 1177 Lebanon 01 744156 Luxembourg 0800 21 99 Netherlands 0800 022 27 43 Norway 22 55 10 04 Oman 790925 Portugal 01 318 0051 Qatar 418999 Saudi Arabia 01 2303294 South Africa 0800 11 48 49 Spain 902 100 077 Sweden 08 445 1210 Switzerland 0800 553 109 Turkey 0212 425 9090 UK 0500 55 55 55 United Arab...

Страница 6: ...xplanation of the Menu Features and how to use them 29 Using the Messaging Menu Provides an explanation of the Message Center and how to use it 53 Using the MiniBrowser Provides an explanation of the MiniBrowser and how to use it 59 Accessories Details the accessories available for use with your phone 65 What To Do If Helps you to solve any problems that may occur 67 Index A comprehensive Index 77...

Страница 7: ...Contents 6 English toc fm5 Page 6 Tuesday October 19 1999 9 16 PM ...

Страница 8: ...ous 5 If you receive an incoming call at an inconvenient time do not take notes or look up phone numbers while driving Jotting down a to do list or going through your address book takes attention away from your primary responsibility driving safely 6 Dial sensibly and assess the traffic if possible place calls when you are not moving or before pulling into traffic Try to plan calls when your car w...

Страница 9: ...and their accessories in the areas where you drive Always obey them The use of these devices may be prohibited or restricted in certain areas For more information please call 1 888 901 SAFE or visit the CTIA website at www wow com com safety fm5 Page 8 Tuesday October 19 1999 9 17 PM ...

Страница 10: ...on comprehensive and periodic evaluations of relevant scientific literature For example over 120 scientists engineers and physicians from universities government health agencies and industry reviewed the available body of research to develop the updated ANSI Standard C95 1 The design of your phone complies with the FCC guidelines and these standards Antenna Care Use only the supplied or approved r...

Страница 11: ...stry Manufacturers Association recommends that a minimum separation of six 6 inches be maintained between a handheld wireless phone and a pacemaker to avoid potential interference with the pacemaker These recommendations are consistent with the independent research by and recommendations of Wireless Technology Research Persons with pacemakers Should ALWAYS keep the phone more than six inches from ...

Страница 12: ...osive atmosphere and obey all signs and instructions Sparks from your battery in such areas could cause an explosion or fire resulting in bodily injury or even death Areas with a potentially explosive atmosphere are often but not always clearly marked They include fueling areas such as gasoline stations below deck on boats fuel or chemical transfer or storage facilities areas where fuel odors are ...

Страница 13: ...Safety 12 English safety fm5 Page 12 Tuesday October 19 1999 9 17 PM ...

Страница 14: ...tures Messaging Menu button Opens messaging menus A Smart Button Use the Smart Button to place and end calls enter menus toggle features on and off and select items in the display See qZ Volume Keys The upper and lower volume keys can adjust keypad earpiece and ringer volume After pressing the Smart Button the volume keys also scroll through memory entries and menu features Using the Smart Button ...

Страница 15: ...s idle A To silence the keypad tones see page 39 To adjust the volume of your conversation the earpiece volume use the volume keys during a call Press q to raise the volume or press Z to lower the volume Adjusting Ringer Volume To adjust ringer volume Press Ä q to raise the volume or press Ä Z to lower the volume The Display The display on your phone can show alphanumeric characters as well as use...

Страница 16: ... connections and push it downwards until it clicks into place 4 Replace the phone battery cover 5 NS No Service Indicator If you travel beyond the range of a cellular system the No Service Indicator appears to let you know that calls cannot be placed or received from your location 6 o Short Message Service Displayed when the phone has received a message The symbol will flash when your message stor...

Страница 17: ... indication Ignore this indication and let the battery charge for several more hours remove and re insert the battery into the charger and charge for an additional 14 hours Your batteries will not charge if they are not matched properly to the phone connection markings and Please ensure that you have installed the batteries properly before initiating a charge To ensure that you enjoy maximum batte...

Страница 18: ...r location matches that of your travel charger Install the batteries into your phone see Installing the Batteries To charge your battery 1 Attach the correct adapter plug to the travel charger 2 Connect the travel charger to the phone A The connector is keyed and can only be inserted one way 3 Insert the travel charger plug into a suitable mains power socket A beep tone is heard and the battery ic...

Страница 19: ...ry Indicators Your phone monitors and displays information about your battery The following message will appear on the display as the condition occurs Battery Meter Indicators The battery meter displays different messages depending on the batteries attached and whether or not there is an external power source The battery meter is found in the Call Related Features part of the Options Menu A When t...

Страница 20: ...es Your phone will automatically begin searching again in a minute or two if you would like it to start searching immediately just press any key Standby Mode To conserve energy your phone enters standby mode and turns off the backlight when you have not touched a key for a few seconds The backlight will come back on as soon you press a key or open the phone Placing a Call To place a call 1 Extend ...

Страница 21: ...4 to learn how to view your stored Caller IDs Unanswered Call Indicator Even with the latest wireless technology sometimes you are unavailable to answer calls If your phone is ON it keeps a count of unanswered calls For example if you miss two calls your display will show 2 Calls Unanswered If you subscribe to Caller ID service you can easily return the calls that you missed See page 50 to learn h...

Страница 22: ... If you hear an ordinary busy signal Display Last Ten Numbers Dialed Your phone keeps track of the last ten numbers you have dialed Muting the Microphone For privacy during a call mute the microphone You can hear the person on the other end but he or she cannot hear you AnswerCall Press to answer the call and automatically place the current call on hold or End Current Call Press to end the current...

Страница 23: ...any one of these buttons and your phone will perform that function Phone Book The Phone Book is the place to find all your personal names and numbers See page 32 Messaging If you subscribe to messaging you can use this shortcut or the one on page 53 Last 10 Dialed Your phone remembers the last ten numbers you dialed Turn to page 21 to learn more Main Menu Select this option to access your phone s ...

Страница 24: ...nd Numbers Each memory location can store up to four numbers For a single contact you can store every number you need like home mobile fax and more Keep in mind Your Phone Book sorts alphabetically by the first letter in the entry If you store an entry without a name it will be placed at the back of the Phone Book How to Store Phone Numbers 1 Enter Number Enter the phone number you want to store Y...

Страница 25: ... would like to insert a letter earlier in the sequence 3 Choose Label Press 0 to scroll through the available labels After 0 you will see Home Mobile Pager or Work 4 Enter Marks Press Ú to scroll through the available punctuation marks space 1 _ 5 Finish Storing Enter up to 20 letters Press a when you are finished Your phone will confirm the entry by displaying the information stored 1 Enter Press...

Страница 26: ...Enter Location Enter the two digit memory location of the phone number you are looking for 3 Place Call Press and hold a or press to call the number You will see Calling 4 End Call Press or close the phone or Press and hold a until you hear a high tone You will see Press to End Call then Press a again 1 Recall Entry Press a twice and then press q or z to scroll to the name you are looking for or P...

Страница 27: ...ntered a string of numbers and pauses store the string in the same way you store other entries You can store up to 32 digits including pauses 1 Enter Number Enter the number with the keypad The person on the line will hear tones as you dial 2 Store Number Press  enter a two digit location enter a name with the keypad and press  to finish See page 23 for more details or End Call Press to end your...

Страница 28: ...bers Repeat this step to send each group of numbers that you have stored 3 End Call Press close the phone or press and hold a until you hear a high tone and press a again 1 Recall 2nd Location Once you have sent the tones from the 1st location press ä and the two digit memory location where you stored the second set of digits 2 Send Tones Press ä and to send the tones in the 2nd location If you ha...

Страница 29: ...ss You will see Enter Number Enter the phone number you are calling You may enter the number manually or recall it by location 3 Place Call Press and hold a to place the call Your phone will dial the number to access your long distance provider then wait for your input when it reaches the first pause 4 Send More Numbers Press a or press to send the next group of numbers when the recording prompts ...

Страница 30: ...r volume keys to scroll to sub menus and to control volume Use the middle Smart Button to choose menus and functions Follow these symbols as a guide for using the keys on the side of your phone Press q to scroll up Press A to select Press Z to scroll down You can also use your phone s Ç and È keys to scroll through the menu system Road Maps To help you navigate through the phone s menu system each...

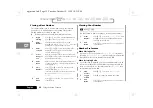
Страница 31: ... how to recall and store phone numbers using the menu system edit your memory information add numbers to existing entries view your own phone number A You can also recall phone numbers without using the Phone Book See Recalling an Entry by Name on page 24 or Recalling an Entry by Memory Location on page 25 Start Phone Book Recall By Name Recall By Location Phone Book Status Store New Number Edit M...

Страница 32: ... first entry with that letter 3 Find Name If necessary press q or Z to scroll to the name you are looking for 4 Place Call Press and hold a or press to call the displayed number You will see Calling 5 End Call Press or close the phone or Press and hold a until you hear a high tone You will see Press to End Call then Press a again 1 Begin Recalling Press q or Z to scroll to Recall By Location and p...

Страница 33: ...press a You will see Location XX XX is the number of the lowest available location 3 Enter Location Press  or Ç to store the number in the displayed location or enter a new two digit location and press  or Select Range of Ten Enter the first digit of the memory location and press Ç to store it in the first available location beginning with that digit 4 Enter Name Enter a name to identify the pho...

Страница 34: ...t a time or press and hold C to erase the entire number Press Ç to move the cursor backward 4 Finish Number Press a or  when you finish the phone number 5 Change Original If you would like to save your changes in the same location then press a or  You will see the name associated with the entry or Copy Entry If you would like to move the entry to a new location and keep the original entry then p...

Страница 35: ...intervals that you specify In this section you will learn how to monitor the length of your calls set and view the resettable timer for long term monitoring program audible timers for your individual needs Start Phone Book Timers Individual 00 00 00 Cumulative Time 00000 Reset Timer Individual Timer Off One Minute Timer Off Repeating Timer Off Single Timer Off To Main Menu Resettable Time 00000 op...

Страница 36: ... time in minutes since your phone was activated Resetting the Timer i Press Ä a then Ý Ü and continue with step 2 i Press Ä then â à C to reset the timer This feature allows you to monitor elapsed air time over a period of time that you choose After you reset the timer it will continue to keep track of your air time in minutes until you reset it again 1 View Timer When you enter the Call Timers me...

Страница 37: ...u will hear the beep 10 seconds before the end of each interval and the party on the other end will not hear the beeps 1 Find Feature Press q or Z to scroll to Individual Timer 2 Toggle Display Press a to toggle On or Off the automatic display of the individual timer 3 Exit Menu Press to exit the menu or you may scroll to other features 1 Find Feature Press q or Z to scroll to One Minute Timer 2 T...

Страница 38: ...et time The party on the other end will not hear the beeps 1 Find Feature Press q or Z to scroll to Single Timer 2 Toggle Timer Press a to toggle the timer On or Off 3 Enter Seconds If you toggle the timer ON you will see Enter Seconds Enter the number of seconds you would like before the beep and press a to set the timer You will see Set At XXX Secs 4 Exit Menu Press to exit the menu or you may s...

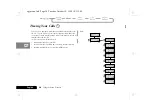
Страница 39: ...l learn how to choose from nine different ringer styles silence the keypad silence all your phone s tones with one convenient feature set the Message Reminder Start Phone Book Timers Tone Control Silent Mode Off Ring Vib Select Ringer Style 1 Setup Msg Tones Reminder TonesSetup Keypad Tones On DTMF Select Service Tones Off To Main Menu opt_menu fm5 Page 38 Tuesday October 19 1999 10 31 PM ...

Страница 40: ...lence the tones your phone sends across the line See Transmit Tones on page 40 for more information 1 Enter Feature Press q or Z to scroll to Ringer Style and press A to select 2 Select Ringer Press q or Z to scroll through the ringer styles As you scroll your phone will give an audible sample of the currently displayed style Press A to select the displayed option 3 Exit Menu Press to exit the men...

Страница 41: ...ON you will be instantly alerted to any change in your wireless service You will hear two short beeps when your phone 1 starts to roam 2 returns to a home system after roaming 3 loses service or 4 finds service A Your phone will always beep if a call is dropped 1 Find Feature Press q or Z to scroll to Keypad Tones 2 Toggle Feature Press A to toggle the feature On or Off 3 Exit Menu Press to exit t...

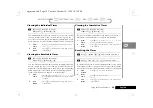
Страница 42: ... to lock and unlock your phone place priority calls view and change your lock code restrict call placement and memory access reset or clear your phone s settings Start Auto Lock Off Priority Call On Secure Options View Lock Code Change Lock Code Change SecureCode Service Level 4 Master Reset Master Clear Secure Code______ To Main Menu To Main Menu Phone Book Timers Lock Secure Tone Control opt_men...

Страница 43: ...ccess to their own emergency numbers Check with your Service Provider for more information Storing a Priority Call Number You should reserve memory location 01 for an emergency number or the number of a family member or close friend To store your priority number follow these steps 1 Find Feature Press q or Z to scroll to Auto Lock 2 Toggle Lock Press A to toggle the feature On or Off 3 Exit Menu P...

Страница 44: ...re Code is a six digit number factory set to 000000 You will probably want to change it to something unique and easy to remember Place Call When Priority Call is ON press and hold Ú at any time 1 View Code Press A to select View Lock Code You will see Lock Code XXX 2 Exit Menu Press to exit the menu or you may scroll to other features 1 Begin Change Press q or Z to scroll to Change Lock Code and p...

Страница 45: ...ress A to select the setting See the chart below for descriptions 3 Exit Menu Press to exit the menu or you may scroll to other features Level 1 Calls can be placed from memory locations 1 10 only No dialing from keypad No memory edit or storage No access to name directory Level 4 This is the default setting No restrictions 1 Memory 1 10 Only 4 Standard Setting 1 Reset Features Press q or Z to scr...

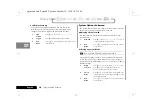
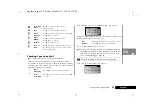
Страница 46: ...ariety of system specific settings Start Phone Book Timers Lock Secure Tone Control Phone Options Phone Info Feature Review Call Options System Options To Main Menu To Main Menu To Main Menu Multi Key Answer Off Open To Answer Off Auto Answer Off Instant Redial Off Display System ID Select SystemMode Roam List Version Display Options MiniBrowser Options To Main Menu Quick Menu On Change Language C...

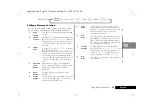
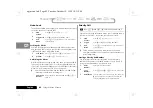
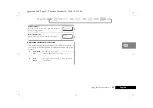
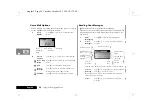
Страница 47: ...r any key in the center of the keypad Ú through È A If there are any digits in your Scratchpad or if your phone is locked this feature will not work 1 Find Feature Press q or Z to scroll to Phone Info then press A to select 2 Scroll Press q or Z to scroll through the the information 3 Exit Menu Press to exit the menu or you may scroll to other features 1 Begin Review Press q or Z to scroll to Feat...

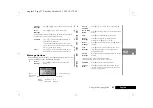
Страница 48: ...e Press SND to Redial This probably means the network is temporarily busy If you turn Instant Redial ON your phone will redial for the next four minutes or until the call goes through A This feature redials only when the network is busy If you hear a normal busy signal this feature will not work See page 21 for more redialing options 1 Find Feature Press q or Z to scroll to Open to Answer 2 Toggle...

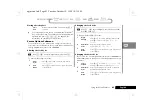
Страница 49: ... supply like a charger or vehicle accessory 1 Toggle Feature When you enter Display Options you will see Quick Menu Press A to toggle the feature On or Off 2 Exit Menu Press to exit the menu or you may scroll to other features 1 Begin Selection Press q or Z to scroll to Change Language and press a to select 2 Choose Option Press q or Z to scroll through the available languages and press a to selec...

Страница 50: ... phone you can begin with the MiniBrowser or the regular phone features Contact your Service Provider for availability 1 Find Feature Press q or Z to scroll to Auto Hyphen 2 Toggle Feature Press A to toggle the feature On or Off 3 Exit Menu Press to exit the menu or you may scroll to other features 1 Find Feature Press q or Z to scroll to 24 Hour Clock 2 Toggle Feature Press A to toggle the featur...

Страница 51: ...type of system your phone will attempt to access See below for a chart of available settings 1 Find Feature Press q or Z to scroll to Confirm at Start 2 Toggle Press A to toggle between On and Off 3 Exit Menu Press to exit the menu or you may scroll to other features 1 View SID Press A to select Display System ID You will see the System ID for your phone 2 Exit Menu Press to exit the menu or you m...

Страница 52: ...e Standard Mode Your phone first seeks a home type system then a non home type system Home Only Mode Phone will not operate outside its home system 1 View Roam List Press q or Z to scroll to Roam List Version then press A to select You will see Version XXXX 2 Exit Menu Press to exit the menu or you may scroll to other features Standard Scan Home Only opt_menu fm5 Page 51 Tuesday October 19 1999 10...

Страница 53: ...Using the Menu Features 52 English opt_menu fm5 Page 52 Tuesday October 19 1999 10 31 PM ...

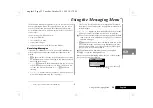
Страница 54: ... to Press o and begin flashing Msg Mem Low Appears when your phone s message memory is almost full at approximately 85 capacity Contact your Service Provider for availability Your Service Provider holds your messages and will forward them after you have made room See page 60 to learn how to delete messages Msg Mem Full Appears in the main display when the message memory is completely full and your...

Страница 55: ...aller Press Âto store the information Caller ID Options When viewing Caller IDs press the Message Key to see the options available for the highlighted Caller ID 1 Enter Messaging Press to open the Messaging Menu 2 Select Caller ID Press q or Z to scroll to Caller ID and press a to select 3 Select Caller Press q or Z to highlight a Caller ID to view and press a to view complete information for that...

Страница 56: ...ook To learn how see Pause Dialing on page 26 i Press and hold to call your Voice Mail number If you have no new messages you will see Go To Msg Menu Press a to return your phone to the Messaging Menu Exit Press a to exit Messaging to idle mode Delete Message Press a to delete the currently selected Caller ID Press a again to confirm Delete AllMsgs Press a to delete all your Caller IDs Press a aga...

Страница 57: ...Voice Mail notification Press a to confirm CallBack Press a to dial your Voice Mail box number 2 5 1 2 Exit Call Back Go To Messaging Menu Exit Delete Message 1 Enter Messaging Press to open the Messaging Menu 2 Select Messages Press q or Z to scroll to Messages and press a to select Flashing icons represent messages that have not been viewed Select a Message Press q or Z to highlight a message to...

Страница 58: ...re To Memory Call Back Go To Messaging Menu Exit Delete Message Delete All Messages Lock Unlock 4 Choose Function Press q or Z to scroll to one of the following Go To Msg Menu Press a to return your phone to the Messaging Menu Exit Press a to exit Messaging to idle mode Delete Message Press a to delete the currently selected message Press a again to confirm Delete AllMsgs Press a to delete all mes...

Страница 59: ...Using the Messaging Menu 58 English msg fm5 Page 58 Tuesday October 19 1999 10 37 PM ...

Страница 60: ...u MiniBrowser you will need an IP address for your phone The IP address is the location of a server provided by your Service Provider and it will be loaded into your phone by your Service Provider when you subscribe to this service Contact your Service Provider for more information Launching the MiniBrowser If your IP address is already set then you are ready to go Just follow these simple steps F...

Страница 61: ...he key matching the number of the list item In the above example press à for Email Scroll Press q or z to scroll up and down the page You can also use Ç or È Above press z once to scroll to Email twice to scroll to To Do List Select Press a or the left soft key see the next page to select the highlighted item Above press a to select Web Sites Go Back One Page While navigating press C to return to ...

Страница 62: ...s Most of the time while browsing you will not be able to receive calls depending on your service callers will probably get your Voice Mail A Look for the IU indicator on the lower line of the display If you see it your phone is online and you will not be able to receive calls Occasionally when you access a page that you have recently visited and the information on the page has not changed your ph...

Страница 63: ...the bookmarked page There are nine bookmarks available so your favorites are never more than a keypress away Show URL To see the address of the current page choose this feature Reset UP This features relaunches the MiniBrowser About UP This feature offers information on the company that helps to provide the web browsing service Select Press a to select Help You will see a help screen specific to t...

Страница 64: ...ubmenu contains a couple features for advanced users like security and technical settings 1 Select Press a to select Advanced 2 Scroll Press q or z to scroll to Set UP Link or Security and press a to select browse fm5 Page 63 Tuesday October 19 1999 10 45 PM ...

Страница 65: ...Using the MiniBrowser 64 English browse fm5 Page 64 Tuesday October 19 1999 10 45 PM ...

Страница 66: ... and microphone for simple handsfree and private telephone conversations The headset plugs directly into the jack on the top of your phone so that you can wear your phone and move freely Place the foam cover on the earpiece for a more comfortable fit Zero Install Car Kit For the quickest and easiest mobile solution use the Zero Install Car Kit Just plug it in attach the microphone and you are read...

Страница 67: ...Accessories 66 English m3cd_us bk access fm5 Page 66 Tuesday October 19 1999 10 47 PM ...

Страница 68: ...ies are especially sensitive to high temperature extremes As a good rule always take your phone with you when you leave your car The display says Locked How do I unlock my phone Enter the last three digits of your cellular number If that doesn t work use the factory preset lock code 123 If all else fails call your service provider the company that sends you your monthly cellular bill for assistanc...

Страница 69: ... as your previous attempt Also keep in mind that when using your calling card you must enter the number you are calling with the area code but without the initial 1 Check with your long distance carrier for details on using your calling card My phone started beeping and the display says 1 Call Unanswered What happened Someone tried to call you while you were in an area where the signal was weak Pr...

Страница 70: ...70 4912602 4916262 4918403 4918732 4922209 4924194 4930126 D309301 D309451 4945570 4954796 4956854 4963812 4963843 4965537 4970475 4972355 4972432 4972455 4975808 4982108 4984219 4989230 D314173 4992753 4998289 D315330 D315543 5004992 5008925 5010309 5010570 5014294 5014346 D316859 5017856 5018188 5020076 5020091 5020092 5020093 5023580 5023866 5023911 5025387 5028859 5029233 5036532 5040127 50420...

Страница 71: ...3 5396654 D356309 5402447 5404120 5404582 5406146 5406562 D357224 D357457 5410275 5414711 D358148 5420759 5424689 5428820 5428836 5430416 5432017 5434947 5436589 5436802 5438684 D361070 5444764 5446763 5448763 5448770 5448771 5453997 D362840 D362852 5461643 5463628 5465412 5469177 5475752 D365094 5477192 D365817 5486843 5487184 5488335 5490177 5493198 5493700 5493714 5495206 5497126 5497383 D36764...

Страница 72: ...ty Products that have a D have a 2 two year warranty Products that have a Y or a B have a 3 three year warranty and products that have a P or a C have a 5 five year warranty commencing from the date of installation The warranty time period for radiotelephone accessories and batteries is as follows PCS portable telephone batteries 1 year Carrying cases Defect free at time of shipment Other radiotel...

Страница 73: ...responsible in any way for any ancillary equipment not furnished by Motorola which is attached to or used in connection with Motorola s PCS Subscriber Radiotelephone Products or for operation of our equipment with any ancillary equipment and all such equipment is expressly excluded from this warranty Furthermore Motorola cannot be responsible for any damage to Motorola equipment resulting from the...

Страница 74: ...ring the date of purchase transceiver serial number and place of purchase or installation if applicable Warranty service is available by returning Motorola branded Radiotelephone Products to a Motorola Service Center authorized in writing by a Motorola Area Service Manager to perform warranty work on Motorola PCS Subscriber Radiotelephone products A Carrier or Distributor branded Radiotelephone Pr...

Страница 75: ...accessory battery or parts become or in Motorola s opinion be likely to become the subject of a claim of infringement of a United States patent that you will permit Motorola at its option and expense either to procure for you the right to continue using the PCS Radiotelephone or parts or to replace or modify the same so that it becomes non infringing or to grant you a credit for such PCS Radiotele...

Страница 76: ...dental or consequential damages or limitations on how long an implied warranty lasts so the above limitations or exclusions may not apply to you This warranty gives you specific legal rights and you may also have other rights which vary from state to state m3cd_us bk warrant fm5 Page 75 Tuesday October 19 1999 10 47 PM ...

Страница 77: ...Motorola Limited Warranty 76 English m3cd_us bk warrant fm5 Page 76 Tuesday October 19 1999 10 47 PM ...

Страница 78: ...5 Bookmark 62 Bookmarks 61 browsing the web 59 63 busy signal 67 button Message 13 Smart 13 C call ending 20 placing 14 19 receiving 20 Call Back messages 57 Call Options 46 47 Call Timers 34 37 road map 34 Caller ID 20 deleting 54 number preference 32 options 54 viewing 54 calling card storing information 68 calling cards storing numbers 27 using 28 changing lock code 43 changing secure code 43 c...

Страница 79: ... storing 26 28 E earpiece 13 editing memory 33 ending a call 20 F Fault finding 67 69 function keys 13 H headset jack 13 Home Only Mode 51 I In Use Indicator 14 indicator Digital 14 In Use 14 No Service 15 indicators Roam 14 individual call timer 35 auto display 36 Installing the Batteries 15 Instant Redial 47 Internet 59 63 J jack headset 13 K Keypad Tones 39 L last ten numbers dialed 21 lock aut...

Страница 80: ...number character 27 28 Number Preference 32 O one minute timer 36 outgoing calls controlling 44 P Pause Dialing 26 27 personalizable banner 48 Phone Book 30 32 editing 33 recalling 31 road map 30 status 31 storing 32 phone book clearing entry 25 entering a name 24 entering letters 24 entry recalling by location 31 recalling with short cuts 25 recalling entry by location 25 by name 24 storing names...

Страница 81: ...40 secure code changing 43 Secure Options 43 44 security 41 44 selecting ringer style 39 service level 44 Service Tones 40 Short message service symbol 15 Show URL 62 Signal strength symbol 14 single timer 37 Smart Button 13 Soft Keys 60 Speed Dial 25 Standard Mode 51 storing 32 Call Back number 57 names and numbers 23 Symbols 14 system ID viewing 50 system mode 50 System Options 50 51 T timers au...

Страница 82: ...4 cumulative call timer 35 individual call timer 35 36 lock code 43 resettable call timer 35 your number 32 Voice Mail calling 26 27 checking 55 deleting notification 56 options 56 storing number 26 27 voice mail 68 volume adjusting 14 muting 21 volume keys 13 W What to do if 67 69 Z Zero Install Car Kit 65 m3cd_us bk m3cd_us IX Page 81 Tuesday October 19 1999 10 47 PM ...

Страница 83: ...Index 82 English m3cd_us bk m3cd_us IX Page 82 Tuesday October 19 1999 10 47 PM ...

Отзывы: