background image

Chapter 10: Programmes

61

Update RSS feed

1. Tap 

Application Drawer

 > 

Rss Reader

.

2. Tap 

Menu

 > 

Update all

 to update the RSS feeds.

New feeds are displayed in the RSS feed inbox.

10.23 Settings

In the Settings menu, you can view and make adjustments for wireless control, 
call settings, general phone settings and security settings. See “Phone settings” 
on page 63.

10.24 SIM Toolkit

Connects directly to and uses services provided by your mobile service provider.

10.25 Talk

Google Talk is Google's instant messaging programme.

To sign in to Google Talk

1. Tap 

Application drawer

 > 

Talk

.

2. Tap 

Create

 or 

Sign in

 to your Google account.

3. Follow the on-screen instructions to login or create 

your Google Mail username and password.

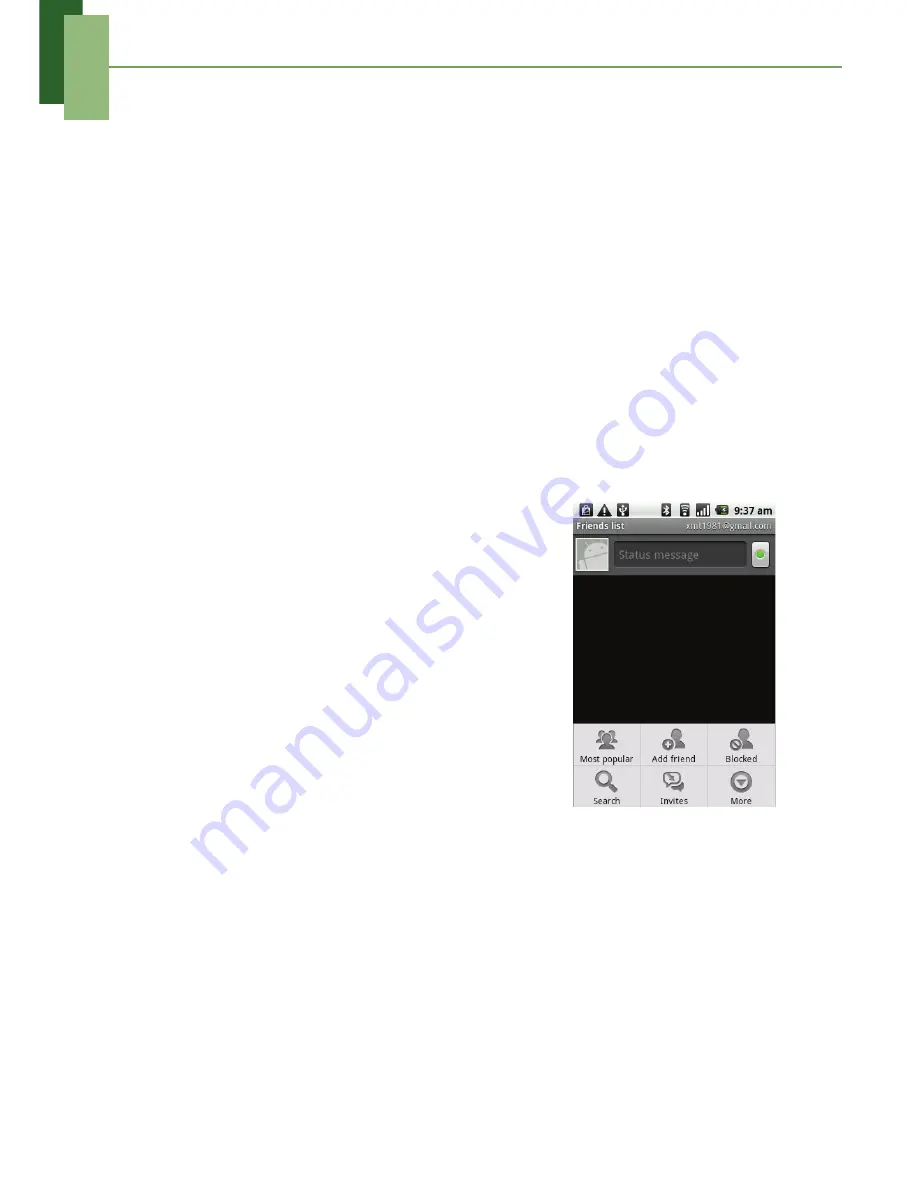
4. Once logged in, you can begin using Google Talk 

and do any of the following:

• View friends list: Tap 

Menu

 > 

All friends

• Add friends to friends list: Tap 

Menu

 > 

Add friend

.

• To switch to different chats: Tap 

Menu

 > 

Switch 

chats

.

• To block a person: Tap 

Menu

 > 

Blocked

.

• To invite a person to your chat: Tap 

Menu

 > 

Invites

.

• To configure Google Talk settings: Tap 

Menu

 > 

More

 > 

Settings

.

• To sign out: Tap 

Menu

 > 

More

 > 

Sign out

.

• To view terms and privacy: Tap 

Menu

 > 

More

Terms & Privacy

10.26 Videos

You can playback the video clips captured with this device. See “Photos and videos” 
on page 40.

Содержание MOTO XT502

Страница 1: ...User Guide MOTOROLA QUENCH XT5 XT502 TM ...

Страница 2: ......

Страница 3: ... icons 7 Shortcut menu 9 Application drawer 11 Extended Home screen 11 Using widgets 12 Setting the wallpaper 12 2 2 LED indicators 13 2 3 Adjusting the volume 13 2 4 Contacts 14 Adding a contact 14 Searching for contacts 14 Importing contacts 15 Backing up contacts 16 Favorite contacts 16 Chapter 3 Using the phone 17 3 1 Voice calls 17 Making a call 17 Answering a call 18 Ending a call 19 3 2 Voi...

Страница 4: ...sing email settings 33 Chapter 6 Using the Internet 34 6 1 Connecting to the Internet 34 Wi Fi 34 Mobile data networks 35 Starting a data connection 36 6 2 Browsing a web page 37 Managing a web page 37 Quick search on your phone and the web 38 Chapter 7 Using Bluetooth 39 7 1 Connecting to Bluetooth devices 39 Chapter 8 Multimedia applications 40 8 1 Photos and videos 40 Taking a photo 40 Recordin...

Страница 5: ...6 PDF To Go Lite 56 10 9 Email 57 10 10 Facebook 57 10 11 File browser 57 Managing files and folders 57 10 12 Gallery 57 10 13 Google Mail 58 10 14 GPS Tracker 58 10 15 Maps 58 10 16 Market 59 10 17 Messaging 59 10 18 Music 59 10 19 MySpace 59 10 20 Note Pad 60 10 21 Phone 60 10 22 RSS reader 60 10 23 Settings 61 10 24 SIM Toolkit 61 10 25 Talk 61 10 26 Videos 61 10 27 Voice dialer 62 10 28 Voice ...

Страница 6: ...gs 68 Ring settings 68 11 3 Using wireless networks 68 11 4 Protecting your phone 69 Enable or disable SIM card PIN 69 Enabling screen lock protection 69 11 5 Resetting the phone 69 Chapter 12 Using the PC Tools application 70 12 1 Using the PC Tools application 70 Installing the driver 70 Using your phone as a storage device 71 Using your phone as a modem 71 Using your phone to sync with a comput...

Страница 7: ...on Touch screen Home Return to the Home screen Press and hold to see recent activities Search LED Alerts This device is equipped with 2 LED indicators Green Send button Red End button For more information see LED indicators on page 13 Back cover Push and slide down to open the back cover 5 Megapixel camera See Photos and videos on page 40 Flash LED Speaker for PLUGGABLE EQUIPMENT the socket outlet...

Страница 8: ...ry quick press to turn the screen on or off temporarily Volume Slide up or down to increase or decrease the volume Shutter Press the shutter to activate the camera In Camera mode press to take a photo or video See Photos and videos on page 40 Micro USB port Connect USB cable to PC as a modem USB mass storage Connect USB cable and the AC adapter to charge the battery Strap hole Users have to use th...

Страница 9: ... card To remove the back cover 1 Turn the device off 2 Push and slide down to open the back cover SIM card The SIM card contains your phone number memory storage and network service details To install the SIM card Insert the SIM card as shown Make sure that the gold contacts are facing down and that the cut off corner is facing towards the battery slot To remove the SIM card 1 Remove the battery 2...

Страница 10: ...lot To remove the battery Use your fingertip to lift the battery tab and remove the battery To replace the back cover Secure the hooks on the back cover with the designated holes on the device and close the back cover NOTE To ensure battery performance and avoid the risk of fire Only use the original batteries designated for the device Do not store the battery in temperatures below 10 C or higher ...

Страница 11: ... diagram 3 Plug the AC adaptor into the wall socket to start charging When the battery is charging the red LED is activated the icon is also displayed in the status bar When the battery is fully charged the red LED disappears and the green LED is activated if the device is turned on the icon is also displayed in the status bar NOTE The battery can also be charged when you connect the device to a c...

Страница 12: ...ne to sleep mode To set this device to sleep mode press the power button briefly This will turn the display off To turn the display on press the power button briefly 1 7 Unlocking the screen To unlock the screen 1 Press the power button or front buttons briefly to turn on the display from sleep mode 2 Tap and swipe right to unlock the screen 1 8 Turning the sound on or off To enable disable the so...

Страница 13: ...f information Tap the status bar and scroll down to view ongoing phone activities or notifications easily To close the window press Shortcut menu Tap an icon to access the function Application drawer Tap to view the applications and device settings Status bar Displays status and notification icons and clock Message appointment task and connection notifications are also displayed here Tap to open t...

Страница 14: ...he following icons may appear in the battery icon area To charge the battery see Charging the battery on page 5 Icon Description Sound is off Vibrate mode is activated Speakerphone is on Phone is muted Icon Description Battery is full Battery is low Battery is charging Phone network icon The following icons may appear in the phone network icon area Icon Description No network signal Maximum signal...

Страница 15: ...to select the contact that you would like to call or send a text message to See page 14 Application drawer Tap to access the Application drawer See page 7 Connection icon The following icons may appear in the connection icon area Notification icon The following icons may appear in the notification icon area Icon Description WiFi is connected Bluetooth connection is active GPRS data connection is a...

Страница 16: ...s 2 Tap Widgets to display the list of widgets 3 Tap to add the items that you want to appear on the Home screen To remove a shortcut 1 Tap and hold the desired shortcut icon The icon expands 2 appears at the bottom of the Home screen 3 Drag the icon to to delete The shortcut icon is then removed ...

Страница 17: ... screen Swipe your finger to the left or right across the Home screen The two left and two right extensions to the Home screen provide more space for icons widgets shortcuts and other items Tap to close the Application drawer and return to the Home screen Swipe your finger up or down to access more applications in this device Tap an icon to open the application ...

Страница 18: ... with pictures taken with this device Set wallpaper from Pictures 1 From the Home screen tap Menu Add Wallpapers 2 Select wallpaper from is displayed on screen 3 Tap Gallery 4 Tap to select pictures taken from the camera in the phone or saved on your SD card 5 You will see thumbnail images of all pictures Tap to select the picture that you want to use as wallpaper 6 Drag your finger to select the ...

Страница 19: ...e Ringer volume slider appears 3 To adjust the volume complete either of the following a Drag the volume slider to adjust the volume b Press the volume button Slide the volume button up or down to adjust the volume NOTE When the device is set to silent mode all sounds are turned off except media and alarm 3 Tap to exit the menu To adjust in call volume 1 During a phone call press the volume button...

Страница 20: ... contact information using the on screen keyboard TIPS To add a picture tap Image Icon then select a picture file or take a photo of the contact immediately To take a photo of the contact tap 4 Tap Done to save Searching for contacts On the Contacts screen complete any of the following to easily search for contacts Tap Menu Search Type the first few letters of the contact to search The list is fil...

Страница 21: ... card are imported Copy microSD contacts to the phone 1 From the Home screen tap Contacts 2 Tap Menu Import Export Import from SD card NOTE To copy a single contact simply tap the contact tap Import one VCard file and tap to select the contact that you want to copy Then edit contact information as in Adding a contact To copy multiple contacts tap Import multiple VCard files Tick to select contacts...

Страница 22: ... the memory card Favorite contacts You can add the most frequently called contacts to the favorite contact list which helps you to access the contacts quickly and easily Add to favorites 1 From the Home screen tap Contacts 2 From the contact list tap and hold the desired contact 3 Tap Add to favorites 4 The contact now appears in the favorites list Remove from Favorites 1 From the Home screen tap ...

Страница 23: ...Phone screen 1 From the Home screen tap Phone 2 Tap the phone number on the keypad NOTE Tap to erase a wrong number Tap and hold to erase the entire number 3 Tap the phone number or press the Send button to dial 4 To end the call press the End button To make a call from Contacts 1 From the Home screen tap Contacts 2 Tap the desired contact 3 Tap Call home Call work or Call mobile Alternatively pre...

Страница 24: ...ect an incoming call To accept the call press the Talk Send button To reject the call press the End button To put a call on hold If a call comes in while you are already on another call tap Menu Hold to put the first call on hold To take a call off hold tap Hold again To switch between calls If a call comes in while you are already on another call tap Menu Hold to put the first call on hold Tap Me...

Страница 25: ...call tap End call or press the End button 3 2 Voice mail Listening to voice mail To listen to a voice mail message 1 From the Home screen tap Phone 2 Tap to listen to your voice mail messages NOTE Before you use the voice mail service you need to add a voice mail number Tap Application Drawer Settings Call settings Voicemail settings Use the numeric keypad to enter the voice mail number and tap OK...

Страница 26: ... to display the on screen keyboard Use the on screen keyboard as you would use a computer keyboard Tap the keys to enter characters To toggle between upper and lower case letter display tap To display the numeric and symbols keyboard tap Tap to toggle back Lower case keyboard default Upper case keyboard Numbers and symbols CAPs Lock selector arrow Tap to toggle between upper case or lower case tex...

Страница 27: ... methods to use 4 2 Configuring phone keyboard settings You can use the keyboard aids to help you when you input text with the device keyboard 1 Tap Application Drawer Settings Language keyboard 2 Tap TouchPal 3 Select the applicable options from the following Basic settings Prediction Gestures Chinese and Handwriting submenus Basic settings Options available include Word prediction Key press soun...

Страница 28: ...ls Creating and sending a text message This device offers several ways to create and send a new text message From the Messaging screen 1 Tap New message 2 The Compose screen is displayed 3 In the To field enter the recipient s phone number TIP To add recipients from Contacts tap To and enter at least two numbers of a contact number or two characters of a contact name Then the corresponding contact...

Страница 29: ...saging before sending a message the unsent message will automatically be saved as a draft To request message delivery notification 1 In Messaging tap Menu Settings to access SMS and MMS settings 2 Tap to tick Delivery reports checkbox 3 Tap to exit the menu Receiving and managing messages When you send and receive messages from a contact these messages are grouped as a message thread A message thr...

Страница 30: ...the steps above To forward a text message 1 Tap Application Drawer Messaging 2 Tap to view a message thread 3 Tap and hold a message to display the message options 4 Tap Forward 5 In the To field enter the recipient s phone number 6 Tap Send To delete all text messages You can delete all text threads in Messaging 1 Tap Application Drawer Messaging 2 Tap Menu Delete threads A warning message pops u...

Страница 31: ... deleted by flicking your finger down across the sender of the message 4 Tap and hold the highlighted message 5 Tap Delete message To copy message text You can use this function to copy the text from a message to a new message that you are composing 1 Tap Application Drawer Messaging 2 Tap a message thread to open it 3 Tap and hold the message to display the submenu options 4 Tap Copy message text...

Страница 32: ...mber or two characters of a contact name Then the corresponding contact will be listed for you to select 5 Enter the subject 6 To insert a picture or video file tap Menu Attach 7 To insert text tap Type to compose then enter the message 8 To insert an audio file tap Menu Attach Audio 9 Tap Send From Contacts 1 From the Home screen tap Contacts 2 Tap a contact and hold the contact that you want to ...

Страница 33: ...er your message using the on screen keyboard 8 Tap Send 5 3 Voice message This device can be used to send voice messages To create a voice message 1 Tap Application Drawer Messaging 2 Tap New message 3 Tap Menu Attach Record audio 4 Tap to record your message 5 Tap to stop recording 6 Tap to listen to your recording 7 Tap Use this recording to proceed or Discard to return to the compose message sc...

Страница 34: ...Chapter 5 Email messaging 28 Recording voice 1 Tap to record your message 2 Tap to stop recording NOTE Tap to play voice Displays recording information Tap buttons to record stop and play Equaliser ...

Страница 35: ... Select your email account provider 3 Enter your email address and password 4 Tap Next The device will automatically retrieve the email settings To add another email account tap Menu Add account 5 Enter Name and Account display name NOTE The Account display name is the name shown on the Home screen and Email screen 6 Tap Done To open email From the Application Drawer tap Email to view your emails ...

Страница 36: ...ssaging 30 To configure email settings Configure message settings using the Account settings submenus 1 On the Accounts screen tap to select an email account 2 Tap Menu Account settings to open the email setting submenus ...

Страница 37: ...1 On the Home screen tap Contacts 2 Tap a name to open contact 3 Tap Email home or Email work 4 Choose to send an email via Google Mail or other email accounts 5 Enter the subject and compose the content 6 Tap Send Adding attachments to an email message 1 Before sending your message tap Menu Attach 2 Select a picture that you want to attach from the gallery folders Receiving emails Emails are auto...

Страница 38: ...our email server NOTE Only supported file types can be opened on this device To reply to or forward an email 1 Open the message 2 Do any of the following Tap Reply or Reply all to reply to the email Tap Menu Forward Then enter the recipient in the To field 3 Compose your message 4 Tap Send Managing email folders To delete an email 1 Tap Application Drawer Email then tap an email account 2 Tap Inbo...

Страница 39: ...email checking frequency 1 Tap an email account 2 Tap Menu Account settings to view the email account settings and make adjustments 3 Tap Email check frequency You can set the device to check for new emails automatically every 5 mins every 10 mins every 15 mins every 30 mins every hour or never To set up default account 1 Tap an email account 2 Tap Menu Account settings to view the email account s...

Страница 40: ...Fi on or off To connect to a Wi Fi network 1 Turn Wi Fi on 2 Tap Wi Fi settings The device scans for Wi Fi signals 3 Detected networks are displayed below Tap a network connection then tap Connect 4 If you select an unsecured network the connection is automatically established Otherwise proceed to the next step 5 When you attempt to connect to a secure network you will be prompted for the password...

Страница 41: ...re your settings To configure Wi Fi settings 1 From the Home screen tap Application Drawer Settings Wireless networks 2 Tap Wi Fi settings 3 Tap Menu Advanced NOTE If you use static IP enter the IP settings as required 4 In IP settings enter the information for IP address gateway netmask and DNS Tap OK to save your settings Mobile data networks Check the availability of these connections with your...

Страница 42: ... tap OK 7 Tap Menu Save to store your settings or tap Menu Discard to exit without saving the changes Starting a data connection A data connection is automatically activated when the device is turned on If you set up multiple data connections select the connection that you want to use manually To start a data connection manually 1 Tap Application Drawer Settings 2 Tap Wireless networks Mobile netw...

Страница 43: ...ter the URL of the page that you want to set as home page 3 Tap OK to save your settings Managing a web page While viewing a web page tap Menu to change view settings or apply other functions The following table lists the menu options Depending on the function some options may be unavailable Menu item Descriptions New window Open a web page in a new window Bookmarks Tap to select from the list of ...

Страница 44: ...in the appropriate application such as Contacts or Browser 4 If what you are searching for is not in the list tap in the Quick Search Box The Browser opens displaying the results of a Google search on the web Add bookmark Tap to save as favorite web pages to visit Find on page Tap to find the text on the web page Select text Tap to select text on the web page Page info Tap to view web page informa...

Страница 45: ... You need to pair and create a partnership with a Bluetooth device to exchange information 1 Tap Application drawer Settings Wireless networks 2 Tap Bluetooth settings to view the menu options 3 To search for a new device tap Scan for devices 4 Tap the device to connect 5 Enter the PIN to start pairing then tap OK NOTE PIN of the device must be the same PIN on the other Bluetooth pairing device 6 ...

Страница 46: ... activate the camera at any time press and hold the shutter button on the side 2 Aim the device at the subject then press the shutter button halfway down or tap and hold to focus 3 The focus frame turns green to indicate that the focus is set fully press the shutter button or tap to take the shot Displays the last captured image Tap or to zoom the image in or out Tap to take a photo Slide to switc...

Страница 47: ...ng a shot a thumbnail image is displayed in the top right corner of the screen 1 Tap the thumbnail to view the image in full screen size Tap DELETE to delete the picture and view the next picture Tap SHARE to share the picture via Email or Messaging Tap SET AS to set the image as Contact icon or Wallpaper Tap DONE to save your settings Indicates recording time Tap to record video Displays the last...

Страница 48: ...p DELETE to delete the picture and view the next picture Tap SHARE to share the picture via Email or Messaging Tap PLAY to playback the video clip Tap DONE to save your settings Configuring camera settings On the camera screen tap Menu Settings The Camera settings menu is displayed on the left of the screen Swipe your fingers up and down to scroll the page for more options Tap an option to configu...

Страница 49: ...lity Super fine Fine Normal Metering Mode Frame Average Center Weighted Spot Metering Sharpness 0 1 2 Contrast 2 1 0 1 2 Saturation 2 1 0 1 2 Brightness 3 2 1 0 1 2 3 prompt after capture No limit No preview 3 seconds 5 seconds 10 seconds Grid Off On Shutter sound Off On Video mode Video quality VGA QVGA QCIF Video Encoder MPEG4 H263 H264 Video duration 60 minutes for MMS 10 minutes 30 minutes Whi...

Страница 50: ...3 Tap an image to view 4 To view previous next image tap the left right sides of the screen To play a slideshow 1 While viewing an image tap Slideshow 2 Tap the screen again to stop the slideshow To zoom the image While viewing the image tap the screen to show the zoom bar Tap to zoom out in Tap to view the next image Tap to view the previous image Tap to play slideshow ...

Страница 51: ...select the crop area and tap inside the box to crop the image 4 Tap Save to save the image as contact icon To edit an image While viewing an image tap Menu More To crop the image tap Crop Drag your finger to select the crop area Tap inside the box to crop Tap Save to save the image To rotate the image tap Rotate Left or Rotate Right To view file properties 1 While viewing an image tap Menu More De...

Страница 52: ...llowing categories Artists Albums Songs and Playlists Now Playing screen Displays the list of songs currently playing and those on queue for playback Drag the icon on the left of each media file to arrange the sequence of files for playback Audio information display area Tap to go to the Now playing screen Tap to enable or disable the repeat function Tap to go to the next song Slide to go forward ...

Страница 53: ...een Tap Party shuffle to play all songs in shuffle order Tap Add to playlist to add the song to a preferred playlist Tap Use as ringtone to set this song as your ringtone Tap Delete to delete this song Creating a playlist Add songs to a specific playlist or create a playlist 1 Tap Application Drawer Music The Library screen is displayed 2 Tap and hold the song you want to add 3 Tap Add to playlist...

Страница 54: ...pplications 48 To remove a music file from a playlist 1 Tap Application Drawer Music The Library screen is displayed 2 Tap and hold the song you want to delete 3 Tap Remove from playlist The song is removed from the playlist ...

Страница 55: ...necting to GPS 2 When GPS is connected tap to set POI 3 Tap to start tracking 4 You can view your tracking distance speed trackers and the number of POIs on screen 5 Tap Menu Mode to set your mode Walk Bicycle or Car Hiding the GPS window To use other applications and keep the GPS tracking on at the same time complete the following 1 In the GPS tracker tap Menu 2 Tap Hide to hide the tracking appl...

Страница 56: ...pplication drawer GPS tracker 2 Tap Menu Format 3 Tap to choose the file format You can save the GPS tracking record in the following file formats KML GPX or Both 4 Tap OK to confirm Save GPS file 1 Tap Application drawer GPS tracker 2 Tap Menu Save to 3 Enter default path to save the file on your memory card 4 Tap OK to confirm ...

Страница 57: ...watch Contacts Stores names numbers email and other information See page 14 Documents To Go Uses Document To Go applications such as Word To Go Sheet To Go Slideshow To Go and PDF To Go Lite Email Sends and receives email messages See page 22 Facebook Logs in and uses Facebook applications on your device File Browser Manages audio video and picture files Gallery Views and edits photos and videos S...

Страница 58: ...s of your favorite news or websites Settings Configures the device settings wireless settings and call settings of this device SIM Toolkit Connects directly to and uses services provided by your mobile service provider Talk Google s instant messaging programme Videos Plays back the video clips Voice Dialer Read and record predefined texts to be recognised and used by this device for voice dialling...

Страница 59: ... Select the dates for the From and To fields NOTE For an all day event tick All Day 5 To set repetition select the repetition from the list 6 To set a reminder select the reminder time from the list 7 When finished tap Done to return to the calendar TIP From the Calendar screen tap a day or a time slot then tap Menu New event to set a new appointment on the tapped date or time To view your agenda ...

Страница 60: ...he current time in different locations 1 Tap Application drawer Clock 2 Tap the World clock tab the current time of selected cities is displayed 3 Tap Menu Search to select from the world major cities list 4 The current time of the selected cities is shown on the atlas screen Using Stopwatch 1 Tap Application drawer Clock 2 Tap the Stopwatch tab Tap Start to start and time elapsed will appear on s...

Страница 61: ...rosoft Word documents doc and docx It supports embedded pictures font color bold italics underline bulleted and numbered lists and more To open Word To Go Viewer 1 Tap Application drawer Documents To Go Word To Go Viewer 2 Tap Open File 3 Tap the file you want to open Swipe your finger on the screen to pan or go through other pages 4 To close the file tap Return NOTE To create a new document or ed...

Страница 62: ... Go Viewer 1 Tap Application drawer Documents To Go Slideshow To Go Viewer 2 Tap Open File 3 Tap the file you want to open 4 To close the file tap Return NOTE To create a new presentation or edit an existing presentation purchase the full version of Documents To Go PDF To Go Lite PDF To Go Lite allows you to view Adobe PDF files pdf It supports page view word wrap multiple zoom levels auto rotate ...

Страница 63: ...wser 2 Tap the folder list and tap the folder you want to explore Managing files and folders To open an item tap it To move copy delete rename or set the picture as Contact icon or Wallpaper tap and hold the item then tap the option To sort items tap Menu Sort then select an option To search for a file tap Menu More Search 10 12 Gallery You can view your captured images recorded video clips and do...

Страница 64: ... 10 14 GPS Tracker Use GPS Tracker to record the time and speed of your training See Using GPS tracker on page 49 10 15 Maps Maps is Google s mapping service to search for places of interest To open Maps 1 Tap Application drawer Maps 2 Do any of the following To search for a place of interest Tap Menu Search then type in a keyword to begin searching To get direction Tap Menu Directions To select a...

Страница 65: ...from the market Tap Apps to view the list of applications available and tap Games to view the list of games available You can also tap Downloads to view the programmes that you have previously downloaded NOTE Android Market may not be supported in some countries 10 17 Messaging Use Messaging to send or receive text and MMS messages See Text messages on page 22 10 18 Music Use the Music player to p...

Страница 66: ...automatically saved 10 21 Phone Use Phone to make phone calls or manage your contact list See Voice calls on page 17 10 22 RSS reader Use the RSS reader to get live updates from your favorite web sites Add a new RSS feed 1 Tap Application Drawer Rss Reader 2 Tap Menu New feed 3 Tap an import option Import from OPML file Select a file from the SD card Import OPML from the Internet Enter the URL to ...

Страница 67: ...gle Talk 1 Tap Application drawer Talk 2 Tap Create or Sign in to your Google account 3 Follow the on screen instructions to login or create your Google Mail username and password 4 Once logged in you can begin using Google Talk and do any of the following View friends list Tap Menu All friends Add friends to friends list Tap Menu Add friend To switch to different chats Tap Menu Switch chats To bl...

Страница 68: ...ording tap 4 Tap Save to save the file To play a voice note 1 Tap Menu Voice Note A list of voice notes is displayed 2 Tap the voice note you want to listen to 3 The voice note is played with the Music player 10 29 YouTube YouTube is an online video streaming service that allows you to view search and upload videos To start using YouTube 1 Tap Application drawer YouTube 2 Videos are grouped into c...

Страница 69: ...ts Bluetooth settings Manage connections set device name and discoverability of the device VPN settings Set up manage Virtual Private Networks VPNs Mobile networks Set options for roaming networks and Access Point Names Application Description Fixed Dialling Numbers Managed fixed dialling numbers Voicemail Set voice mail number Other call settings Call forwarding call barring caller ID and call wa...

Страница 70: ...on Set the e compass calibration for the device Application Description Use wireless networks Set location in applications such as maps using wireless networks Use GPS satellites Check to enable GPS satellites Use assisted GPS Use server to assist GPS AGPS Settings Adjust AGPS settings This option is only available if Enable GPS satellites is activated GPS Ephemeris Auto Download Enable Disable Ep...

Страница 71: ...and Google Mail or tap to add a Google Mail account Application Description Use My Location Check to use My Location for Google search results and other Google services Factory data reset Delete all data on the device Application Description Unmount SD card Unmount the memory card for safe removal Internal phone storage Shows available phone storage Application Description Google search settings M...

Страница 72: ...o increase or decrease the value 5 To adjust the date tap the month day or year field and tap or to increase or decrease the value 6 Tap Set to apply the values Application Description Install voice data Install the voice data required for speech synthesis Application Description Automatic Check to use network provided values Set date Tap to set the date for this device Set time zone Set time zone...

Страница 73: ...alarm To enter the time numerically tap the hour minute or AM PM field and tap or to increase or decrease the value 4 Tap Ringtone to set up the preferred ringtone when your alarm sounds 5 Tap Vibrate to enable disable vibration when the alarm sounds 6 Tap Repeat to select a day to sound the alarm Tap OK to confirm 7 Tap Label and enter an alarm description 8 To turn on the alarm tick Turn on alar...

Страница 74: ...tically when rotating the device Ring settings You can assign a ringtone and a ringtone type for various events such as an incoming call or new message received for example To change the ringtone and ringtone type of an incoming call 1 Tap Application Drawer Settings Sound display 2 In Sound settings submenu tap Phone ringtone 3 Select the desired ringtone from the lists 4 Tap OK when finished To ...

Страница 75: ...5 To change the PIN code tap Change PIN 6 Enter the old PIN code 7 Enter the new PIN code and confirm Enabling screen lock protection When Screen lock is enabled you are required to draw the pattern to unlock the screen 1 Tap Application Drawer Settings Location Security 2 In the Screen unlock pattern submenu tap Set unlock pattern 3 Follow the on screen instructions to draw your own personal unlo...

Страница 76: ...e Phone as modem Allows you to use your device as a modem Synchronization Tool Allows you to sync your device with a computer NOTE The pre loaded user manual in the microSD card can only be viewed through the storage function 12 1 Using the PC Tools application Installing the driver 1 Turn on your device and connect it to your computer using the USB cable 2 From the Windows desktop double click My...

Страница 77: ...deo files to a folder on your computer Using your phone as a modem This feature allows you to use your device as a modem to access the Internet 1 Make sure that the Wi Fi function on your device is set to disable mode Tap Application Drawer Settings Wireless controls Turn off Wi Fi mode uncheck Wi Fi 2 In the PC Tools application select Phone as modem 3 Select APN You can edit the correct APN of y...

Страница 78: ...h a computer In the PC Tools application select Synchronization Tool Start Synchronization allows you to initiate synchronization Synchronization Setting allows you to set the synchronization settings Follow the on screen instructions to complete the settings Synchronization Summary displays the summary of the synchronization process ...

Страница 79: ...y a wet or damp battery with an appliance or heat source such as a hair dryer or microwave oven Avoid leaving your phone in your car in high temperatures DOs Do avoid dropping the battery or phone Dropping these items especially on a hard surface can potentially cause damage Do contact your service provider or Motorola if your phone or battery has been damaged from dropping or high temperatures No...

Страница 80: ...torola com recycling www rbrc org call2recycle in English only Disposal promptly dispose of used batteries in accordance with local regulations Contact your local recycling center or national recycling organizations for more information on how to dispose of batteries Warning never dispose of batteries in a fire because they may explode Battery charging Notes for charging your phone s battery When ...

Страница 81: ...t the governmental requirements for safe exposure Please note that improvements to this product model could cause differences in the SAR value for later products in all cases products are designed to be within the guidelines The World Health Organisation has stated that present scientific information does not indicate the need for any special precautions for the use of mobile devices They note tha...

Страница 82: ...is device is intended solely for copying non copyrighted materials materials in which you own the copyright or materials which you are authorised or legally permitted to copy If you are uncertain about your right to copy any material please contact your legal advisor Open source software information For instructions on how to obtain a copy of any source code being made publicly available by Motoro...

Страница 83: ...nformation Devices enabled with GPS or AGPS technology also transmit location based information Additionally if you use applications that require location based information e g driving directions such applications transmit location based information This location based information may be shared with third parties including your wireless service provider applications providers Motorola and other th...

Страница 84: ...omply with local regulatory requirements in your country concerning exposure of human beings to RF energy Operational precautions For optimal mobile device performance and to be sure that human exposure to RF energy does not exceed the guidelines set forth in the relevant standards always follow these instructions and precautions Product operation When placing or receiving a phone call hold your m...

Страница 85: ...e If you have any questions about using your mobile device with your implantable medical device consult your healthcare provider Driving precautions Using a mobile device while driving may cause distraction End a call if you can t concentrate on driving Input information about your destination and route prior to your drive Do not input data or engage in text messaging while driving Keep your eyes ...

Страница 86: ...uts when exposed to flashing lights such as when playing video games These may occur even if a person has never had a previous seizure or blackout If you have experienced seizures or blackouts or if you have a family history of such occurrences please consult with your physician before playing video games or enabling a flashing lights feature if available on your mobile device Discontinue use and ...

Страница 87: ...plicable products bear the FCC logo and or an FCC ID in the format FCC ID xxxxxx on the product label Motorola has not approved any changes or modifications to this device by the user Any changes or modifications could void the user s authority to operate the equipment See 47 CFR Sec 15 21 This device complies with part 15 of the FCC Rules Operation is subject to the following two conditions 1 Thi...

Страница 88: ...lutions To clean your mobile device use only a dry soft cloth Don t use alcohol or other cleaning solutions shock and vibration Don t drop your mobile device Information from the World Health Organisation Present scientific information does not indicate the need for any special precautions for the use of mobile phones If you are concerned you may want to limit your own or your children s RF exposu...

Страница 89: ...isposal of your mobile device packaging product guide Product packaging and product guides should only be disposed of in accordance with national collection and recycling requirements Please contact your regional authorities for more details Privacy data security Motorola understands that privacy and data security are important to everyone Because some features of your mobile device may affect you...

Страница 90: ...mart practices while driving Drive safe Call smart Check the laws and regulations on the use of mobile devices and their accessories in the areas where you drive Always obey them The use of these devices may be prohibited or restricted in certain areas for example handsfree use only Go to www motorola com callsmart in English only for more information Your mobile device lets you communicate by voi...

Страница 91: ...se of fire traffic accident or medical emergencies wherever wireless phone service is available Use your mobile device to help others in emergencies If you see an auto accident crime in progress or other serious emergency where lives are in danger call 911 or other local emergency number wherever wireless phone service is available as you would want others to do for you Call roadside assistance or...

Страница 92: ...specifications without notice or obligation MOTOROLA and the Stylised M Logo are registered in the US Patent Trademark Office The MOTOBLUR logo is a trademark of Motorola Inc Facebook is a trademark of Facebook Inc The Bluetooth trademarks are owned by their proprietor and used by Motorola Inc under license Microsoft Windows Windows Me and Windows Vista are registered trademarks of Microsoft Corpo...

Страница 93: ...Wi Fi 802 11 b g Bluetooth 2 1 EDR USB USB 2 0 High Speed client Power Battery Rechargeable Li Ion 1270 mAh AC Adapter AC input voltage 100 240 Vac 50 60 Hz AC input current 0 3 Aac max DC output voltage 5 Vdc typical DC output current 1 A typical Temperature Operating 15 C to 55 C Non operating Storage 20 C to 70 C Charging 0 C to 40 C Humidity Operating 10 to 90 non condensing Non operating Stor...

Страница 94: ...rientation 68 E Email 57 58 Email 33 Email 31 F File managing 57 Folders managing 57 G Gallery 57 Google Mail 58 Google Talk 61 GPS using 49 70 H Home screen 7 I Icons Battery 8 Connection 9 Notification 9 Phone network 8 Status bar 7 volume 8 Input method 21 Internet 34 Browsing 37 connect data connection 36 connecting 34 K Keyboard on screen 20 L LED 1 13 M Maps 58 Market 59 Memory card 5 Menu A...

Страница 95: ... off 6 Programmes 51 S Screen orientation 68 Screen lock 6 69 Settings alarms 67 basic 66 date and time 66 display 68 keyboard 21 ringtone 68 Shutter button 2 SIM install 3 remove 3 SIM Toolkit 61 Slideshow 44 T Text entering 20 V Video playback 45 recording 41 viewing 42 Videos 61 Voice dialer 62 Voice dialler 62 Voice mail 19 Volume adjusting 13 slider 2 W Wi Fi 34 Add Wi Fi 35 Connect to Wi Fi ...

Страница 96: ......

Отзывы: