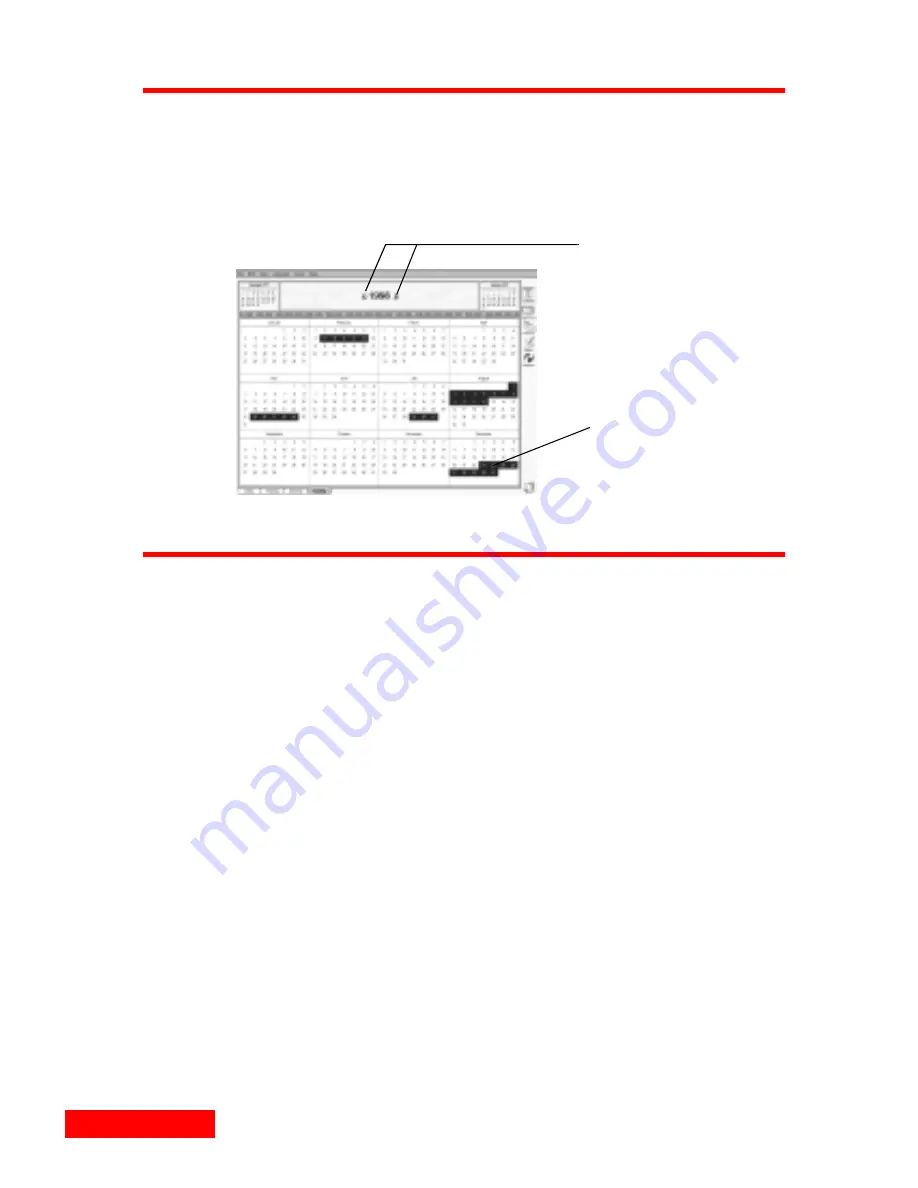
background image

58

Chapter 7

The Yearly View

The Yearly view displays only multi-day events, such as 
vacations and conferences. Change to the Yearly view by 
clicking its View tab. 

Scheduling events

Enter your appointments and scheduled events on the Events 
list. You can have a maximum of 288 events scheduled 

Click a day to go to 
that day in the Daily 
view.

Drag the mouse over

a range of dates to
schedule multi-day

events.

Change to the 
previous or next year 
using the left and right 
arrows.

Содержание CLIPON ORGANIZER

Страница 1: ...Using Contacts 14 Changing views 14 Sorting cards 15 Changing the telephone number display 15 Editing your Contacts 16 Using the Calendar 19 Changing views Daily Weekly Monthly 19 Using reminder alarms 19 Viewing events 19 Editing your Calendar 20 Using To Do Lists 22 Checking off completed items 23 Creating To Do items 23 Using Memos 25 Creating QuickNotes 25 Using Time Zones 26 Changing cities a...

Страница 2: ...TrueSync Desktop 38 Starting TrueSync Plus 39 About the documentation 39 Using online help 39 For more information 39 Chapter 5 Synchronizing 41 Setting up TrueSync 41 Using the TrueSync Setup Wizard 42 Synchronizing 44 Changing the TrueSync setup 45 Changing synchronization options 46 Selecting what to synchronize 46 Selecting files folders or categories 47 Selecting and mapping Contacts fields 4...

Страница 3: ...y and Monthly views 57 The Yearly View 58 Scheduling events 58 When you travel changing time zones 59 Entering To Do items and calls 60 Chapter 8 TrueSync Desktop Contacts view 61 Using the Contacts view 61 Cardfile basics 61 Creating a cardfile 62 Adding cards 63 Chapter 9 TrueSync Desktop Memos view 65 Using the Memos view 65 Memo files folders and memos 66 Creating memos 67 Changing margins and...

Страница 4: ...apter 11 TrueSync Desktop Printing 73 Using the Printing options 73 Calendar printing 73 Printing in the daily format 74 Printing different formats 74 Printing in Contacts view 74 Printing labels address book pages and envelopes 75 Printing in the Memos view 76 Index 77 ...

Страница 5: ... On and press the Call button The Clip On promptly dials the number for you In addition the Clip On can be easily customized to work the way you do go to the Preferences screen and choose whether you want to operate it with your right hand or left hand You can add contacts names tasks and events on your Clip On and then synchronize to a personal information manager PIM such as TrueSync Desktop and...

Страница 6: ...ish updates its synchronization accessors frequently to ensure that customers can synchronize with the most recent releases of popular software organizers and devices For all the latest Starfish news visit www starfish com ...

Страница 7: ...ain to return to the main Home screen Press and hold Home for a few seconds to turn off the Clip On View Press the View key to see a menu of current options such as Daily Weekly and Monthly views in the Calendar Select Press the Select key to choose an option Edit Press the Edit key to add or edit contacts tasks or events Call With the phone correctly attached and turned on select a phone number a...

Страница 8: ...elow the status icons tell you to press the Home key to exit the Setup Wizard or the Next Down key to continue Getting started with the Setup Wizard When you first turn on the Clip On the Setup Wizard will help you get started The second Wizard screen lets you select your profile Your selection determines which set of pre defined lists is offered Back Up Press the Back Up and Next Down keys to scr...

Страница 9: ...your profile selection Next enter your first name using the arrow keys to select the letters of your name To scroll quickly hold down one of the arrow keys After you have highlighted a choice press the Select key If you make an error select Erase If you want to enter numbers Press the Select key to enter your choice If you want to return to the previous screen press the Home key Use the Edit key i...

Страница 10: ...Next Down key The next task is to customize the time zone setting Use the arrow keys to select a city in your time zone To enter the correct date use the arrow keys to select the month and then press the Select key Then use the arrow keys When your first name is spelled correctly press the Edit key When your last name is spelled correctly press the Edit key Press the Select key to continue with th...

Страница 11: ...the year After you have entered the year select the time then press the Select key when you have finished The next screen shows a summary of your settings If they are correct press the Next Down key to continue Now press the Select key and you are ready to start using the StarTAC Clip On Press the Select key to enter your choice ...

Страница 12: ...12 Chapter 1 ...

Страница 13: ...ill then see a dialog displaying the telephone number being dialed as shown below To cancel a call for example if you receive a busy signal or the phone rings numerous times without a response press End on the telephone or close the phone Using the StarTAC Clip On s call memory Press the Call key at the Home Main screen to view a dialog displaying a list of the ten most recently dialed telephone n...

Страница 14: ...If you have only one cardfile category or the Contacts modules does not contain any cardfiles All will not appear Now you can Choose a cardfile by pressing the View key highlighting the desired cardfile with the Up or Down key and then pressing the Select key to make your choice Scroll through the alphabetical tabs of a cardfile with the Up or Down key Go to a specific lettered tab by pressing the...

Страница 15: ... can sort cards in cardfiles alphabetically by last name first name or company When you synchronize the Clip On the order is reset to the last name To sort cards 1 In the Contacts module press the View key The menu appears Highlight Sort Order and press the Select key 2 Use the Up or Down key to move the highlight to the field by which you want to sort Press the Select key to choose the sort order...

Страница 16: ... the upper right corner of the card Then press the Edit key and select Display This Number This option appears only if there are multiple entries 4 Press the Select key to choose the field The selected item now appears after the name in the tabbed cardfiles view Editing your Contacts You can create edit and delete Contacts by selecting Edit mode and using the Clip On s Wizards In addition you can ...

Страница 17: ...hen you are finished If it is a Company Contact this screen will not appear 6 Now choose the category for your new Contact If there are no categories or only one category this Wizard screen will not be displayed 7 Confirm the contact name by pressing the Down key If you want to make a change press the Edit key 8 Depending on your selections you may be asked to enter company information for the new...

Страница 18: ... the Contact and then press the Edit key 2 Use the Down key to move the highlight to Remove and press the Select key You will be asked to confirm the deletion of this contact Highlight Yes and press the Select key to complete the removal highlight No and press the Select key to keep the Contact To set up a meeting or telephone call with a Contact 1 Highlight the Contact and then press the Edit key...

Страница 19: ...nthly areas of your Calendar press the View key You will see a menu of your options Highlight the desired view and press the Select key Using reminder alarms You can set an alarm for an event in your personal information manager such as TrueSync Desktop Then synchronize your desktop Calendar to the StarTAC Clip On Wherever you are the Clip On alarm will then remind you of that event When an alarm ...

Страница 20: ...tup It will show a pre set QuickList of events Use the Up or Down key to choose from the list and then press the Select key 4 Confirm the event s type and subject by pressing the Down key 5 Depending on your selections you may now be asked to select a participant If you choose to select a participant from your Contacts use the Up or Down key to scroll through the alphabetical tabs of a cardfile Yo...

Страница 21: ...tered based on the selected recurrence pattern Use the Up or Down key to scroll through the list and highlight a recurrence pattern Press the Select key to enter your choice If you select a recurrence pattern you must select the duration such as 2 Weeks Highlight a duration and press the Select key to enter your choice Confirm the recurrence pattern and press the Edit key to move to the next scree...

Страница 22: ... can also create reschedule delete and check off To Do items In addition you can make calls from To Do lists To view To Do items 1 From the Home screen highlight the To Do icon and press the Select key 2 You will see a list of your To Do items Highlight a To Do item and press the Select key to see the details of that item 3 After viewing the details press the Home key to return to the To Do list 4...

Страница 23: ...the item If the item that you check off was overdue it will be removed from the Overdue Tasks List Creating To Do items You can create To Do items including tasks calls and deliverables To create a To Do item 1 Press the Edit key highlight New To Do and press the Select key 2 Highlight the type of To Do from the menu and press the Select key 3 Select the To Do item subject The list of subjects wil...

Страница 24: ...screen press the Select key to enter your new To Do item Press the Up key if you want to return to a previous Wizard screen To reschedule or remove a To Do item 1 Highlight the To Do item with the Up or Down key 2 Press the Edit key and then highlight the Reschedule or Remove option Press the Select key 3 If you are rescheduling the To Do item use the Up or Down key to choose the new date and the ...

Страница 25: ...nt to edit it synchronize the QuickNote to TrueSync Desktop or another PIM Edit it in that information manager and then re synchronize To view or remove Memos and QuickNotes 1 At the Home screen highlight the Memos icon and press the Select key A list of your Memos including your QuickNotes will appear Highlight an item and then press the Select key to read it using the Up or Down key to scroll Pr...

Страница 26: ... is highlighted 5 The Confirmation screen appears Press the Select key to accept your selection or press the Edit key to revise it 6 If you have entered too many letters to view the truncated QuickNote will appear in the list of Memos followed by three dots at the end of the text To add to a QuickNote 1 Highlight the QuickNote with the Up or Down key 2 Press the Edit key and then highlight the App...

Страница 27: ...both the Home and World clocks to show different cities and or time zones 1 Move from the Home Clock to the World Clock by using the Up or Down key 2 Press the Select key to change to a different city or time zone 3 Use the Up or Down key to highlight your new choice and press the Select key Setting the clock To change the clock settings 1 In the Time Zones module press the View key 2 Select Set C...

Страница 28: ... field to field If you are changing the clock time use the Up or Down key to change the month date year and or time Press the Select key to move from field to field Understanding time zones and travel When you change the time zone of the currently selected clock the calendar events automatically change to reflect the new time zone For example an appointment scheduled for 2 p m in New York changes ...

Страница 29: ...e that you desire is highlighted press the Select key To change your password 1 Press the View key in the Preferences module Use the Down key to highlight the Set Password option then press the Select key 2 Press the Down key to move to the Password option then press the Select key 3 To set a password press five keys You can choose any order or combination of keys that you desire When you have pre...

Страница 30: ... your Clip On Press the View key and use the menu to return to the Preferences screen or to set your clock or password Synchronizing with the Clip On You can quickly and easily synchronize data from a desktop application such as TrueSync Desktop with the Clip On For details on using TrueSync Desktop and synchronizing please read Chapters 5 and 6 NOTE If you have a password enabled on the Clip On y...

Страница 31: ...low For details on system requirements please read Requirements on page 36 To connect the Clip On to your computer 1 Connect the cable to the Clip On and your computer 2 You should hear a connection tone To connect the Clip On to your telephone 1 The Clip On uses the auxiliary battery connector on the back of the phone Insert the spring clip on top of the Clip On into the connector and pull it dow...

Страница 32: ... up to nine months of average use To remove the old batteries and install new batteries 1 Turn over the Clip On 2 Slide the door open 3 Insert a new battery with the positive side facing the front of the Clip On 4 Carefully close the battery compartment door until it snaps shut NOTE If you are using vibration mode with an analog phone vibration mode will be turned off when you connect the Clip On ...

Страница 33: ...33 Setup and product care 33 Product care If the screen of the Clip On becomes smudged or dusty apply eyeglass cleaning fluid or isopropyl alcohol to a clean cloth and gently wipe the screen clean ...

Страница 34: ...34 Chapter 3 ...

Страница 35: ... direct synchronization among your desktop applications devices and or services Both software programs accompany your purchase You can import your data from another PIM into TrueSync Desktop and then synchronize using TrueSync Desktop Or if you prefer to synchronize directly from another PIM such as Outlook you can use TrueSync Plus Either choice provides complete and reliable synchronization For ...

Страница 36: ...r installation 256 color VGA video and monitor An MPC 2 Compatible CD ROM drive A pointing device compatible with Windows 95 Windows 98 or Windows NT 4 0 A sound card and speakers required to play sounds WAV files for appointment alarms A printer supported by Windows 95 Windows 98 or Windows NT 4 0 required to print from TrueSync Desktop Installing the product As with any product Starfish recommen...

Страница 37: ...e button to locate the program SETUP EXE on the CD ROM 7 To begin the installation click the Finish button or click SETUP EXE and then click the Open button The Readme file Any last minute changes or additions to TrueSync Desktop or TrueSync Plus are documented in a Readme file View the TrueSync Desktop Readme file by clicking the Windows Start button and choosing Programs TrueSync Desktop Readme ...

Страница 38: ...e Programs 3 Choose TrueSync Desktop or TrueSync Plus from the listed applications 4 Click the Add Remove button 5 Click the Yes button 6 Back up any data you want to keep and then delete the TrueSync folder usually Program Files Starfish TrueSync 7 Restart Windows Starting TrueSync Desktop After you complete the installation click the Windows Start button and choose Programs TrueSync Desktop True...

Страница 39: ...hoose Help Troubleshooter or click Start in the Windows Taskbar and choose Programs TrueSync Desktop TrueSync Desktop Troubleshooter The Troubleshooter is an HTML document and starts in your browser Using online help Both TrueSync Desktop and TrueSync Plus include detailed online help systems To open Help press F1 or choose Help Topics For more information For technical support and ordering help r...

Страница 40: ...40 Chapter 4 ...

Страница 41: ...chronization If you want to use TrueSync Plus right click the TrueSync launcher icon in the Windows taskbar and click Configure If you are using TrueSync Desktop click the TrueSync icon on the Deskpad or choose View TrueSync To establish which data to synchronize you will then use the TrueSync Setup Wizard to select your synchronization options as explained in the next section Setting up TrueSync ...

Страница 42: ...n you may have the option to select another folder by clicking the Browse button 4 Select the device that you want to synchronize 5 Depending on the device you chose in step 4 you may be prompted to specify how you will connect your device to your computer 6 If you use a service you may be asked whether you want to synchronize with that service 7 Depending on the service you chose in step 6 you ma...

Страница 43: ...you want to synchronize For details see Selecting and mapping Contacts fields on page 48 11 Specify the Calendar files or folders you want to synchronize 12 Specify the Memos files or folders you want to synchronize 13 Specify the To Do list files or folders you want to synchronize 14 When you are satisfied with your selections click Finish to display the TrueSync window You can change your ...

Страница 44: ...n options on page 46 To synchronize 1 Connect your device to your computer 2 Click the TrueSync icon in the center of the TrueSync window Click the plus signs to expand the log entries Select an error message and press F1 for help Below is a magnified view of the TrueSync Toolbar Click the TrueSync icon to synchronize The Synchronization Log shows you the results of your synchronizations Memos Opt...

Страница 45: ...ries to synchronize specify which Contacts fields to synchronize and how those fields map to corresponding fields in other clients To add a client to your configuration Add a client to your configuration using the Client Add menu option You will be prompted to specify details about each client such as which folders or categories to synchronize After a client is added it is represented in the TrueS...

Страница 46: ...ze All data types Calendar Contacts Memos To Do items will be synchronized unless you specifically exclude them To exclude a data type from synchronization choose Data datatype and check the Do not synchronize datatype option The data type will be excluded from each synchronization until you uncheck the option Select Synchronize to synchronize this client s data with data from one or more other cl...

Страница 47: ... or categories that you can select is limited by devices For example suppose you have four Contacts folders set up for synchronization to a device the limit for that device You then decide to synchronize another Contacts folder Before you can do so you will need to If you align not mapped in one column with an item in another column it means that item will not be synchronized If you select an item...

Страница 48: ... to do is choose one of the SmartMap options your choice determines which fields to synchronize For information about each of the SmartMap options click the Help button Customized mapping by clicking the Customize Mapping button This option lets you map each pair of fields To change mapping click a field click the down arrow at the right and select the new mapping from the drop down list To save s...

Страница 49: ...de details about the progress and results of the synchronizations Select Synchronize Options to specify how TrueSync displays Log entries Click the Help button for details To get help on error messages highlight an error and click F1 Setting up multiple users If you use more than one synchronization configuration or if more than one person uses the same computer to synchronize set up an additional...

Страница 50: ...he current username is indicated on the TrueSync window title bar To modify the settings for a user You can modify the synchronization settings for any user by selecting the user and changing the settings as described in Changing the TrueSync setup on page 45 and Changing your preferences on page 48 ...

Страница 51: ... Desktop view The Status bar displays information about the current view Choose View Status Bar Highlight any command on the menu bar and press F1 for help To change how the Deskpad appears and set other display options choose Tools Preferences General To delete a card memo or calendar activity drag it to the Delete icon Click buttons on the Toolbar to perform tasks quickly without using the menus...

Страница 52: ...ar to its original view click the Reset button Any changes affect only the Toolbar for the current view To customize a different Toolbar select the desired view and make your changes there Setting preferences You can customize TrueSync Desktop by setting its preferences Choose Tools General Preferences in the EarthTime and Contacts views or Tools Preferences General To add a button 1 Click the but...

Страница 53: ...view you want for the default or check the box to return to the last view used before exiting Choose where you want the Deskpad icons Change the display fonts for the Contacts and Memos views Click Password at Start Up and set a Start up password so that only someone with the password can open TrueSync Desktop ...

Страница 54: ...54 Chapter 6 ...

Страница 55: ...w The Calendar view is a powerful tool for helping you organize your appointments and other events Use the Calendar to schedule events set reminders and maintain a list of To Do items and phone calls To change to the Calendar view click the Calendar icon on the Deskpad press F6 or choose View Calendar ...

Страница 56: ...at the top of the Events pane Change the Local Time with the Time Zone drop down list Click a tab to select the view of the Calendar you want The Calls pane shows the calls you need to make The To Do pane shows the tasks you need to accomplish including any you did not complete yesterday A magnified view of the Toolbar is shown below Recurring Event Special Day Event Save Calendar Find Schedule An...

Страница 57: ...r The Weekly and Monthly views The Weekly and Monthly views display scheduled activities in standard calendar formats Change to a view by clicking its view tab Click a date in the mini calendar to go directly to that day Change to the previous or next month by clicking the left and right arrows Change to the previous or next week or month using the left and right arrows Double click a day in the W...

Страница 58: ... by clicking its View tab Scheduling events Enter your appointments and scheduled events on the Events list You can have a maximum of 288 events scheduled Click a day to go to that day in the Daily view Drag the mouse over a range of dates to schedule multi day events Change to the previous or next year using the left and right arrows ...

Страница 59: ...er each appointment for a trip to New York select the USA Eastern time zone When you arrive in New York change the Local Time to New York time Your events adjust to display in New York time whether those events are in New York or elsewhere Thus an event you need to attend in New York at 10 a m will appear at 10 a m on your The bell icon indicates an alarm Double click an event or right click an ev...

Страница 60: ...typing When you begin typing TrueSync Desktop places an icon in front of the text Click the left column to check off items when completed Click any blank line and begin typing to create a new item Click the right column to add or change the details for an item Right click an item to modify it NOTE You can open calendars from previous versions of TrueSync Desktop and Sidekick in TrueSync Desktop 2 ...

Страница 61: ...ts Once you have updated your cardfiles you can use the TrueSync window to transfer them to your device To open the Contacts view click its Deskpad icon choose View Contacts or press F5 Cardfile basics In the left pane of the Contacts view is the card list your visual index to the cards in the active cardfile the cardfile whose tab is selected In the right pane is the current card in the cardfile ...

Страница 62: ...tion Carriage returns are allowed only in the last field of each card The index lines of cards in the current cardfile Click one to see the card or modify its contents The index line is at the top of each card It can contain any three fields in the cardfile and is used to sort the cards Type characters in the Look For box to find a card A magnified view of the Toolbar is shown below Click the scro...

Страница 63: ...late for your needs click OK If you want to define all your own fields choose None from the Cardfile Template list If you want to customize a cardfile you may find it easier to edit the provided field names of a cardfile template rather than to create all of the field names NOTE If no cardfiles are open use Cards Define Fields to open this dialog box The new cardfile contains the field names from ...

Страница 64: ...64 Chapter 8 ...

Страница 65: ... Memos view The Memos view lets you create memos organize them in folders and save them as files You can apply formatting to your memos and you can even create memos to merge with names from a cardfile To open the Memos view click the Memos Deskpad icon press F7 or choose View Memos ...

Страница 66: ...f the Toolbar is shown below The date the memo was created appears here Click to change between Index View and full screen Memo View Click the tab of the folder you want The Memos list displays the subject lines of all memos in the current folder Click a subject to display that memo The currently selected memo appears here Use the Ruler to set margins and tabs To make changes or additions type dir...

Страница 67: ... place the memo 2 Click the Add New Memo button or choose Memos Memo Add A new blank memo appears with the insertion point in the subject line 3 Type a subject and then press the Enter key to move into the body of the memo 4 Type and format your text Changing margins and tabs Use the ruler when you want to change margins or set a tab stop To change more than one paragraph select the paragraphs bef...

Страница 68: ...Tab stop To add a tab stop click on the ruler where you want it To move a tab stop drag it along the ruler To delete a tab stop click it and drag downward away from the ruler Drag to move both left margin markers together Drag to change the right margin If you create a new paragraph by pressing Enter at the end of an existing paragraph the new paragraph retains the margins and tabs of the existing...

Страница 69: ...nfigure it to show both your home location and the local time as you travel To open EarthTime click the EarthTime icon in the Deskpad or choose View EarthTime The Deskpad icon shows the current time Depending on the device your EarthTime settings such as the Home clock Local time and the other world clock settings may be transferred to your device when you synchronize The EarthTime map When you cl...

Страница 70: ...ing that daylight saving time is in effect City clock for Scotts Valley Icons indicate location of other selected cities Double click on the map to center it at that location EarthTime has a database of over 540 cities from which you can select world city clocks to display 1 Click the city panel and choose Select a Different City from the shortcut menu 2 Specify a country or view cities from all c...

Страница 71: ...e local city 2 Click the panel containing the local city and click Set as Local Time from the shortcut menu An icon appears to indicate the Local Time city Changing the Home Clock Your Home Clock indicates the time where you live It should be set automatically when you first start TrueSync Desktop To change your Home Clock 1 Set one of the eight city panels to display your home city 2 Click the pa...

Страница 72: ...72 Chapter 10 ...

Страница 73: ...s to a variety of formats using either preprinted or customized forms Preview your output before you print it to save time and materials Calendar printing Select from a variety of formats for printing calendar activities including TrueSync Desktop s daily weekly monthly and yearly views You can also print to paper forms for several popular organizers ...

Страница 74: ... or several cards in the Contacts view To print one or more cards choose File Print Cards or click the Print button on the Contacts Toolbar You can specify how many cards to print per page Click to display the options panel Click to change the fonts used in the calendar Click to change your Windows print settings Click to preview the printed pages Click to change margins Select the dates to print ...

Страница 75: ...nge it within the print area available The procedures for using all three dialog boxes are the same but involve different templates and content arrangements Once you have specified the information in the four steps click Preview to see the result Click Print when you are ready to print Click to preview the results of your choices You can see the overall layout here as you work In Step 4 you specif...

Страница 76: ... Print from the Memos view or click the Print button on the Memos Toolbar The Print Memos dialog box appears You can print a single memo all of the memos filed in specific folders selected memos marked memos or after a search operation memos listed in the Found window ...

Страница 77: ...e Calendar 56 60 canceling a call 13 canceling events 21 card list Contacts 61 card views 14 cardfile select 14 cardfiles 61 creating 62 cards adding 63 changing Calendar dates 57 client preferences 48 Contact cards 62 EarthTime clocks 71 EarthTime locations 70 fonts 53 memo margins 67 print settings 74 synchronization options 48 time zones 59 To Do items and Calls 60 Toolbar buttons 52 TrueSync D...

Страница 78: ...ing numbers 13 directories default 53 displaying telephone numbers 15 Down key 8 E EarthTime resetting clocks 71 selecting cities 70 Edit mode 7 editing 9 Calls 60 contacts 62 events 59 To Do items 60 e mail addresses 15 ending a call 13 ending times events 59 entering text 9 envelope icon 14 envelopes 75 events canceling 21 creating 20 maximum scheduled 58 overlapping 59 rescheduling 21 schedulin...

Страница 79: ...g 25 viewing 25 menu 7 menu bar 51 menus shortcut 52 mini calendar 57 Monthly view 19 Monthly view Calendar 57 multi day events viewing 56 N new batteries 32 new Contacts 16 new events 20 notebook icon 14 O online help 39 opening Calendar 55 Contact cardfiles 62 EarthTime 69 Memos view 65 organizing tasks 55 overview TrueSync Desktop 51 P password 30 password setting 53 placing a call 13 preferenc...

Страница 80: ...n 31 setting up meetings 18 Setup Wizard 8 38 shortcut menus 52 sorting cards 15 special days viewing 56 StarTAC Clip On Mobile Organizer batteries 32 Calendar 19 connecting 31 Contacts 14 features 7 keys 7 making a call 13 Memos 25 Preferences 28 product care 33 To Do items 22 starting times events 59 starting TrueSync Desktop 38 starting TrueSync Plus 41 start up password 53 Status bar 51 status...

Страница 81: ...ng 37 setting up 38 starting 38 TrueSync Plus 41 turning off alarms 19 U uninstalling TrueSync Desktop 37 Up key 8 V View key 7 viewing multi day events 56 special days 56 time zones 69 viewing events 19 viewing To Do items 22 views Calendar 57 common features 51 Contacts 62 customizing 52 EarthTime 69 Memos 66 printing Calendar 74 setting default 53 W Web site addresses 15 Weekly view 19 Weekly v...

Отзывы: