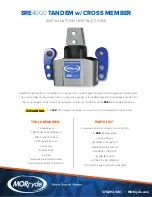
STANDARD 3" WIDE FRAME HANGER:
Step 1
Using appropriately rated jacks to support the
trailer, jack unit up and support frame with safety
stands and support axles with floor jacks.
Step 4
Slide cross member
half with slots over
the end of the wet bolt
and thread the nut on
without tightening. The
open end of the channel
should face down.
Step 5
Repeat steps 2-4 on
opposite side of frame
for the cross member
half with holes.
Step 6
Make sure the cross member ends are pressed against
the frame hanger. Line up holes on both cross members
and insert flange bolts (4 on each side) into holes that are
furthest from the center in both the top and bottom rows
(do not tighten flange bolts at this time).
Step 7
Tighten wet bolts from Step 3 on both sides to 40 ft-lbs.
Then tighten flange bolts from Step 6 to 40 ft-lbs.
Step 9
Remove jacks and supports from frame and axles.
Step 8
Insert clamp strap
inside frame hanger
and bolt to cross
member. Tighten to
15 ft-lbs.
Step 3
Replace stock equalizer with
SRE
4000. Reinstall shackle
links and tighten shackle link nuts. Replace shoulder bolt
with wet bolt (shoulder bolt w/ grease zerk) included in
installation kit. The bolt should point toward the inside of
the trailer. Do not install nut until next step.
If you have any questions regarding installation procedure or have difficulty with any of the install steps,
please give us a call at
574-293-1581
or email
.
Step 2
Remove shoulder bolt from frame hanger
and remove shackle links.
Shoulder Bolt
574.293.1581 • MORryde.com


