background image

9

INSTALLATION

Installation 

Before installing the machine, the location characterized  

follows shall be selected:

1.Rigid, dry, and level surface 
2.Avoid direct sunlight
3.Sufficient ventilation
4.Room temperature is above 0

5.Keep far away from the heat resources such as coal or gas.

as 

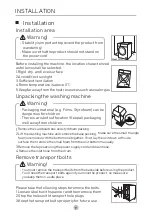
Unpacking the washing machine

1.

 Remove the cardboard box and styrofoam packing.

2.

 Lift the washing machine and remove the base packing.

3.

 Remove the tape securing the power supply cord and drain hose.

4.

 Remove the inlet hose from the drum.

Make sure the small triangle 

foam is removed with the bottom one together. If not, lay the unit down with side 
surface, then remove the small foam from the unit bottom manually.

Please take the following steps to remove the bolts:
1.Loosen 4 bolts with spanner and then remove them.
2.Stop the holes with transport hole plugs.
3.Keep the transport bolts properly for future use.

Remove transport bolts

•   

   Stability is important to prevent the product from 

     wandering!

Make sure that the product should not stand on 

     the power cord.

Warning!

• 

 Packaging material (e.g. Films, Styrofoam) can be 

    dangerous for children.

  There is a risk of suffocation ! Keep all packaging 

    well away from children.

Warning!

•   
•   

You must  remove the transport bolts from the backside before using the product. 
You’ll need the transport  bolts again if you move the product , so make sure       
you keep them in a safe place.

Warning!

w

w

W

>


20mm

Installation area

Содержание CIW-10715

Страница 1: ...CIW 10715 COMBI WASHER DRYER...

Страница 2: ...tion OPERATIONS Quick Start Before Each Washing Detergent Dispenser Control Panel Option Other Functions Programmes Washing Programmes Table MAINTENANCES Cleaning And Care Trouble Shooting Technical S...

Страница 3: ...er to avoid a hazard The electric shock SAFETY INSTRUCTIONS This combination of symbol and signal word indicates a potentially dangerous situation which may result in death or serious injuries unless...

Страница 4: ...th the manufacturer s instructions and local safety regulations Risk to children EN countries the appliance can be used by children aged from 8 years and above and persons with reduced physical sensor...

Страница 5: ...washer dryer is not to be used if industrial chemicals have been used for cleaning The exhaust air must not be discharged into a flue which is for exhausting fumes from appliances burning gas or othe...

Страница 6: ...achine 3 Handle the machine carefully Never hold each protruded part on the machine while lifting Machine door can not be used as the handle during the conveyance 4 This appliance is heavy Transport c...

Страница 7: ...type environments Areas for communal use in blocks of flats or in launderettes Warning After the program is completed please wait for two minutes to open the door If it is unavoidable that fabrics th...

Страница 8: ...will not be damaged Remove all objects from pockets such as lighters and matches before use the appliance This marking indicates that this product should not be disposed with other household wastes th...

Страница 9: ...water Drain hose optional support The product line chart is for reference only please refer to real product as standard Note Drum Power supply cord Control panel Detergent dispenser Service filter Do...

Страница 10: ...it down with side surface then remove the small foam from the unit bottom manually Please take the following steps to remove the bolts 1 Loosen 4 bolts with spanner and then remove them 2 Stop the hol...

Страница 11: ...for some program Connect the inlet pipe as indicated There are two ways to connect the inlet pipe 1 Connection between ordinary tap and inlet hose To prevent leakage or water damage follow the instruc...

Страница 12: ...fix it properly with a rope Position drain hose properly otherwise damage might result of water leakage Do not kink or protract the drain hose Water trough Min 60cm 100cm Max Trough Hose Retainer Bind...

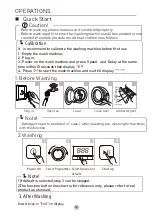
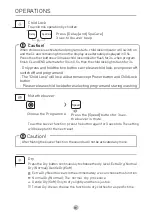
Страница 13: ...Caution OPERATIONS Main Wash Pre Wash Softener Power On Select Programme Select function or default Start up 1 2 3 4 Buzzer beep or End on display 3 After Washing 1 If default is selected step 3 can b...

Страница 14: ...the inlet valve and draining system may be damaged If the machine is placed under condition of 0 or less then it should be transferred to normal ambient temperature to ensure the water supply hose and...

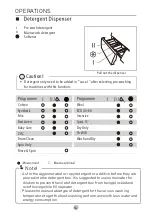
Страница 15: ...nt for the various washing temperature to get the best washing performance with less water and energy consumption Note OPERATIONS Pull out the dispenser Caution Detergent only need to be added in case...

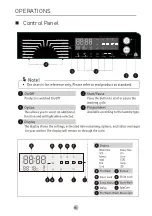
Страница 16: ...OPERATIONS Control Panel 15...

Страница 17: ...me and when the power is restarted the program will continue OPERATIONS Soil The washing time will increase or decrease after you select it SoilLevel Extra Rinse The laundry will undergo extra rinse o...

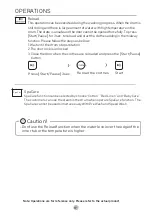
Страница 18: ...the clothes adding in the midway function Please follow the steps as bellow 1 Wait until the drum stops rotation 2 The door lock is unlocked 3 Close the door when the clothes are reloaded and press t...

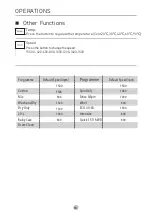
Страница 19: ...ulate the temperature Cold 20 30 40 60 90 Other Functions OPERATIONS 18 Cotton Mix Wash and Dry Dry Only 20 Baby Care Drum Clean Programme Default Speed rpm Programme Default Speed rpm Spin Only Rinse...

Страница 20: ...make child lock indicator flash for 3s when program finish CL and END alternate for 10s in 0 5s then the child lock lights flash for 3s Only press and hold the two button can release child lock even...

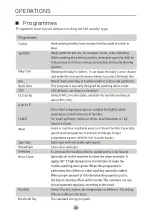
Страница 21: ...OPERATIONS Programmes are available according to the laundry type Programmes Wash and Dry Quick 15 1h WD 20...

Страница 22: ...ECO 40 60 Wash Dry ECO 40 60 as the default Wash And Dry dry level Extra Dry Other as the default Half load for 8 0 10 0Kg machine 4 0 5 0Kg Quarter load for 8 0 10 0Kg machine 2 0 2 5Kg Programme Lo...

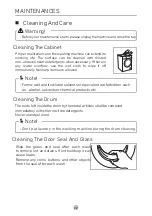
Страница 23: ...re The rusts left inside the drum by the metal articles shall be removed immediately with chlorine free detergents Never use steel wool Proper maintenance on the washing machine can extend its working...

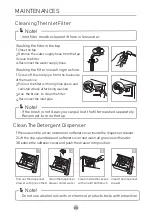
Страница 24: ...long nose pliers and reinstall it back after being washed 3 Use to clean the filter 4 Reconnect the inlet pipe the brush Clean The Detergent Dispenser Do not use alcohol solvents or chemical products...

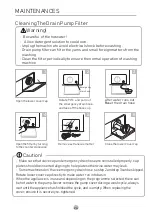
Страница 25: ...is empty When replacing the cover ensure it is securely re tightened Cleaning The Drain Pump Filter Warning Be careful of the hot water Allow detergent solution to cool down Unplug the machine to avo...

Страница 26: ...utlet hose Clean and wipe the detergent box Abnormal noise Check if the fixing bolts have been removed it s installed on a solid and level floor Check Indicator or display does not light Disconnect th...

Страница 27: ...Power WashingCapacity Model H W D MAINTENANCES 595 565 850 74kg 1900W The wool wash cycle of this machine has been approved by The Woolmark Company for the washing of machine washable wool products p...

Страница 28: ...27 87A 17th November str 55535 Pylea Thessaloniki CIW 10715 85 60 57...

Страница 29: ...28 80 C...

Страница 30: ...ion of the Dry at full load Drying Remaining moisture content of the Dry at full load Drying Programme duration of Dry at full load Drying Power consumption of off mode Power consumption of Left on mo...

Страница 31: ...programmes in terms of combined energy and water consumptions for washing that type of cotton laundry The actual water temperature may differ from the declared cycle emperature Please choose the suit...

Страница 32: ...nity waste collection recycling centre In the European Union there are separate collection systems for used electrical and electronic products Please help us to conserve the environment we live in DEC...

Страница 33: ......
Отзывы: