C
Ch
hiip
pp
piin
ng
g b
blla
ad
de
e
Ì
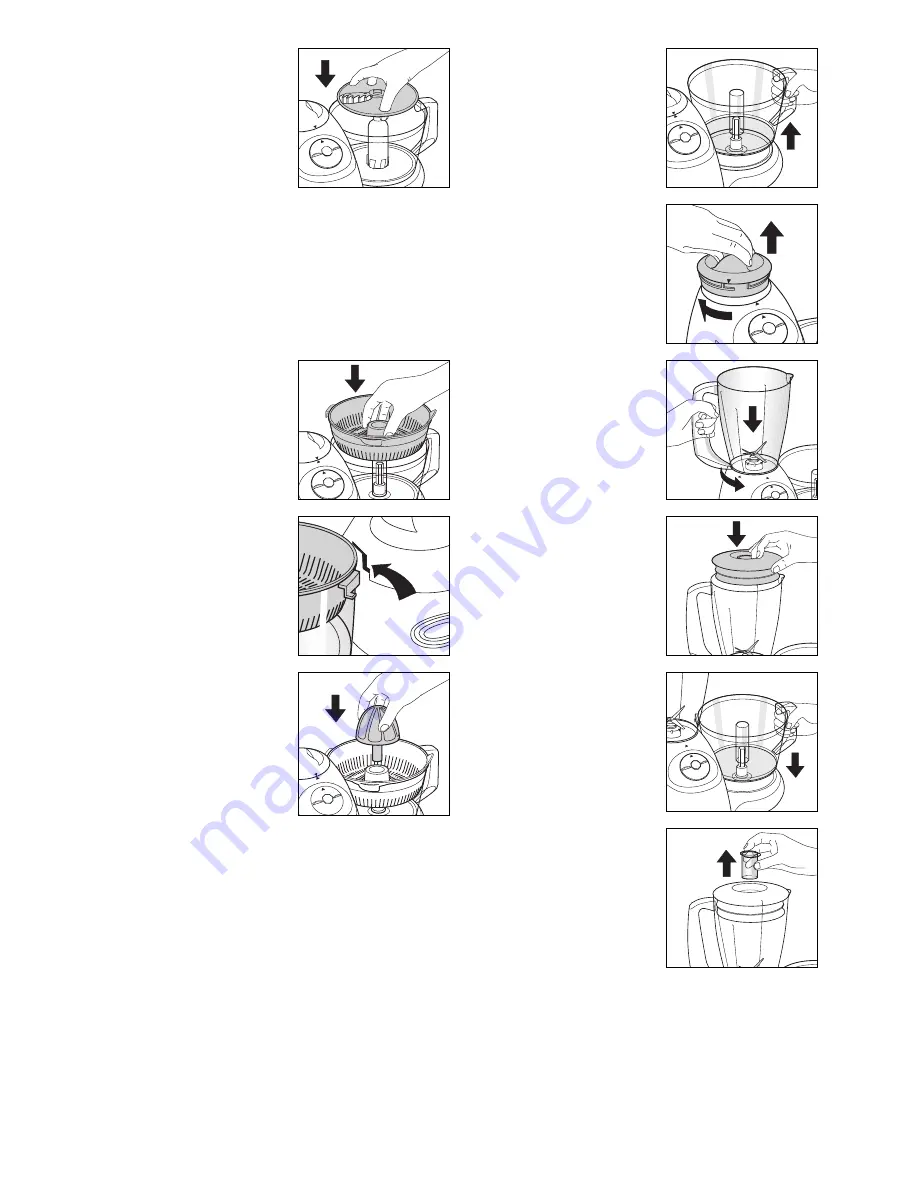
1 Fit the processor bowl and
spindle as detailed previously.
2 Using the finger holes in the
chipping blade, fit it over the
spindle and press firmly into
place as indicated.
WARNING: USE
EXTREME CAUTION -
BLADES ARE SHARP.
3 Fit the lid and click into place
as detailed in the ‘Setting up’
section.
4 Plug in the processor.
5 Use the food pusher
Á
to add
food into the processor bowl
through the feeder tube.
C
Ciittrru
us
s jju
uiic
ce
err
1 Fit the processor bowl as
detailed previously.
2 Fit the citrus press bowl
Ú
into the processor bowl.
3 Rotate anti-clockwise. Ensure
that the citrus press bowl tab
has ‘clicked’ into place.
4 Insert the citrus cone
Û
into
the centre of the citrus press
bowl, with its shaft inside the
central column of the bowl.
5 Plug in processor
6 Place fruit on citrus cone and
hold with a cupped hand.
7 Turn speed control to MIN.
WARNING: ALWAYS
OPERATE THE JUICER
AT MINIMUM SPEED
ONLY.
B
Blle
en
nd
de
err
·
1 Remove the processor bowl
and lid.
2 Remove the safety cover
¤
.
This can only be done once the
processor lid has been
removed.
3 Place the blender
·
into its
location on the processor
body, with handle to the left.
Turn anti-clockwise until
blender clicks in place and the
arrows are aligned.
4 Place food in blender.
5 Place the lid
‚
and goblet
„
on the blender.
6 Replace the processor bowl
and processor lid. Ensure that
the lid tab has clicked into
place. The blender will not
operate if the processor lid is
not ‘clicked’ in place.
7 Plug in the processor.
8 Always operate the blender
with the lid in place.
9 When blending hot liquids,
remove the goblet
„
.
10 Never operate the blender
with more than 1500ml of
liquid or when empty.
TO REMOVE BLENDER,
YOU MUST FIRST UNLOCK
AND REMOVE THE PROCESSOR
LID.
FOR SAFETY, DO NOT
FIT ANY ATTACHMENTS
INTO THE FOOD
PROCESSOR BOWL WHEN
USING THE BLENDER.
7


