6
ENGLISH
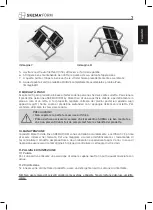
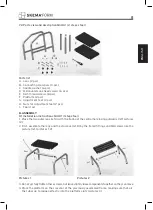
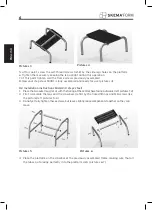
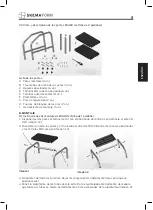
Pictures 3
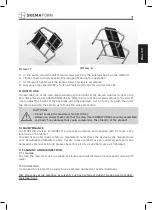
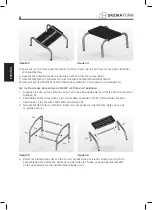
Pictures 4
5. At this point, screw the self-thread screws (ref.E) by the side legs holes on the platform
6. Tighten them securely keeping the leg upright during this operation
7. At this point tighten well the frame screws previously assembled
8. Now your step stool MI481 is fully assembled and ready for use (pictures 4)
8.2 Installation instructions MI482 (2 steps stool)
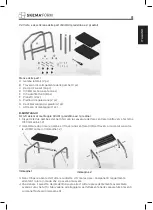
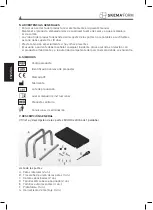
1. Place the two outer legs (ref.A) with the flaring of the central hole facing outwards (ref.1 pictures 1-2)
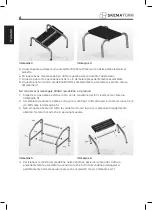
2. First, Assemble the legs and the crossbars (ref.B) by the flared fittings and M8 screws like
the picture(ref.1 pictures 5-6)
3. Do not yet fully tighten these screws, but leave slightly loose components together so they can
move
Pictures 5
Pictures 6
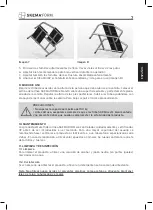
4. Place the platform on the crossbar of the previously assembled frame, making sure that all
the tubes go to lodge perfectly into the platform slots (pictures 6-7)
Содержание SKEMA FORM
Страница 1: ...PREDELLINI MANUALE DI ISTRUZIONI MA MI481_MI482 03 A _ITA_11 2020 ITALIANO...
Страница 10: ...10 ITALIANO NOTE...
Страница 12: ......
Страница 13: ...STEP STOOL INSTRUCTIONS MANUAL MA MI481_MI482 03 A _ENG_11 2020 ENGLISH...
Страница 22: ...10 ENGLISH NOTES...
Страница 24: ......
Страница 25: ...ESTRIBOS MANUAL DE INSTRUCCIONES MA MI481_MI482 03 A _ESP_11 2020 ESPA OL...
Страница 34: ...10 ESPA OL NOTAS...

