background image

HIM

12

The Interface Solution Experts

Smart HART

 Loop

Interface and Monitor

seconds.  In this example, we will use seven seconds.
The HIM then sees its slave device speak and waits
seven seconds for it to speak again.  As long as the
HIM sees a new message from its slave device its
outputs are updated based upon the measured vari-
ables.  If the slave device does not speak within the
seven second period, the HIM declares a “No HART”
situation and sends its outputs to the failed communi-
cations values.

To use this feature, proceed with the following steps:

1.

Select the 

Listen (Specified Slave) button.

2.

Enter your desired value into the 

Timeout Period(s)

text box.

Factory default is 5 seconds.  The maximum Timeout
Period is 30 seconds.

3.

Set the exact slave address of the instrument you

wish to monitor.  Click the 

Set Slave Address button.

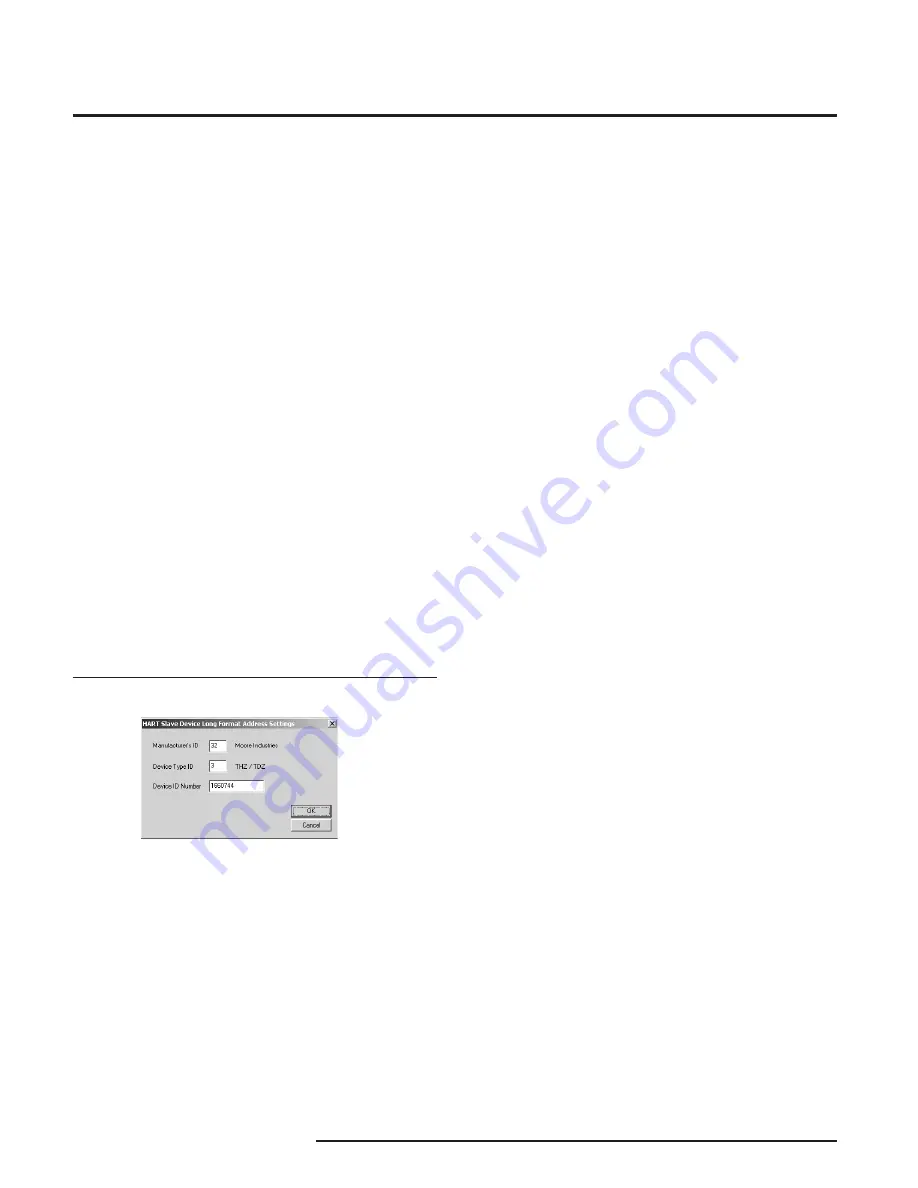
This brings up the 

HART Slave Device Long Format

Address Settings screen (Figure 8).  Enter the required
information into the appropriate text boxes.

The 

Manufacturer’s ID and Device Type ID for the

instrument that the HIM will listen to are available from
the HART Foundation website at 

www.hartcomm.org

and/or the instrument manufacturer.

Values obtained from the HART website are in HEX
code.  The HIM does not use HEX code; you must
convert this value to Decimal code.

Figure 8.

  HART Slave Device Long Format Address Settings

Screen

To convert HEX to Decimal code, perform the
following steps:

Access the Calculator feature in Microsoft
Windows® by opening the 

Start menu.  Next,

select 

Programs then Accessories and finally

Calculator.

Ensure that the Calculator is in 

Scientific mode.

To do this, select the 

View dropdown menu

and choose 

Scientific.

Click the 

Hex radio button and enter the HEX

code value.

Next, click the 

Dec button and the value will be

converted into the Decimal value.

Enter the converted value into the proper param
eter.

The 

Device ID Number is the serial number of

the exact device to which the HIM will listen.

4.

Once complete, press 

OK.

Download the information to your instrument once you
are finished.

Auto Clear Status Bit

Most HART instruments indicate when a device's
configuration has been changed.  This indication
(status bit) can be reset by sending HART command
38–reset configuration changed.  Checking the 

Auto

Clear Status Bit box causes the HIM to issue this
command whenever the HART instrument it is
monitoring has its configuration changed.  However,
the HIM can also be set to alarm on this bit (see
Programming the Alarm Parameters).  If the HIM is
both set to alarm and to auto clear, then it will do
both–going into alarm mode and resetting that
indication.

Quick Read/Set

The 

Quick Read button causes the PC Configuration

Software to read the communications information from
the attached HIM; the 

Quick Set button causes the

software to configure the HIM’s communications
settings to match those of the PC Software.

Содержание Smart HIM HART

Страница 1: ...HIM HIMNovember 2005 224 778 00C Smart HART Loop Interface and Monitor Smart HART Loop Interface and Monitor...

Страница 2: ...ions 5 Configuring the HIM 6 Installing the HIM 7 Installing the HIM into the Loop 7 Bench Checking the HIM 9 PC Configuration Software 10 HART Parameters 11 Display Parameters 13 Alarms Parameters 14...

Страница 3: ...hey have to offer Works with every Smart HART Device The instrument can be programmed in minutes to inter face with every HART compatible monitoring and con trol device About this Manual Wherever you...

Страница 4: ...interface over RS485 parameters as specified in U S Standard EIA RS485 Address Range Configurable from 1 to 247 Unit will assume a MODBUS address of 01 by default Baud Rate Interface supports the fol...

Страница 5: ...2 T3 T4 T5 T6 T7 T8 T9 T10 T11 T12 TX TX TX TX IN IN IN IN IN IN IN IN No Label I Source AO2 I Source AO2 A MODBUS 2 A MODBUS 2 ALARM RELAYS POWER NO1 CM1 NC1 I Source or I Sink AO2 I Source or I Sink...

Страница 6: ...re Once these software settings are made they are downloaded to the monitor in the form of a Configuration File and stored in the unit s non volatile memory You can choose to save a backup copy of the...

Страница 7: ...or 35mm Top Hat EN50022 DIN rails ElectricalConnections After mounting you are ready to connect the HIM to the loop Each unit comes equipped with a transmitter excitation terminal which allows it to s...

Страница 8: ...sted pair technique Shields are to be connected to an earth or safety ground at the unit itself The maximum length of unshielded input and output signal wiring should be 2 inches Power Sourcing Parame...

Страница 9: ...ut taking advantage of the Transmitter Excitation TX terminal If you need further descriptions of the terminals see Table 2 READY INPUT TRIP 2 TRIP 1 COM 0 ADDR For a HART Transmitter the resistor mus...

Страница 10: ...e device was configured HIM Tag A phrase used to identify a HIM Figure 7 HIM PC Configuration Software Screen HIM Device Status Displays how the HIM is function ing giving a brief summary of any error...

Страница 11: ...ny other HART device in the loop must be configured either as a HART Secondary Master 1 per loop or as a HART Slave up to 16 per loop Conversely setting the HIM to function as the Secondary HART Maste...

Страница 12: ...at Address Settings Screen To convert HEX to Decimal code perform the following steps Access the Calculator feature in Microsoft Windows by opening the Start menu Next select Programs then Accessories...

Страница 13: ...HIM to sequentially display two HART variables in five second increments Directly below the Toggle checkbox are two list boxes to select the variables that you would like to be displayed Notice that...

Страница 14: ...ware error or failure has occurred in the connected HART device ConfigurationChanged Bit6 Relay trips whenever it detects that the connected HART device has had its configuration changed Cold Start Bi...

Страница 15: ...s information returned by certain HART instruments This provides flexibility to the requirement of alarming on additional status infor mation Choosing this feature you are given the ability to specify...

Страница 16: ...et the Source as SV Set the Input Range to 0 and 400 F and the Output Range to 4mA to 20mA Click Quick Set to download the new configuration file to the HIM OutputCurrentBox The Output Current Box on...

Страница 17: ...il the analog output matches the minimum point 4mA for a 4 20mA output when you click the Fix Output at Low Point button After the low point is trimmed press the Fix Output at High Point button Read t...

Страница 18: ...tion CustomCurve The middle section of the screen displays the custom curve table After enabling custom curve mode and setting the variable to be monitored continue by selecting the number of points f...

Страница 19: ...er to measure the level of a tank in either centimeters inches or PSI Since the tank is only 300 centimeters 10 feet high the full range of the primary variable PV output from the DP transmitter is 0...

Страница 20: ...r highly skilled staff of trained technicians and engineers pride themselves on their ability to provide timely accurate and practical answers to your process instrumentation questions Factory phone n...

Страница 21: ...a transmission It should be set to match the baud rate of the attached controller The interface supports the following baud rates 300 600 1200 2400 4800 9600 and 19200 Parity The HART monitor supports...

Страница 22: ...RIP 2 TRIP 1 COM DEG C 0 ADDR COMMON NC normally closed NO normally open 4 20mA DCS Sensor Input NO NC DC GND 24Vdc Power Source DCC R must be 250 ohms and 1100 ohms R HART Field Instrument Temperatur...

Страница 23: ...currentx 100mA HIM Status Information Bit 0 hardware failure Bit 1 EEPROM fail Bit 2 EEPROM configuration checksum error Bit 3 EEPROM calibration checksum error Bit 4 EEPROM blank Bit 5 Out of range...

Страница 24: ...m 2 HART Primary variable float format HART Secondary variable float format HART Third variable float format Hart Fourth variable float format Scaled Primary variable float format Scaled Secondary var...

Страница 25: ...Bit 0 Bit 1 Bit 2 Bit 3 Bit 4 Bit 5 Bit 6 Bit 7 MSB device status LSB device error code Bit Position Description HART device no comms HART device malfunction HW fail EEPROM fail EEPROM checksum error...

Страница 26: ...ance Director Moore Industries Europe General Mgr June 20 2003 Manufacturer sName MooreIndustries International Inc Manufacturer sAddress 16650SchoenbornStreet NorthHills CA91343 6196 USA Declaresthat...

Страница 27: ...OR BREACH OF ANY WARRANTY CONCERNING THE GOODS OR SERVICES SHALL BE FOR THE COMPANY AT ITS OPTION TO REPAIR OR REPLACE THE GOODS OR SERVICES OR REFUND THE PURCHASE PRICE THE COMPANY SHALL IN NO EVENT...

Отзывы: