Before attempting to connect or operate this product,
please read these instructions completely.
Product
Instructions
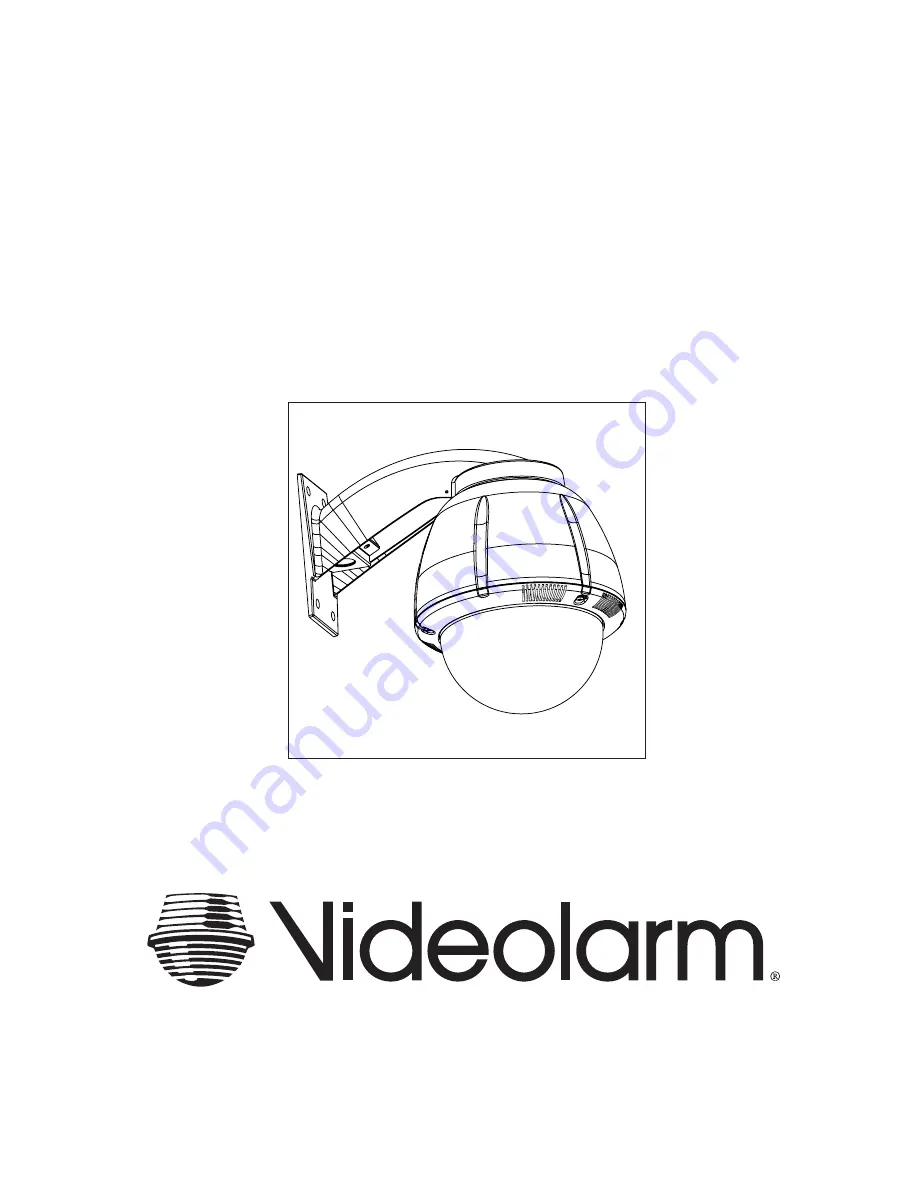
QView Series QRH Rugged Dome
QRHW & QRHP
81-IN5338
8/8/05
Страница 1: ...Before attempting to connect or operate this product please read these instructions completely Product Instructions QView Series QRH Rugged Dome QRHW QRHP 81 IN5338 8 8 05 ...
Страница 2: ... charges The limited warranty stated in these product instructions is subject to all of the following terms and conditions 1 NOTIFICATION OF CLAIMS WARRANTY SERVICE If Purchaser believes that the Product is defective in material or workmanship then written notice with an explanation of the claim shall be given promptly by Purchaser to Videolarm but all claims for warranty service must be made with...
Страница 3: ...UNT QRH A wall mount bracket comes standard with this unit and a template is included to use as a guide for mounting the bracket to a wall Choose the desired location for installation and mark the drill holes using the template Mount the wall mount bracket to the wall with 4 bolts not provided Run approximately 8 of wiring out of the wall and into the wall mount NOTE Be sure the hardware and the m...
Страница 4: ... a guide 5 Once all wiring connections are made place the wires inside the wall mount bracket and close the access door Secure with the screw removed earlier 6 Clean the outside of the dome Figure 2 Access panel 3 Open the access door on the bottom of the wall mount by loosening the screw nearest the mounting plate Figure 2 Figure 3 Add thread sealing tape 1 Mount the housing assembly to the mount...
Страница 5: ...m Length feet meters The QRH is setup with 2 individual power inputs 1 Accessory Power yellow and green wire 2 Camera Power red and orange If you wish to provide a single power transformer it is recommended that 1 Be certain that you know the total power consumption of the hous ing Heaters 25 watts Blowers 2 watts camera pan tilt not supplied 2 Check the supplied wiring chart to be sure that you h...
Страница 6: ...NT MAY BE NEEDED SEE THE TROUBLESHOOTING SECTION FOR ADJUSTMENT INFORMATION CAMERA SETTINGS HIGH RES BLACK WHITE FIXED AND FIXED VARI FOCAL LENSES There are no user adjustable settings on these units Figure 7 Figure 7 AUTO IRIS LENSES The dip switches are factory set with AES off and backlight compensation on Figure 8 The auto iris is also set at the factory but an adjustment screw is included for...
Страница 7: ...ve the option of transmitting video signals to NVT receivers via unshielded twisted pair cable You must purchase the receiver separately Instructions for connecting the receiver end of the the unshielded twisted pair cable will be included with the NVT receiver Following are instruc tions for connecting the unshielded twisted pair cables to the RJ45 Cat 5 cable running outside your housing UNSHIEL...
Страница 8: ...4 DO make sure the pair of wires carrying the video signal is sent as a twisted pair e g the blue white white blue wires twisted together as a pair not a split pair e g blue white conductor part of one pair orange white conductor part of another pair Wire What NOT to DO 1 DO NOT USE SHIELDED TWISTED PAIR WIRE It will severely degrade the distance performance Short runs may be used with some signal...
Страница 9: ...eck polarity WON T SYNC TORN PICTURE 1 Make sure that you are using unshielded twisted pair wire 2 Check distance equalization settings 3 For installations with passive non amplified transceivers at both ends check for ground loops This may be done with an AC Voltmeter as shown below If the voltage is greater than 1 2 volt use an amplified receiver such as the NV 652R NV 862R or NV 1662R Alternate...
Страница 10: ... appear to be unusually dim STATIONARY OR SCROLLING HORIZONTAL LINES ON SCREEN PICTURE IS CLEAR LOW OR NO COLOR PICTURE IS DARK OR GRAINY IN GOOD LIGHTING CONDITIONS The auto iris lens is set at the factory If you experience video too light or dark you can manually adjust using the auto iris adjustment screw If there is low or no color the Auto Iris is too open if the picture is dark or grainy in ...
Страница 11: ... 11 1 9 2 3 5 4 6 8 7 10 14 16 15 18 17 13 12 11 QRHW QRHP Exploded Diagram for Replacement Parts ...
Страница 12: ...RPFD040 Upper Bracket Assembly 9 RPRH709 Housing Top Gray RPRH710 Housing Top White 10 WM10 WM10 Wall Mount 11 RPQF01 PC Board and Input Cables Video Power 12 RPQF02 Multi Camera Metal Base Bracket 13 RPQRH71000 Plastic Articulated Bracket 17 RPQRH71010 Camera Bracket and Hardware 18 RPQF20NF3 Hi Res B W 3 6 Fixed Lens RPQF20NA Hi Res B W 4 9mm Auto Iris Varifocal Lens RPQF50NF3 Hi Res Color 3 6 F...
Страница 13: ... 13 2 000 3 250 R 733 2 132 2 981 1 537 5 500 Mounting Template ...