6
Auto-Leveling
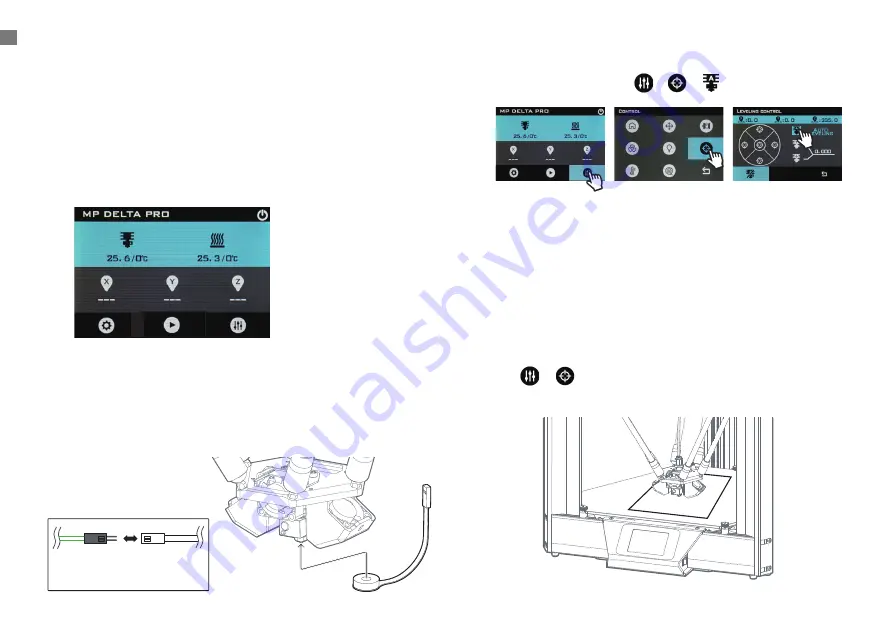
Before your first print, and anytime you remove the build plate,
you’ll want to run an auto-level to ensure that your parts adhere
well to the glass. Follow the procedure below to run an auto-level
and calibrate the Z-offset of your machine.
Adjusting the Z-Offset
The Z-offset is the distance between the glass build plate and
the nozzle. The auto-level process ensures that this distance is
consistent across the entire surface of the build plate, but the
distance itself must be manually calibrated. You can do this easily
using a piece of clean, flat copy paper, which are usually about
100 microns thick.
1. Ensure that the hotend is at room temperature.
1. Tap
>
2. Place the piece of copy paper on the build plate.
PREPARING TO PRINT
2. Connect the auto-level sensor to the green wire from the
cable harness, and affix the the sensor’s foam ring to the
nozzle.
NOTE: Use the minimum amount of force required
to affix the sensor to the nozzle. If the nozzle is touching
the plastic membrane, it may prematurely trigger the
switch.
3. On the LCD screen, tap
>
>
Auto Leveling
4. Once the process is complete, remove the auto-level sensor.
Green Wire
from Effector
Wire Harness
Auto-level
Sensor Wire
Содержание Delta Pro
Страница 1: ...Monoprice Delta Pro 3D Printer User s Manual ...
Страница 15: ......


