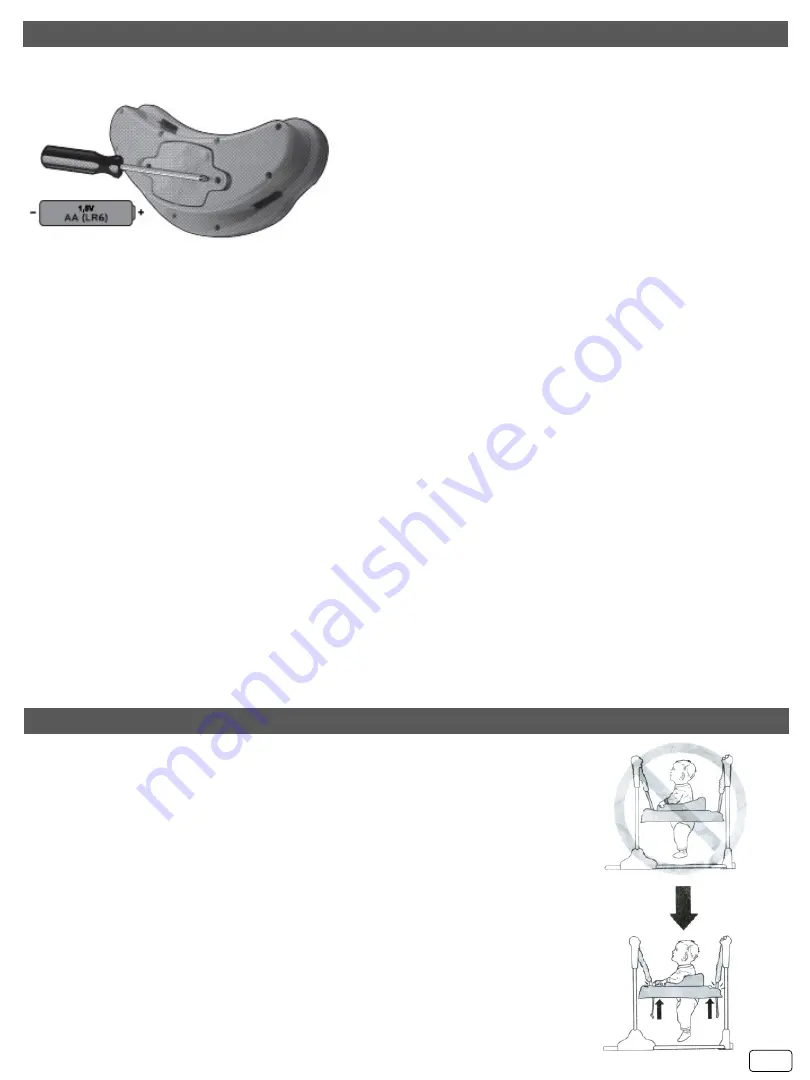
PLACING OF THE BATTERIES OF THE MUSIC TOY
In order to activate the functions of the music toy, you must place in the battery compartment
3 x 1.5V “AA” batteries:
1. Loosen the screws of the battery compartment lid
with a Phillips screwdriver and remove it.
2. Place 3 pieces 1.5V „АА” (LR6) alkaline batteries in
the battery compartment.
3. Put back the lid of the battery compartment and
tighten it with the screws.
4. When the sounds and the lights become weak or
they do not activate at all, you must replace the
batteries of the product, because they are most
probably discharged.
5. Only an adult must replace the batteries.
6. If this product starts to stop and go during operation you must reset the electronics: slide the
power/volume switch and turn it off and then back on.
Information for the safety of the batteries
In case of an emergency liquids may leak from the batteries, which may cause injuries due to
chemical burn or damage of the product. In order to avoid leakage of the batteries:
1. Do not mix discharged/ old with new batteries or of different types: alkaline, standard (carbon–
zinc) or rechargeable (nickel – cadmium).
2. Place the batteries correctly according to the polarity, marked on the internal side of the battery
compartment.
3. Remove the batteries if you are not going to use the product for a long period of time.
4. Always remove the discharged batteries from the toy.
5. Remove the batteries at the places intended for that purpose; not in the containers for household
waste. Do not throw the product in fire. The batteries may explode or leak.
6. Never shorten the batteries terminals.
7. Use batteries of a similar or equivalent type only.
8. Do not charge non-rechargeable batteries.
9. Remove the rechargeable batteries from the product before charging.
10. If you use removable rechargeable batteries, they must be recharged under adult supervision
only.
ADJUSTMENT OF THE HEIGHT OF THE SEAT
1. Put the child in the jumper seat. Check the distance between
child’s legs and the floor. The child’s toes must touch the floor
(without jumping). If the entire foot of the child touch the floor or if the
toes does not touch the floor, adjust the jumper’s height in one of the
3 position (position 1 is for the smaller and position 3 is for the
bigger children).
Take the child out of the seat.
- Lift the seat ring, so that the bottom of the seat to be facing you.
- Look where the strap is located and release it to the desired height
(1,2 or 3)
- Tighten the strap around the slot according to the desire height.
Push the strap until you hear “click’ and tighten it.
Repeat this to attach the other 2 straps to the seat tray
IMPORTANT! Ensure that whole 3 straps are placed on the same
height!
8
Содержание MUSICAL FRIENDS 668-27
Страница 2: ...PARTS ASSEMBLING A B C 2...
Страница 3: ...D E F 6 12 81 EN71 1 2 3 6 11 300 81 4 5 6 7 20 8 9 10 11 3 1 5V LR6 12 13 BG 3...
Страница 4: ...1 2 3 4 5 2 6 3 7 8 9 3 1 1 2 2 B 3 3 4 4 D 5 5 E 6 6 F 3 x 1 5V AA 1 2 3 1 5V LR6 3 4 5 6 1 4...
Страница 5: ...2 3 4 5 6 7 8 9 10 5 1 1 3 1 2 3 2...


