Crimp Force Monitor
Doc. No: TM-638007950
Release Date: 03-21-13
UNCONTROLLED COPY
Page 15 of 21
Revision: A
Revision Date: 03-21-13
4.2.1
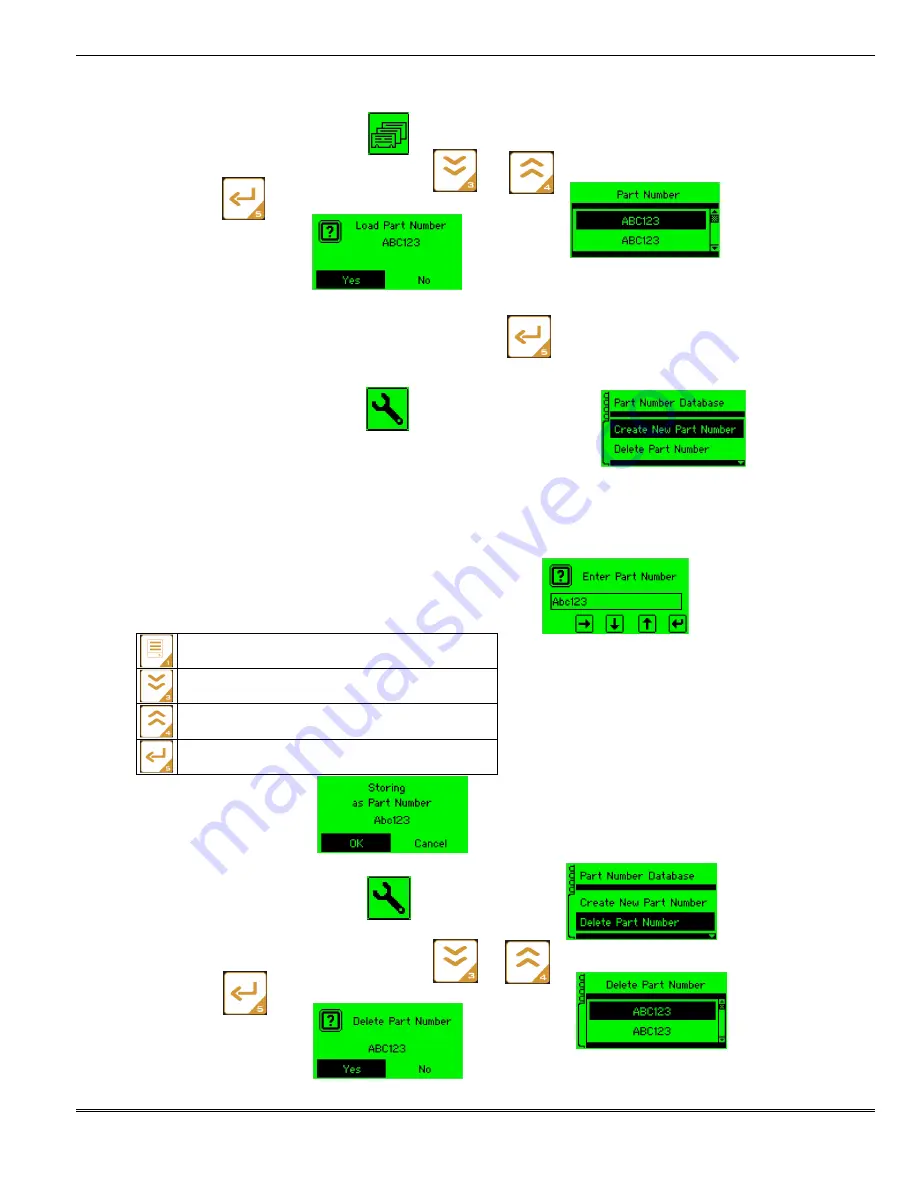
Loading a Part Number
1.
From the main menu, select the icon.
2.
Scroll through the part number list with the and keys.
3.
Press the button to select the highlighted part number.
4.
Confirm the selection.
5.
The crimp force monitor will automatically load the stored parameters and proceed to the learn screen.
6.
After the machine has been set-up and verified press to start the learn process.
4.2.2 Creating a New Part Number
1.
From the main menu, select the icon.
2.
Select
Create New Part Number
in the
Part Number Database
tab.
Configuration Parameters Stored in a New Part Number
The CFM will save the current configuration parameters under the entered name. The parameters from
the Signature Capture, Signature Analysis, Gross Tolerances and Learn Parameters are stored in the part
number database. Please refer to Appendix A for more information on the parameters stored for each
mode of operation.
3.
Enter a name for the new part number using the keypad.
Forward: Move the cursor to the next character
Down: Scroll down through available characters
Up: Scroll up through available characters
Enter: Finished entering Part Number name
4.
Confirm the selection.
4.2.3 Deleting a Part Number
1.
From the main menu, select the icon.
2.
Select
Delete Part Number
in the
Part Number Database
tab.
3.
Scroll through the part number list with the and keys.
4.
Press the button to delete the highlighted part number.
5.
Confirm the selection.


