background image

Betriebsmodi und Konfigurationen

ESP

NDL

ENG

ITA

FRA

DEU

DEU

24

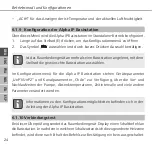
•  „ACtH“ für das Anzeigen der Ist-Temperatur und der aktuellen Luftfeuchtigkeit

6.1.9  Konfiguration der Alpha IP Basisstation

Über dieses Menü wird die Alpha IP Basisstation im Standalone-Betrieb konfiguriert.
1.  Lange auf das Stellrad (E) drücken, um das Konfigurationsmenü zu öffnen.
2.  Das Symbol „

“ auswählen und durch kurzes Drücken Auswahl bestätigen. 

Ist das Raumbediengerät an mehr als eine Basisstation angelernt, mit dem 
Stellrad die gewünschte Basisstation auswählen.

Im Konfigurationsmenü für die Alpha IP Basisstation stehen Geräteparameter 
„UnP1/UnP2“ und Kanalparamenter „ChAn“ zur Verfügung, über die Vor- und 
Nachlaufzeiten der Pumpe, Absenktemperaturen, Zeitintervalle und viele andere 
Parameter verändert werden.

Informationen zu den Konfigurationsmöglichkeiten befinden sich in der 
Anleitung der Alpha IP Basisstation.

6.1.10 Verbindungstest

Bei dieser Überprüfung sendet das Raumbediengerät Display einen Schaltbefehl an 
die Basisstation. Je nachdem in welchem Schaltzustand sich die zugeordnete Heizzone 
befindet, wird diese nach Erhalt des Befehls zur Bestätigung ein bzw. ausgeschaltet.

Содержание Alpha IP

Страница 1: ...RTD 61001 XX Alpha IP DEU FRA ITA ENG NDL ESP 32714 1819 ...

Страница 2: ...ESP NDL ENG ITA FRA DEU 2 DEU 6 3 4 ENG 32 FRA 58 NDL 84 ITA 111 ESP 138 1x 1x 2x 2x 2x 2x 3 0 x 30 mm 5 mm Key SGTIN QR 1x ...

Страница 3: ...DEU FRA ITA ENG NDL ESP 3 150 cm 30 cm ...

Страница 4: ...ESP NDL ENG ITA FRA DEU 4 B C D E A 1 2a 2b 2c ...

Страница 5: ...DEU FRA ITA ENG NDL ESP 5 3 4 ...

Страница 6: ... 2 3 Konformität 10 3 Funktion 10 4 Geräteübersicht 11 4 1 Technische Daten 12 5 Inbetriebnahme 13 5 1 Gerät anlernen 13 5 1 1 Anlernen ohne Alpha IP Access Point Standalone Betrieb 13 5 1 2 Anlernen an Alpha IP Access Point 15 5 2 Montage 16 5 2 1 Montage Aufputz 16 5 2 2 Auf einer Unterputzdose montieren 17 5 2 3 Mit Klebestreifen montieren 17 6 Betriebsmodi und Konfigurationen 18 6 1 Konfigurat...

Страница 7: ...tum und Uhrzeit einstellen 23 6 1 7 Offset Temperatur 23 6 1 8 Auswahl der Temperaturanzeige Luftfeuchtigkeit 23 6 1 9 Konfiguration der Alpha IP Basisstation 24 6 1 10 Verbindungstest 24 7 Bedienung 25 8 Anzeigen 26 8 1 Statusanzeigen 26 8 2 Fehleranzeigen 27 9 Batterien wechseln 29 10 Reinigen 30 11 Werkseinstellungen herstellen 30 12 Außerbetriebnahme 31 13 Entsorgen 31 ...

Страница 8: ...n Die Anleitung ist aufzubewahren und an nachfolgende Benut zer weiterzugeben Diese Anleitung sowie zusätzliche Alpha IP Systeminformationen sind stets aktuell unter www alphaip de zu finden Systeminformationen Funktionen und Bedienschritte aus der Anleitung des Alpha IP Access Point HAP 21001 sind zu berücksichtigen 1 2 Symbole Folgende Symbole werden in dieser Anleitung verwendet Hinweis Kennzei...

Страница 9: ...izkörperthermostaten drahtlosen Kommunikation im Alpha IP Netzwerk Jegliche andere Verwendung Änderungen und Umbauten sind ausdrücklich un tersagt Eine nicht bestimmungsgemäße Verwendung führt zu Gefahren für die der Hersteller nicht haftet und zum Gewährleistungs und Haftungsausschluss 2 2 Sicherheitshinweise Zur Vermeidung von Unfällen mit Personen und Sachschäden sind alle Sicher heitshinweise ...

Страница 10: ...Hiermit erklärt der Hersteller dass das Gerät der Richtlinie 2014 53 EU entspricht Der vollständige Text der EU Konformitätserklärung ist unter der folgenden Inter netadresse verfügbar www alphaip de 3 Funktion Mit dem Alpha IP Raumbediengerät Display RTD 61001 xx kann die Raumtemperatur zeitgesteuert eingestellt werden um so die Heizphasen individuellen Bedürfnissen anzupassen Das Raumbediengerät...

Страница 11: ...t weshalb Störungen nicht ausgeschlossen werden können Störein flüsse können z B hervorgerufen werden durch Schaltvorgänge Elektromotoren oder defekte Elektrogeräte Die Reichweite in Gebäuden kann stark von der im Außenbereich Frei feld abweichen 4 Geräteübersicht vgl Abb 1 auf Seite 4 A Montageunterteil B Raumbediengerät Display C Display D Systemtaste Anlerntaste und LED E abnehmbares Stellrad D...

Страница 12: ...len Bediensperre Soll Temperatur Datum Uhrzeit Offset 4 1 Technische Daten Geräte Kurzbezeichnung RTD 61001 xx Versorgungsspannung 2x 1 5 V LR03 Micro AAA Stromaufnahme 50 mA max Batterielebensdauer 2 Jahre typ Schutzart IP20 Verschmutzungsgrad 2 Umgebungstemperatur 0 bis 50 C Abmessungen B x H x T 86 x 86 x 24 6 mm 32 mm Gewicht 110 g inkl Batterien Funkfrequenz 868 3 MHz 869 525 MHz Empfängerkat...

Страница 13: ... mit anderen Geräten kommunizieren kann muss es zunächst angelernt werden Das Anlernen des Raumbediengerät Display erfolgt direkt an die Alpha IP Basissta tion oder im Verbund mit Heizkörperthermostaten an den Alpha IP Access Point Beim direkten Anlernen erfolgt die Konfiguration am Gerät beim Anlernen an den Access Point über die Alpha IP App 5 1 1 Anlernen ohne Alpha IP Access Point Standalone B...

Страница 14: ... An der Alpha IP Basisstation siehe Anleitung Alpha IP Basisstation den gewünsch ten Kanal auswählen 2 Für 4 Sekunden die Systemtaste der Alpha IP Basisstation drücken bis die LED der Systemtaste schnell orange blinkt 9 9 Die Geräte LED beginnt orange zu blinken 3 Raumbediengerät Display vom Montageunterteil abnehmen vgl Abb 3 auf Seite 5 4 Isolierstreifen aus dem Batteriefach herausziehen oder Ba...

Страница 15: ...hone öffnen 2 Den Menüpunkt Gerät Anlernen auswählen 3 Das Raumbediengerät Display vom Montageunterteil lösen vgl Abb 3 auf Seite 5 4 Isolierstreifen aus dem Batteriefach herausziehen oder Batterien einlegen vgl Abb 4 auf Seite 5 Falls Batterien eingelegt sind die Systemtaste D kurz drücken um den Anlernmodus zu aktivieren 5 Das Gerät erscheint automatisch in der Alpha IP App 6 Zur Bestätigung die...

Страница 16: ...e Leitungen an der Position verlaufen 2 Das Gerät falls erforderlich mit einem geeigneten Schraubendreher vom Monta geunterteil lösen vgl Abb 3 auf Seite 5 3 Das Montageunterteil an die Montageposition halten Auf die korrekte Ausrich tung des Montageunterteils achten 4 Das Montageunterteil horizontal ausrichten 5 Zwei diagonal gegenüberliegende Bohrlöcher anhand des Montageunterteils an zeichnen v...

Страница 17: ...ose verwendet werden 1 Das Gerät falls erforderlich mit einem geeigneten Schraubendreher vom Monta geunterteil lösen vgl Abb 3 auf Seite 5 2 Das Montageunterteil horizontal auf der Unterputzdose ausrichten 3 Das Montageunterteil mittels passenden Schrauben montieren vgl Abb 2b auf Seite 4 4 Das Raumbediengerät Display auf das Montageunterteil aufsetzen und in die Klammern einrasten vgl Abb 3 auf S...

Страница 18: ... 4 Die Schutzfolie von der zweiten Seite des Klebestreifens entfernen 5 Das Gerät an der gewünschte Position horizontal ausrichten und festdrücken 6 Betriebsmodi und Konfigurationen Über das Stellrad vgl E in Abb 1 stehen am Gerät die Bedienfunktionen zur Verfü gung Die Einstellungen werden je nach Konfiguration an die Alpha IP Basisstation oder an die Alpha IP App übertragen 6 1 Konfigurationsmen...

Страница 19: ...ngstest nur im Standalone Betrieb auswählbar 6 1 1 Automatikmodus Zur Aktivierung des Automatikbetriebs wie folgt vorgehen 1 Lange auf das Stellrad E drücken um das Konfigurationsmenü zu öffnen 2 Das Symbol auswählen und durch kurzes Drücken Auswahl bestätigen 6 1 2 Manueller Betrieb Zur Aktivierung des manuellen Betriebs wie folgt vorgehen 1 Lange auf das Stellrad E drücken um das Konfigurationsm...

Страница 20: ...ahl bestätigen Anzeige S zeigt die Startzeit An zeige E die Endzeit 4 Durch Drehen des Stellrads die Temperatur einstellen die während der definier ten Zeit gehalten werden soll und Auswahl durch kurzes Drücken bestätigen 6 1 4 Bediensperre Die Bedienung am Gerät kann gesperrt werden um das ungewollte Verändern von Einstellungen z B durch versehentliches Berühren zu verhindern Um die Bediensperre ...

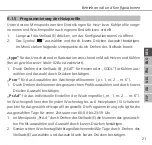
Страница 21: ...eizen oder COOL für Kühlen aus wählen und Auswahl durch Drücken bestätigen Pr nr für das Auswählen der Wochenprofilnummer nr 1 nr 2 nr 6 1 Durch Drehen die Nummer des gewünschten Profils auswählen und durch kurzes Drücken Auswahl bestätigen Pr Ad für das individuelle Einstellen der Wochenprofile nr 1 nr 2 nr 6 Im Wochenprofil werden für jeden Wochentag bis zu 6 Heizphasen 13 Schaltzeit punkte für ...

Страница 22: ... Drücken auswählen und bestätigen 7 Vorgang für den gesamten Zeitraum von 00 00 bis 23 59 Uhr wiederholen Wochenprofil 1 3 Heizen 4 6 Kühlen Bei einem CO Signal wechselt das Programm von Heizen bzw Kühlen automatisch nach folgendem Schema 1 Heizen zu 4 Kühlen 2 Heizen zu 5 Kühlen 3 Heizen zu 6 Kühlen bzw umgekehrt OSSF für das Aktivieren On bzw Deaktivieren OFF der Smart Start Stop Funktion auswäh...

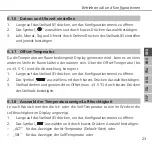
Страница 23: ...t Temperatur bis zu 3 5 C wird die Abweichung korrigiert 1 Lange auf das Stellrad E drücken um das Konfigurationsmenü zu öffnen 2 Das Symbol auswählen und durch kurzes Drücken Auswahl bestätigen 3 Stellrad drehen und gewünschten Offset max 3 5 C durch kurzes Drücken des Stellrads bestätigen 6 1 8 Auswahl der Temperaturanzeige Luftfeuchtigkeit Je nach Wunsch werden die Ist oder die Soll Temperatur ...

Страница 24: ...mit dem Stellrad die gewünschte Basisstation auswählen Im Konfigurationsmenü für die Alpha IP Basisstation stehen Geräteparameter UnP1 UnP2 und Kanalparamenter ChAn zur Verfügung über die Vor und Nachlaufzeiten der Pumpe Absenktemperaturen Zeitintervalle und viele andere Parameter verändert werden Informationen zu den Konfigurationsmöglichkeiten befinden sich in der Anleitung der Alpha IP Basissta...

Страница 25: ...atur bis zum nächs ten Schaltzeitpunkt bestehen Danach wird das eingestellte Heizprofil wieder aktiviert Im manuellen Betrieb bleibt die Temperatur bis zur nächsten manuel len Änderung erhalten Manueller und Automatikbetrieb Das Stellrad 3 Sekunden drücken um zwischen den Betriebsarten manuell und Automatik zu wechseln Im Automa tikbetrieb ist das über die Alpha IP App eingestellte Heizprofil akti...

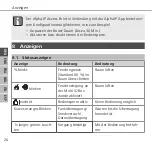
Страница 26: ...ensperre 8 Anzeigen 8 1 Statusanzeigen Anzeige Bedeutung Bedeutung blinkt Feuchtegrenze Standard 60 im Raum überschritten Raum lüften blinken Feuchteeingang an der Multi IO Box wurde aktiviert Raum lüften leuchtet Bediensperre aktiv Keine Bedienung möglich Kurzes oranges Blinken Funkübertragung Sendeversuch Datenübertragung Warten bis die Übertragung beendet ist 1x langes grünes Leuch ten Vorgang ...

Страница 27: ...er App eingeben 1x oranges und 1x grünes Leuchten nach Einlegen der Batterien Testanzeige Wenn Testanzeige erloschen fortfahren 8 2 Fehleranzeigen Anzeige Bedeutung Lösung Batteriespannung gering Batterien wechseln blinkt Verbindung zum Al pha IP Access Point fehlerhaft Die Verbindung prüfen Kurzes oranges Leuch ten nach Empfangsmel dung Batterien leer Batterien wechseln ...

Страница 28: ...t Duty Cycle Den Befehl erneut senden bei Duty Cycle überschrei tung nach spätestens einer Stunde Gerät auf einen Defekt überprüfen z B mechani sche Blockade Funkstörungen beseitigen 6x langes rotes Blinken Gerät defekt Die Anzeige in der App beachten Das Gerät durch einen Fachhändler überprüfen lassen Das Gerät austauschen ...

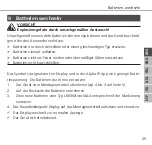
Страница 29: ...s Feuer werfen oder übermäßiger Wärme aussetzen Batterien nicht kurzschließen Das Symbol signalisiert im Display und in der Alpha IP App eine geringe Batte riespannung Die Batterien durch neue ersetzen 1 Das Gerät vom Montageunterteil abnehmen vgl Abb 3 auf Seite 5 2 Auf der Rückseite die Batterien entnehmen 3 Zwei neue Batterien vom Typ LR03 Micro AAA entsprechend der Markierung einsetzen 4 Das R...

Страница 30: ...tel lungen verloren Alpha IP Access Point App Ö Ö Das Gerät befindet sich innerhalb der Funkreichweite des Alpha IP Access Points 1 Sicherstellen dass das Gerät aktiviert ist 2 Das Gerät aus der App löschen Standalone Betrieb 1 Das Gerät vom Montageunterteil abnehmen vgl Abb 3 auf Seite 5 2 Die Batterien entnehmen 3 Die Batterien entsprechend der Markierung in den Batteriefächern wieder ein setzen...

Страница 31: ...8 9 9 Das Gerät führt einen Neustart durch 9 9 Die Werkseinstellungen sind wiederhergestellt 12 Außerbetriebnahme 1 Das Raumbediengerät Display vom Montageunterteil abnehmen vgl Abb 3 auf Seite 5 2 Auf der Rückseite die Batterien entnehmen 3 Das Gerät demontieren und ordnungsgemäß entsorgen 13 Entsorgen Das Gerät nicht im Hausmüll entsorgen Elektronische Geräte sind entspre chend der Richtlinie üb...

Страница 32: ...Function 36 4 Device overview 37 4 1 Technical data 38 5 Commissioning 39 5 1 Teaching the device 39 5 1 1 Teach in without Alpha IP Access Point stand alone operation 39 5 1 2 Teaching in to Alpha IP Access Point 40 5 2 Installation 41 5 2 1 On surface installation 42 5 2 2 Installation in flush type box 43 5 2 3 Installation with adhesive strips 43 6 Operating modes and configuration 44 6 1 Conf...

Страница 33: ... Setting date and time 48 6 1 7 Offset temperature 49 6 1 8 Selection of temperature display humidity 49 6 1 9 Configuration of Alpha IP Base station 50 6 1 10 Connection test 50 7 Operation 51 8 Displays 52 8 1 Status indications 52 8 2 Error indications 53 9 Changing the batteries 55 10 Cleaning 55 11 Restoring the factory settings 56 12 Decommissioning 57 13 Disposal 57 ...

Страница 34: ...efore commencing any work with the device These instructions must be kept and to be handed over to future users The latest version of these instructions of Additional Alpha IP System in formation can be found under www alphaip de System information functions and operating steps from the instructions for Alpha IP Access Point HAP 21001 must be observed 1 2 Symbols The following symbols are used in ...

Страница 35: ... systems FAL x10x1 xxN1 or connected Alpha IP radiator thermostats a wireless communication in the Alpha IP network Every other use modification and conversion is expressively forbidden Improper use leads to dangers the manufacturer cannot be held liable for and to an exclu sion of warranty and liability 2 2 Safety notes All safety notes in these instructions must be observed in order to avoid acc...

Страница 36: ...y Declaration is available under the fol lowing URL www alphaip de 3 Function The Alpha IP room control unit Display RTD 61001 xx allows to set the room temper ature in a time controlled way in order to adapt the heating phases to your individual requirements The room control unit measures the temperature and transmits these data cyclically to the Alpha IP Base station FAL x10x1 xxN1 or to connect...

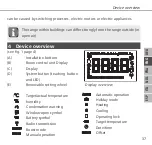
Страница 37: ...vice overview see fig 1 page 4 A Installation bottom B Room control unit Display C Display D System button teaching button and LED E Removable setting wheel Target actual temperature humidity Condensation warning Window open symbol Battery symbol Radio transmission Boost mode Manual operation Automatic operation Holiday mode Heating Cooling Operating lock Target temperature Date time Offset Displa...

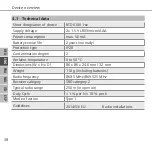
Страница 38: ... service life 2 years normally Protection type IP20 Contamination degree 2 Ambient temperature 0 to 50 C Dimensions W x H x D 86 x 86 x 24 6 mm 32 mm Weight 110 g including batteries Radio frequency 868 3 MHz 869 525 MHz Receiver category SRD category 2 Typical radio range 250 m in open air Duty Cycle 1 per h 10 per h Mode of action Type 1 Guidelines 2014 53 EU Radio installations ...

Страница 39: ...to the Alpha IP Access Point In case of direct teaching in the configuration is done on the device itself in case of teaching in via the Access Point it is done via the Alpha IP app 5 1 1 Teach in without Alpha IP Access Point stand alone operation For teach in keep a minimum distance of 50 cm between the devices The teach in process can be interrupted by shortly pressing the teach in key again Th...

Страница 40: ... page 5 4 Pull out the insulating strip from the battery compartment or insert batteries see fig 4 page 5 If batteries have already been inserted press the system key D for at least 4 seconds in order to activate the teach in mode 9 9 The teach in mode is activated automatically for 3 minutes 9 9 The device LED flashes in orange The LED will light up in green after a successful teach in process If...

Страница 41: ...e teach in mode 5 The device is displayed automatically in the Alpha IP app 6 Enter the last four ciphers of the device number SGTIN or scan the supplied QR code for confirmation The device number can be found below the QR code or in the battery compartment The LED will light up in green after a successful teach in process If the LED lights up red repeat the process 7 Follow the instructions in th...

Страница 42: ...installation bottom correctly 4 Align the installation bottom horizontally 5 Mark two diagonally opposite bore holes using the installation bottom see fig 2a page 4 If wood walls are present the screws can be screwed directly into the wood Pre drilling with a 1 5 mm wood drill can facilitate the installation of the screws 6 For stone walls drill the holes at the marked positions with a 5 mm masonr...

Страница 43: ...he installation bottom and latch it into the clips see fig 3 page 5 5 2 3 Installation with adhesive strips Depending on the ground installation can be performed using the supplied dou ble sided adhesive tapes Installation is possible on different grounds as e g ma sonry furniture tiles or glass If the installation is done with adhesive strips the installation surface must be smooth level undamage...

Страница 44: ...e pending on the configuration the settings are transmitted to the Alpha IP Base station or to the Alpha IP app 6 1 Configuration menu The configuration menu is opened by pressing and holding the setting wheel E The following symbols menus are available by rotating the setting wheel shortly pressing the wheel will select them Section Display Meaning 6 1 1 Automatic operation 6 1 2 Manual operation...

Страница 45: ... open the configuration menu 2 Select the symbol and confirm the selection by shortly pressing the setting wheel 6 1 2 Manual operation Proceed as follows to activate manual operation 1 Press and hold the setting wheel E in order to open the configuration menu 2 Select the symbol and confirm the selection by shortly pressing the setting wheel 3 Turn the setting wheel in order to set the desired te...

Страница 46: ...o be kept during the defined time by turning he setting wheel and confirm your selection by shortly pressing the wheel 6 1 4 Operating lock The operation at the device can be locked in order to prevent the unintentional change of settings e g by accidental touch Proceed as follows in order to activate or deactivate the operation lock 1 Press and hold the setting wheel E in order to open the config...

Страница 47: ...wheel E to HEAT for heating or COOL for cooling and con firm by shortly pressing the wheel Pr nr for the selection of the week profile number no 1 no 2 no 6 1 Select the number of the desired profile and confirm the selection by shortly pressing the setting wheel Pr Ad for the individual setting of the week profiles no 1 no 2 no 6 Up to 6 heating phases 13 switch over points can be set in the week...

Страница 48: ...e 1 3 Heating 4 6 Cooling In case of a CO signal the program changes from heating or cooling automatically according to the following scheme 1 heating to 4 cooling 2 heating to 5 cooling 3 heating to 6 cooling resp vice versa OSSF serves for activating On or deactivating OFF the Smart Start Stop function Once this function is activated the system calculates in a self teaching way when it must star...

Страница 49: ...Select the symbol and confirm the selection by shortly pressing the set ting wheel 3 Turn the setting wheel and confirm the desired offset max 3 5 C by shortly pressing the wheel 6 1 8 Selection of temperature display humidity The display alternately shows the actual or the set temperature as well as the hu midity as required 1 Press and hold the setting wheel E in order to open the configuration ...

Страница 50: ...parameters UnP1 UnP2 and the channel parameters ChAn are avail able in the configuration menu for the Alpha IP Base station these parameters al low the modification of the pump lead and follow up times setback temperatures time intervals and many other parameters Information on the configuration possibilities can be found in the Alpha IP Base station instructions 6 1 10 Connection test During this...

Страница 51: ...next switch over point is reached After that the set heating profile will be re activated In manual operation the temperature remains until the next manual change is made Manual and automatic operation Press the setting wheel for 3 seconds in order to change between manual and automatic operating mode In automatic operation the heating profile set with the Alpha IP app is active In manual op erati...

Страница 52: ...eactivation of the operating lock 8 Displays 8 1 Status indications Display Meaning Meaning flashes Humidity limit standard 60 in the room exceeded Ventilate room flash Humidity input activated at Multi IO Box Ventilate room lights up Operating lock active No operation possible Short flashing in orange Radio transmis sion Transmission attempt data trans mission Wait until the transmission has fini...

Страница 53: ...ur ciphers of the device serial number into the app 1 illumination in orange and 1 in green after in serting batteries Test indication Proceed after the LEDs are out 8 2 Error indications Display Meaning Solution Battery voltage low Change the batteries flashes Bad connection to the Alpha IP Access Point Check the connection Short illumination in orange after reception signal Batteries dead Change...

Страница 54: ...ached duty cycle Re send the command in case of exceeding the duty cycle after one hour at the latest Check the device for a defect e g mechanical blocking Eliminate radio interference 6 x long illumination in red Device defective Observe the indication in the app Have the device checked by a specialised dealer Replace the device ...

Страница 55: ...the Alpha IP app indicates low battery voltage Replacing the batteries 1 Take off the device from the installation bottom see fig 3 page 5 2 Remove the batteries from the back side 3 Insert two new batteries type LR03 Micro AAA according to the marking 4 Position the room control unit Display onto the installation bottom and latch it in 9 9 The display changes to normal indication 9 9 The device i...

Страница 56: ...the device from the app Stand alone operation 1 Take off the device from the installation bottom see fig 3 page 5 2 Remove the batteries 3 Re insert the batteries according to the marking in the battery compartments At the same time press the system key C for 4 seconds until the LED flashes rapidly in orange 4 Release the system key C 5 Press the system key C again for 4 seconds until the LED ligh...

Страница 57: ...he device with domestic waste Electronic devices prod ucts must be disposed of according to the Directive for Waste Electrical and Electronic Equipment at the local collection points for waste electronic equip ment This manual is protected by copyright All rights reserved It may not be copied repro duced abbreviated or transmitted neither in whole nor in parts in any form neither mechanically nor ...

Страница 58: ...onsignes de sécurité 62 3 Fonctionnement 62 4 Vue d ensemble de l appareil 63 4 1 Caractéristiques techniques 64 5 Mise en service 65 5 1 Programmation de l appareil 65 5 1 1 Programmation sans Alpha IP Access Point mode Standalone 66 5 1 2 Programmation sur l Alpha IP Access Point 67 5 2 Montage 68 5 2 1 Montage en surface 68 5 2 2 Montage encastré 69 5 2 3 Montage par bandes adhésives 69 6 Modes...

Страница 59: ... heure 75 6 1 7 Température Offset 75 6 1 8 Sélection de l affichage de la température humidité de l air 75 6 1 9 Configuration de la station de base Alpha IP 76 6 1 10 Test de connexion 77 7 Utilisation 77 8 Affichage 78 8 1 Affichage des statuts 78 8 2 Affichage des erreurs 79 9 Batterien wechseln 81 10 Nettoyer 82 11 Rétablir les réglages de l usine 82 12 Mise hors service 83 13 Élimination 83 ...

Страница 60: ...ion avant d utiliser l appareil Le manuel d utilisation doit être conservé et transmis à l utilisateur suivant Ce manuel les informations complémentaires du système Alpha IP actuels sont toujours disponibles sur www alphaip de Les informations système les fonctions et les étapes d utilisation du ma nuel de l Alpha IP Access Point HAP 21001 doivent être respectées 1 2 Symboles Les symboles suivants...

Страница 61: ...1 xxN1 ou de thermostats d ambiance Alpha IP raccordés communication sans fil sur le réseau Alpha IP Toute autre utilisation modification et transformation est formellement interdite Une utilisation non conforme représente des dangers pour lesquels le fabricant décline toute responsabilité 2 2 Consignes de sécurité Toutes les consignes de sécurité de ce manuel doivent être respectées afin d éviter...

Страница 62: ...r la présente le fabricant déclare que l appareil satisfait à la directive 2014 53 EU Le texte complet de la déclaration de conformité est disponible à l adresse in ternet suivante www alphaip de 3 Fonctionnement Le thermostat d ambiance à écran Alpha IP RTD 61001 xx permet de régler la tem pérature en fonction de l heure pour adapter les phases de chauffae individuelle ment selon le besoins Le th...

Страница 63: ...interférences ne sont pas exclues Les in terférences peuvent être provoquées par exemple par des sauts d émetteur des moteurs électriques ou des appareils électriques défectueux La portée dans le bâtiment peut être très différente de celle à l extérieur champ libre 4 Vue d ensemble de l appareil cf fig 1 page 4 A Base de montage B Écran thermostat d ambiance C Écran D Touche système touche de prog...

Страница 64: ...tique Mode vacances Chauffage Refroidissement Verrouillage Température de consigne Date heure Offset 4 1 Caractéristiques techniques Brève description de l appareil RTD 61001 xx Tension d alimentation 2x 1 5 V LR03 Micro AAA Courant absorbé 50 mA max Durée de vie de la batterie 2 ans type Type de protection IP20 Niveau d encrassement 2 température ambiante de 0 à 50 C Dimensions l x H x P 86 x 86 ...

Страница 65: ...grammation de l appareil Pour que l écran de thermostat d ambiance puisse être intégré au système IP et communiquer avec d autres appareils il doit d abord être programmé La program mation du thermostat d ambiance à écran s effectue directement sur la station de base Alpha IP ou en relation avec des thermostats de radiateurs sur le Alpha IP Access Point En cas de programmation directe la configura...

Страница 66: ... d ambiance à écran doit être programmé sur la tation de base Al pha IP les deux appareils à raccorder doivent être mis en mode programmation 1 Sélectionner le canal souhaité sur la tation de base Alpha IP voir le manuel de la station de base Alpha IP Appuyer sur la touche système de la station de base Alpha IP pendant 4 secondes jusqu à ce que la LED orange de la touche système clignote rapidemen...

Страница 67: ... L Alpha IP Access Point a été installé par le biais de l application Alpha IP cf ma nuel HAP 21001 1 Ouvrir l application Alpha IP sur le smartphone 2 Sélectionner l option de menu Programmation appareil 3 Retirer le thermostat d ambiance à écran de la base de montage cf fig 3 page 5 4 Retirer les bandes isolantes du compartiment à piles ou insérer des piles cf fig 4 page 5 Si les piles sont insé...

Страница 68: ...en surface par vissage avec les bandes adhésives fournies ou un boitier UP 5 2 1 Montage en surface Ö Ö Sélectionner une position de montage adaptée 1 S assurer qu aucun câble ne passe sur cette position 2 Si nécessaire dévisser l appareil de la base de montage à l aide d un tournevis cf fig 3 page 5 3 Maintenir la base de montage en position de montage Veiller à la bonne orien tation de la base d...

Страница 69: ...de fixation sur la base de montage peuvent être utilisés pour le montage sur un boitier encastré 1 Si nécessaire dévisser l appareil de la base de montage à l aide d un tournevis cf fig 3 page 5 2 Orienter la base de montage à l horizontale sur le boitier encastré 3 Monter la base de montage à l aide de vis adaptées cf fig 2b page 4 4 Poser et enclencher le thermostat d ambiance à écran dans les c...

Страница 70: ...g 2c page 4 4 Retirer le film de protection ur les deux faces de la bande adhésive 5 Orienter l appareil à l horizontale dans la position souhaitée et appuyer 6 Modes d exploitation et configuration La molette cf E fig 1 permet de mettre les fonctions de commande à disposition sur l appareil Selon la configuration les réglages peuvent être transmis à la station de base Alpha IP ou à l application ...

Страница 71: ... 6 Date et heure 6 1 7 Température Offset 6 1 8 Sélection de l affichage de la température humidité de l air 6 1 9 Configuration station de base 6 1 10 Test de connexion Sélectionnable uniquement en mode Standalone 6 1 1 Mode automatique Procéder comme suit pour l activation du mode automatique 1 Appuyer longuement sur la molette E pour ouvrir le menu de configuration 2 Sélectionner le symbole et ...

Страница 72: ... l activation du mode vacances 1 Appuyer longuement sur la molette E pour ouvrir le menu de configuration 2 Sélectionner le symbole et valider en appuyant brièvement 3 Tourner la molette pour régler la date et l heure de début et de fin Confirmer chaque donnée en appuyant brièvement L affichage S indique le temps de départ et l affichage E celle de fin 4 En tournant la molette régler la températur...

Страница 73: ...esoins individuels 1 Appuyer longuement sur la molette E pour ouvrir le menu de configuration 2 Sélectionner le symbole et valider la sélection en appuyant brièvement Tourner la molette pour faire afficher les options de menu suivantes dans le menu type pour la commutation de la station de base entre les modes chauffage et refroidisement inactif si boitier Multi IO raccordé 1 Avec la molette E sél...

Страница 74: ... appuyant brièvement 3 Valider l heure de démarrage 00 00 et valider en appuyant brièvement sur la molette E 4 Sélectionner et valider la température souhaitée pour le démarrage en tournant appuyant sur la molette 5 Sélectionner l heure affichée sur l écran en tournant la molette et valider 6 Sélectionner et valider la température souhaitée pour la période sélectionnée en tournant appuyant sur la ...

Страница 75: ...jour en tournant appuyant sur la molette E 6 1 7 Température Offset Dans la mesure où la température est mesurée sur le thermostat d ambiance à écran la température peut être plus ou moins élevée dans différents endroits de la même pièce La température Offset jusqu à 3 5 C corrige la différence 1 Appuyer longuement sur la molette E pour ouvrir le menu de configuration 2 Sélectionner le symbole et ...

Страница 76: ... la station de base Alpha IP en mode Standalone 1 Appuyer longuement sur la molette E pour ouvrir le menu de configuration 2 Sélectionner le symbole et valider en appuyant brièvement Si le thermostat d ambiance est programmé sur plus d une station de base sélectionner la station souhaitée avec la molette Le menu de configuration de la station de base Alpha IP comprend les paramètres de l appareil ...

Страница 77: ...ont ransmis aux thermostats de radia teurs raccordés ainsi qu à l application Alpha IP et y sont affichés Température Tourner la molette vers la droite ou la gauche pour modifier la température En mode automatique la température réglée reste la même jusqu au prochain temps de commutation Ensuite le profil de chauffage réglé se réactive En mode manuel la température réglée reste la même jusqu à la ...

Страница 78: ...ion avec l application Alpha IP permet d autres possibilités de configuration comme par exemple Ajustement de la durée de Boost jusqu à 30 min Activer ou déactiver le verrouillage 8 Affichage 8 1 Affichage des statuts Affichage Signification Signification clignote Seuil d humidité standard 60 dans la pièce dépassé Aérer la pièce clignotent L entrée humidité sur la Multi IO Box a été activée Aérer ...

Страница 79: ... s Mode paramétrage actif Saisir les quatre derniers carac tères du numéro de série de l appareil sur l application Voyant 1 x orange et 1 x vert après l insertion des piles Affichage test Continuer lorsque les affi chages test s éteignent 8 2 Affichage des erreurs Affichage Signification Solution Tension piles faible Remplacer les piles clignote Connexion à l Alpha IP Access Point dé faillante Co...

Страница 80: ... en cas de dépassement du Duty Cycle après un délai maxi mum d une heure Contrôler l absence de défauts sur l appareil par exemple un blocage mé canique Éliminer les dysfonctionne ments radio 6 x longs clignotements rouges Appareil défectueux Respecter l affichage de l application Faire contrôler l appareil par un commerçant spé cialisé Remplacer l appareil ...

Страница 81: ...pas jeter les piles dans le feu ou les soumettre à une température trop élevée Ne pas court circuiter les piles Le symbole sur l écran et sur l application Alpha IP signale un niveau faible des piles Remplacer les piles par des nouvelles 1 Retirer l appareil de la base de montage cf fig 3 page 5 2 Retirer les piles au dos 3 Insérer deux nouvelles piles de type LR03 Micro AAA conformément au marqua...

Страница 82: ...tion Ö Ö L appareil se situe dans le champ de portée du Alpha IP Access Point 1 Veiller à ce que l appareil soit activé 2 Supprimer l appareil de l application Mode Standalone 1 Retirer l appareil de la base de montage cf fig 3 page 5 2 Retirer les piles 3 Remettre les piles dans le compartiment dans le respect du marquage En même temps laisser la touche système C enfoncée pendant 4 secondes jusqu...

Страница 83: ...cant 2018 9 9 Les réglages de l usine sont rétablis 12 Mise hors service 1 Retirer le thermostat d ambiance de la base de montage cf fig 3 page 5 2 Retirer les piles au dos 3 Démonter l appareil et l éliminer de manière conforme 13 Élimination Ne pas jeter l appareil dans les ordures ménagères Les appareils électroniques doivent être éliminés conformément à la directive relative aux appareils élec...

Страница 84: ...eidsinstructies 87 2 3 Conformiteit 88 3 Functie 88 4 Overzicht toestel 89 4 1 Technische gegevens 90 5 Inbedrijfname 91 5 1 Toestel eigen maken 91 5 1 1 Eigen maken zonder Alpha IP Access Point Standalone bedrijf 91 5 1 2 Eigen maken aan Alpha IP Access Point 93 5 2 Montage 94 5 2 1 Montage opbouw 94 5 2 2 Montage inbouwstopcontact 95 5 2 3 Montage kleefbanden 96 6 Bedrijfsmodi en configuratie 96...

Страница 85: ...en 99 6 1 6 Datum en uur instellen 101 6 1 7 Offset temperatuur 101 6 1 8 Selectie van de temperatuuraanduiding luchtvochtigheid 102 6 1 9 Configuratie van het Alpha IP Basisstation 102 6 1 10 Verbindingstest 103 7 Bediening 104 8 Aanduidingen 105 8 1 Statusaanduidingen 105 8 2 Foutaanduidingen 106 9 Accu s vervangen 108 10 Reinigen 109 11 Werkinstellingen opmaken 109 12 Buitenbedrijfname 110 13 A...

Страница 86: ...elezen te worden De handleiding dient bewaard en aan de volgende gebruiker doorgegeven te worden Deze handleiding bijkomende Alpha IP systeeminformatie zijn steeds ac tueel te vinden onder www alphaip de Met systeeminformatie functies en bedieningsstappen uit de handleiding van het Alpha IP Access Point HAP 21001 dient rekening gehouden te worden 1 2 Symbolen Volgende symbolen worden in deze handl...

Страница 87: ...P radiatorthermostaten draadloze communicatie in het Alpha IP netwerk Elk ander gebruik wijzigingen en ombouwen zijn uitdrukkelijk verboden Een niet doelgericht gebruik leidt tot gevaren waarvoor de fabrikant geen aansprakelijkheid aanvaardt en tot uitsluiting van garantie en aansprakelijkheid 2 2 Veiligheidsinstructies Ter vermijding van ongevallen met persoonlijk letsel en materiële schade diene...

Страница 88: ...op kinderen 2 3 Conformiteit Hiermee verklaart de fabrikant dat het toestel overeenstemt met de richtlijn 2014 53 EU De volledige tekst van de EU conformiteitsverklaring is beschikbaar onder het volgende Internetadres www alphaip de 3 Functie Met het Alpha IP kamerbedieningstoestel Display RTD 61001 xx kan de kamertem peratuur tijdsgestuurd ingesteld worden om zo de verwarmingsfasen aan de indi vi...

Страница 89: ...ieve overdrachtweg gerealiseerd waardoor storingen niet kunnen uitgesloten worden Storingsinvloe den kunnen bv uitgelokt worden door schakelingen elektromotoren of defecte elektrische toestellen De reikwijdte in gebouwen kan sterk afwijken van deze buiten openlucht 4 Overzicht toestel zie afb 1 pagina 4 A Montageonderdeel B Kamerbedieningstoestel Display C Display D Systeemtoets Eigen maken toets ...

Страница 90: ...odus Vakantiemodus Verwarmen Koelen Bedieningsblokkering Streeftemperatuur Datum Uur Offset 4 1 Technische gegevens Korte benaming toestel RTD 61001 N1 Voedingsspanning 2x 1 5 V LR03 Micro AAA Stroomopname 50 mA max Levensduur accu 2 jaar typ Beschermingsklasse IP20 Vervuilingsgraad 2 Omgevingstemperatuur 0 tot 50 C Afmetingen B x H x D 86 x 86 x 24 6 mm 32 mm Gewicht 110 g incl accu s Zendfrequen...

Страница 91: ...n met andere toestellen zou kunnen communiceren dient het vervolgens eigen gemaakt te worden Het eigen maken van het kamerbedie ningstoestel Display gebeurt direct aan het Alpha IP Basisstation of in verbinding met radiatorthermostaten aan het Alpha IP Access Point Bij het direct eigen ma ken gebeurt de configuratie aan het toestel bij het eigen maken aan het Access Point via de Alpha IP App 5 1 1...

Страница 92: ...t te worden 1 Aan het Alpha IP Basisstation zie handleiding Alpha IP Basisstation het gewens te kanaal selecteren 2 Gedurende 4 seconden de systeemtoets van het Alpha IP Basisstation indrukken tot de LED van de systeemtoets snel oranje knippert 9 9 De toestel LED begint oranje te knipperen 3 Kamerbedieningstoestel Display van het montageonderdeel afnemen zie afb 3 pagina 5 4 Isoleerbanden uit het ...

Страница 93: ...ndleiding HAP 21001 1 De Alpha IP App op de smartphone openen 2 Het menupunt Toestel eigen maken selecteren 3 Het kamerbedieningstoestel Display van het montageonderdeel losmaken zie afb 3 pagina 5 4 Isoleerbanden uit het accuvak trekken of accu s plaatsen zie afb 4 pagina 5 Indien accu s geplaatst zijn de systeemtoets D kortstondig indrukken om de eigen maken modus te activeren 5 Het toestel vers...

Страница 94: ...f op een inbouwstopcontact 5 2 1 Montage opbouw Ö Ö Een gepaste montagepositie kiezen 1 Zich ervan verzekeren dat geen leidingen aan de positie verlopen 2 Het toestel indien nodig met een gepaste schroevendraaier van het montageon derdeel losmaken zie afb 3 pagina 5 3 Het montageonderdeel aan de montagepositie houden Op de correcte uitrichting van het montageonderdeel letten 4 Het montageonderdeel...

Страница 95: ... het montageonderdeel plaatsen en inklikken zie afb 3 pagina 5 5 2 2 Montage inbouwstopcontact De bevestigingsgaten op het montageonderdeel kunnen voor de montage op een inbouwstontact gebruikt worden 1 Het toestel indien nodig met een gepaste schroevendraaier van het montageon derdeel losmaken zie afb 3 pagina 5 2 Het montageonderdeel horizontaal op het inbouwstopcontact uitrichten 3 Het montageo...

Страница 96: ...losmiddelvrij te zijn 1 De beschermfolie van één zijde van de kleefbanden verwijderen 2 De kleefbanden aan de achterzijde van het montageonderdeel in de daarvoor voorziene verdiepingen bevestigen zie afb 2c pagina 4 3 De beschermfolie van de tweede zijde van de kleefbanden verwijderen 4 Het toestel aan de gewenste positie horizontaal uitrichten en vastdrukken 6 Bedrijfsmodi en configuratie Via het...

Страница 97: ...che bedrijfsmodus 6 1 2 Manuele bedrijfsmodus 6 1 3 Vakantiemodus 6 1 4 Bedieningsblokkering 6 1 5 Programmering van de verwarmingsprofielen 6 1 6 Datum en uur 6 1 7 Offset temperatuur 6 1 8 Selectie van de temperatuuraanduidingen lucht vochtigheid 6 1 9 Configuratie Basisstation 6 1 10 Verbindingstest enkel selecteerbaar in het Standalone bedrijf 6 1 1 Automatische bedrijfsmodus Voor het activere...

Страница 98: ...de gewenste temperatuur in te stellen 6 1 3 Vakantiemodus De vakantiemodus kan gebruikt worden wanneer voor een bepaalde tijdsperi ode bv tijdens een vakantie of een party een vaste temperatuur aangehouden dient te worden Voor het activeren van de vakantiemodus als volgt te werk gaan 1 Langdurig op het instelwiel E drukken om het configuratiemenu te openen 2 Het symbool selecteren en door kortston...

Страница 99: ...lecteren en door kortstondig indrukken de selectie beves tigen 3 Door draaien On selecteren om de bedieningsblokkering te activeren of OFF om de bedieningsblokkering te desactiveren Selectie door kort drukken bevestigen 6 1 5 Programmering van de verwarmingsprofielen Onder dit menupunt worden instellingen voor verwarmings resp koelprofielen uitgevoerd en weekprofielen volgens eigen vereisten opgem...

Страница 100: ...oor de geselecteerde dagen voor een tijdsperiode van 00 00 tot 23 59 uur 1 In het menupunt Pr Ad door draaien van het instelwiel E het nummer van het gewenste profiel selecteren en selectie door kort drukken bevestigen 2 Gewenste weekdag werkdagen weekend alle dagen door draaien van het instel wiel E selecteren en selectie door kort drukken bevestigen 3 Starttijd 00 00 uur door kort drukken van he...

Страница 101: ...het met het verwarmen koelen dient te beginnen om op de gedefinieerde verwarmingstijden exact de aangegeven temperatuur klaar te hebben 6 1 6 Datum en uur instellen 1 Langdurig op het instelwiel E drukken om het configuratiemenu te openen 2 Het symbool selecteren en door kortstondig indrukken de selectie beves tigen 3 Jaar maand dag en uur door draaien drukken van het instelwiel E instellen en tel...

Страница 102: ...eid op het display aangeduid 1 Langdurig op het instelwiel E drukken om het configuratiemenu te openen 2 Het symbool selecteren en door kortstondig indrukken de selectie bevestigen ACT voor het aanduiden van de reële temperatuur Standaardwaarde of SEt voor het aanduiden van de streeftemperatuur of ACtH voor het aanduiden van de reële temperatuur en de huidige luchtvoch tigheid 6 1 9 Configuratie v...

Страница 103: ...llen en vele andere parameters gewijzigd worden Informatie over de configuratiemogelijkheden bevinden zich in de hand leiding van het Alpha IP Basisstation 6 1 10 Verbindingstest Bij deze controle zendt het kamerbedieningstoestel Display een schakelcomman do naar het Basisstation Al naargelang in welke schakeltoestand de aangesloten verwarmingszone zich bevindt wordt deze na het ontvangen van het ...

Страница 104: ...mingsprofiel opnieuw geactiveerd In de manuele bedrijfsmodus blijft de temperatuur tot de volgende manuele wijziging behouden Manuele en automatische bedrijfsmodus Het instelwiel gedurende 3 se conden indrukken om tussen de bedrijfsmodi manueel en automatisch te wis selen In de automatische bedrijfsmodus is het via het Alpha IP App ingestelde verwarmingsprofiel actief In de manuele bedrijfsmodus k...

Страница 105: ...n de bedieningsblokkering 8 Aanduidingen 8 1 Statusaanduidingen Aanduiding Betekenis Betekenis knippert Vochtigheidsgrens standaard 60 in de kamer overschreden Kamer verluchten knipperen Vochtingang bij Multi IO Box werd geac tiveerd Kamer verluchten licht op Bedieningsblokkering actief aanduiding Geen bediening mogelijk Kortstondig oranje knip peren Zendoverdracht Zend verzoek Gegevens overdracht...

Страница 106: ... cijfers van het serienummer van het toestel in het App invoeren 1x oranje en 1x groen oplichten na het plaatsen van de accu s Testaanduiding Wanneer testaanduidingen ver dwijnen verder gaan 8 2 Foutaanduidingen Aanduiding Betekenis Oplossing Accuspanning laag Accu s vervangen knippert Verbinding naar Alpha IP Access Point defect De verbinding controleren Kortstondig oranje op lichten na ontvangst...

Страница 107: ...iet bereikt Duty Cycle Het commando opnieuw zenden bij Duty Cy cle overschrijding na uiter lijk één uur Toestel testen op een defect bv mechanische blokkade Zendstoringen verhelpen 6x langdurig rood knip peren Toestel defect Letten op de aanduidingen in het App Het toestel door een vak man laten testen Het toestel vervangen ...

Страница 108: ...rpen of blootstellen aan overmatige warmte Accu s nooit kortsluiten Het symbool signaleert op het display en in het Alpha IP App een geringe ac cuspanning De accu s door nieuwe vervangen 1 Het toestel van het montageonderdeel afnemen zie afb 3 pagina 5 2 Aan de achterzijde de accu s uitnemen 3 Twee nieuwe accu s van het type LR03 Micro AAA overeenkomstig de mar kering plaatsen 4 Het kamerbediening...

Страница 109: ...pp Ö Ö Het toestel bevindt zich binnen de zendreikwijdte van de Alpha IP Access Points 1 Zich ervan verzekeren dat het toestel geactiveerd is 2 Het toestel uit de app wissen Standalone bedrijf 1 Het toestel van het montageonderdeel nemen zie afb 3 pagina 5 2 De accu s uitnemen 3 De accu s overeenkomstig de markering opnieuw in het accuvak plaatsen Ge lijktijdig de systeemtoets C gedurende 4 second...

Страница 110: ...9 De werkinstellingen worden opnieuw opgemaakt 12 Buitenbedrijfname 1 Het kamerbedieningstoesteldisplay van het montageonderdeel nemen zie afb 3 pagina 5 2 Aan de achterzijde de accu s uitnemen 3 Het toestel demonteren en reglementair als afval verwerken 13 Als afval verwerken Toestel niet met het huishoudelijk afval verwerken Elektronische toestellen dienen overeenkomstig de richtlijn over elektr...

Страница 111: ...115 3 Funzionamento 115 4 Panoramica dell apparecchio 116 4 1 Caratteristiche tecniche 117 5 Messa in funzione 118 5 1 Apprendimento dell apparecchio 118 5 1 1 Apprendimento senza Alpha IP Access Point funzionamento standalone 119 5 1 2 Apprendimento sull Alpha IP Access Point 120 5 2 Montaggio 121 5 2 1 Montaggio sopra intonaco 121 5 2 2 Montaggio con presa a incasso 122 5 2 3 Montaggio con nastr...

Страница 112: ...e la data e l ora 129 6 1 7 Temperatura di offset 129 6 1 8 Selezione della visualizzazione della temperatura umidità dell aria 129 6 1 9 Configurazione della stazione di base Alpha IP 130 6 1 10 Prova di collegamento 131 7 Utilizzo 131 8 Visualizzazione 132 8 1 Indicazioni di stato 132 8 2 Indicazioni di errore 133 9 Batterien wechseln 135 10 Pulizia 136 11 Ripristinare le impostazioni di fabbr 1...

Страница 113: ...ompleta le presenti istruzioni Le istruzioni devono essere conservate e consegnate all utilizzatore successivo Le presenti istruzioni nonché ulteriori informazioni di sistema relative all apparecchio Alpha IP sono sempre disponibili nella versione di volta in volta aggiornata sul sito www alphaip de Devono essere osservati le informazioni di sistema le funzioni e i passag gi di lavoro descritti pe...

Страница 114: ...a ovvero la regolazione dei riscalda menti a pavimento FAL x10x1 xx o dei termostati per corpi caloriferi Alpha collegati attraverso il comando della stazione di base Alpha IP la comunicazione senza fili all interno della rete Alpha IP Qualsiasi altro utilizzo modifica o trasformazione è espressamente vietato Un utilizzo non appropriato può provocare pericoli per i quali il costruttore non è re sp...

Страница 115: ...i alla costante irradiazione sola re o ad altre fonti di calore al freddo o a sollecitazioni meccaniche Assicurar si che nessun bambino giochi con il prodotto o l imballaggio Ove necessario sorvegliare i bambini 2 3 Conformità Con la presente il produttore dichiara che l apparecchio è conforme alla direttiva 2014 53 UE Il testo completo della dichiarazione di conformità è disponibile al se guente ...

Страница 116: ... radio Homema tic HmIP La trasmissione via radio viene effettuata tramite una via di trasmissione non esclusiva pertanto non è possibile escludere la presenza di disturbi Interferenze possono essere causate ad esempio da processi di commutazione motori elettrici o apparecchi elettronici difettosi La portata all interno degli edifici può variare notevolmente rispetto a quella in spazi esterni ovver...

Страница 117: ...mento automatico Modo vacanza Riscaldamento Raffreddamento Blocco del funzionamento Temperatura desiderata Data ora Offset 4 1 Caratteristiche tecniche Denominazione breve dell ap parecchio RTD 61001 xx Tensione di alimentazione 2x 1 5 V LR03 Micro AAA Potenza assorbita 50 mA max Durata in servizio delle batterie 2 anni di norma Tipo di protezione IP20 Grado di impurità 2 Temperatura ambientale Da...

Страница 118: ...finché l unità di controllo Display possa essere integrata nel sistema Alpha IP e comunicare con gli altri apparecchi è necessario eseguirne per prima cosa l ap prendimento L apprendimento dell unità di controllo ambientale Display avviene direttamente sulla stazione di base Alpha IP o in presenza di termostati per corpi caloriferi collegati sull Alpha IP Access Point In caso di apprendimento dire...

Страница 119: ...i disinseri sce automaticamente dopo 30 secondi Se l apprendimento dell unità di controllo ambientale Display avviene sulla stazione di base Alpha IP i due apparecchi da collegare devono essere entrambi in modo di apprendimento Selezionare sulla stazione di base Alpha IP vedere istruzioni della stazione di base Alpha IP il canale desiderato 1 Pulsar la tecla del sistema de la estación base Alpha I...

Страница 120: ...procedura 5 1 2 Apprendimento sull Alpha IP Access Point Per poter eseguire il comando tramite l app Alpha IP l apprendimento dell unità RTD 61001 xx deve avvenire tramite l Access Point HAP 21001 Eseguire l appren dimento dell apparecchio come segue Ö Ö L Alpha IP Access Point è stato impostato tramite l app Alpha IP vedere istru zioni HAP 21001 1 Aprire l app Alpha IP sullo smartphone 2 Selezion...

Страница 121: ...n rosso ripetere la procedura 7 Seguire le istruzioni sull app 5 2 Montaggio Grazie al funzionamento a batteria il luogo di montaggio può essere selezionato in modo flessibile Il montaggio avviene sopra intonaco tramite delle viti e il nastro adesivo fornito o su una presa a incasso 5 2 1 Montaggio sopra intonaco Ö Ö Selezionare una posizione di montaggio appropriata 1 Assicurarsi che in prossimit...

Страница 122: ...ecedentemente marcati uti lizzando una punta per pietra da 5 mm 7 Inserire i tasselli nei fori 8 Montare la base di montaggio utilizzando le viti fornite 9 Applicare l apparecchio sulla base di montaggio e innestarlo in posizione cfr fig 3 pagina 5 5 2 2 Montaggio con presa a incasso I fori di fissaggio sulla base di montaggio possono essere utilizzati per il montaggio su una presa a incasso 1 Ove...

Страница 123: ...i montag gio deve essere liscio in piano integro pulito e privo di grassi e solventi A seconda del substrato il montaggio può essere effettuato con il nastro biade sivo fornito È possibile eseguire il montaggio su diversi substrati ad es pareti in muratura mobili piastrelle o vetro 1 Selezionare una posizione di montaggio appropriata 2 Rimuovere la pellicola di protezione da un lato del nastro ade...

Страница 124: ...ne Con una pressione prolungata della rotella di regolazione E si apre il menu di configurazione Ruotando la rotella sono disponibili i seguenti simboli menu che possono essere selezionati tramite una breve pressione della rotella stessa Capitolo Simbolo visualizzato Significato 6 1 1 Esercizio automatico 6 1 2 Funzionamento manuale 6 1 3 Modo vacanza 6 1 4 Blocco del funzionamento 6 1 5 Programma...

Страница 125: ...configurazione 2 Selezionare il simbolo e confermare la scelta con una breve pressione 6 1 2 Funzionamento manuale Per attivare il funzionamento manuale procedere come segue 1 Premere la rotella di regolazione E in maniera prolungata per aprire il menu di configurazione 2 Selezionare il simbolo e confermare la scelta con una breve pressione 3 Ruotare la rotella di regolazione per impostare la temp...

Страница 126: ... il periodo definito e confermare la selezione con una breve pressione 6 1 4 Blocco del funzionamento È possibile bloccare il funzionamento dell apparecchio per impedire la modifica involontaria delle impostazioni ad es dovuta a un contatto non intenzionale Per attivare o disattivare il blocco del funzionamento procedere come segue 1 Premere la rotella di regolazione E in maniera prolungata per ap...

Страница 127: ...COOL per il raffreddamento e confermare la selezione premendo Pr nr per la selezione del numero del profilo settimanale n 1 n 2 n 6 1 Selezionare ruotando il numero del profilo desiderato e confermare la selezione con una breve pressione Pr Ad per la regolazione individuale dei profili settimanali n 1 n 2 n 6 Nel profilo settimanale è possibile impostare fino a 6 fasi di riscaldamento 13 orari di ...

Страница 128: ...iderata per il periodo di tempo appena impostato e confermarla con una pressione 7 Ripetere la procedura fino a coprire l intero periodo dalle 0 00 alle 23 59 Profilo settimanale 1 3 Riscaldamento 4 6 Raffreddamento Con un segnale CO il programma passa da riscaldamento a raffredda mento in maniera automatica secondo il seguente schema 1 riscaldamento a 4 raffreddamento 2 riscaldamento a 5 raffredd...

Страница 129: ... punto della stanza potrà essere più freddo o più caldo La diffe renza può essere corretta per mezzo della temperatura di offset fino a 3 5 C 1 Premere la rotella di regolazione E in maniera prolungata per aprire il menu di configurazione 2 Selezionare il simbolo e confermare la scelta con una breve pressione 3 Ruotare la rotella di regolazione per selezionare la temperatura di offset desi derata ...

Страница 130: ...n zionamento standalone 1 Premere la rotella di regolazione E in maniera prolungata per aprire il menu di configurazione 2 Selezionare il simbolo e confermare la scelta con una breve pressione Se l apprendimento dell unità di controllo ambientale è stato effettuato con più di una stazione di base selezionare con la rotella di regolazione la stazione di base desiderata Nel menu di configurazione de...

Страница 131: ...confermare la scelta con una breve pressione 7 Utilizzo Tramite la rotella di regolazione cfr lettera E nella fig 1 è possibile impostare le varie funzioni dell unità di controllo ambientale Le impostazioni vengono trasmes se ai termostati per corpi caloriferi associati e all app Alpha IP e qui visualizzate Temperatura ruotare la rotella di regolazione verso destra o verso sinistra per modificare ...

Страница 132: ...o con termostati per corpi caloriferi premere brevemente la rotella di regolazione per attivare la funzione boost che consente un riscaldamento breve e rapido La funzione boost rimane attiva per 5 minuti L Alpha IP Access Point in combinazione con l app Alpha IP offre ulteriori possibilità di configurazione come ad esempio la modifica della durata della funzione boost fino a 30 min l attivazione e...

Страница 133: ...ati Attendere fino al termine della trasmissione 1x accensione lunga in verde Procedura confermata Proseguire con l uso Breve lampeggiamento in arancione ogni 10 s Modo di apprendi mento attivo Inserire nell app le ultime quat tro cifre del numero di serie dell apparecchio 1x accensione lunga in aran cione e 1x in verde dopo l inserimento delle batterie Indicazione di prova Una volta terminata l i...

Страница 134: ... batterie Accensione lunga in rosso Errore di trasmissio ne limite di invio raggiunto Duty Cycle Inviare nuovamente il co mando entro al massimo un ora in caso di supera mento del Duty Cycle Verificare la presenza di difetti nell apparecchio ad es blocchi meccanici Eliminare i disturbi radio 6x lampeggiamenti lun ghi in rosso Apparecchio difet toso Attenersi a quanto indica to sull app Far control...

Страница 135: ...o sottoporle a temperature troppo elevate Non sottoporre le batterie a corti circuiti Il simbolo segnala sul display e sull app Alpha IP una tensione bassa delle bat terie Sostituire le vecchie batterie 1 Estrarre l apparecchio dalla base di montaggio cfr fig 3 pagina 5 2 Estrarre le batterie sul tergo 3 Inserire due batterie nuove del tipo LR03 Micro AAA secondo la polarità illustrata 4 Applicare...

Страница 136: ...arecchio si trova all interno del campo radio dell Alpha IP Access Point 1 Assicurarsi che l apparecchio sia attivato 2 Cancellare l apparecchio dall App Funzionamento standalone 1 Estrarre l apparecchio dalla base di montaggio cfr fig 3 pagina 5 2 Estrarre le batterie 3 Reinserire le batterie nel vano batterie secondo la polarità illustrata Contem poraneamente tenere premuto il tasto di sistema C...

Страница 137: ...maltimento Non smaltire l apparecchio con i rifiuti domestici Gli apparecchi elettrici de vono essere smaltiti in conformità con la Direttiva sui rifiuti di apparecchia ture elettriche ed elettroniche tramite gli appositi punti di raccolta locali Il presente manuale è protetto dalla legge sul diritto d autore Tutti i diritti riservati Esso non può essere fotocopiato riprodotto accorciato o trasmes...

Страница 138: ...Conformidad 142 3 Función 142 4 Vista general del dispositivo 143 4 1 Datos técnicos 144 5 Puesta en marcha 145 5 1 Programación del dispositivo 145 5 1 1 Programación sin Alpha IP Access Point modo independiente 145 5 1 2 Programación en Alpha IP Access Point 147 5 2 Montaje 148 5 2 1 Montaje en superficie 148 5 2 2 Montaje en un cajetín empotrado 149 5 2 3 Montaje con cinta adhesiva 150 6 Modo d...

Страница 139: ...figuración de fecha y hora 155 6 1 7 Temperatura Offset 155 6 1 8 Selección de la indicación de temperatura humedad del aire156 6 1 9 Configuración de la estación base Alpha IP 156 6 1 10 Prueba de conexión 157 7 Manejo 157 8 Indicaciones 159 8 1 Indicaciones de estado 159 8 2 Indicaciones de error 160 9 Cambio de baterías 161 10 Limpieza 162 11 Restablecer los ajustes de fábrica 162 12 Puesta fue...

Страница 140: ...ositivo Conserve el manual y entréguelo al siguiente usuario Este manual así como la información adicional del sistema Alpha IP están siempre disponibles en su versión actualizada en www alphaip de Deben tenerse en cuenta tanto la información del sistema como las fun ciones y las indicaciones de funcionamiento del manual del Alpha IP Ac cess Point HAP 21001 1 2 Simbolos En este manual se utilizan ...

Страница 141: ...e calefacciones por suelo radiante FAL x10x1 xxN1 o termostatos de radiador Alpha IP conectados la comunicación inalámbrica en la red de Alpha IP Cualquier otra utilización alteraciones o modificaciones están expresamente pro hibidas El uso no conforme a lo previsto provoca peligros de los que el fabricante no se hace responsable y causa la anulación de la garantía así como la exonera ción de la r...

Страница 142: ...urarse de que los niños no jueguen con el producto o el embalaje En caso necesario su pervisar a los niños 2 3 Conformidad Por la presente el fabricante declara que el dispositivo corresponde a la Directiva 2014 53 EU El texto completo de la Declaración de Conformidad CE está disponi ble en la dirección de Internet siguiente www alphaip de 3 Función Con el dispositivo de control ambiental Alpha IP...

Страница 143: ...sión por radio se realiza por una vía de transmisión no exclusiva por lo que no es posible descartar interferencias Las interferencias pueden ser debidas p ej a operaciones de conmutación motores eléctricos o aparatos eléctricos defectuosos El alcance en el interior del edificio puede diferir en gran medida del al cance en el exterior campo abierto 4 Vista general del dispositivo véase fig 1 la pá...

Страница 144: ...o Modo vacaciones Calefacción Refrigeración Bloqueo de funcionamiento Temperatura deseada Fecha hora Offset 4 1 Datos técnicos Nombre del dispositivo RTD 61001 xx Tensión de alimentación 2x 1 5 V LR03 Micro AAA Consumo de corriente 50 mA máx Duración de las baterías 2 años típicamente Tipo de protección IP20 Grado de contaminación 2 Temperatura ambiente 0 50 C Dimensiones An x Al x Pr 86 x 86 x 24...

Страница 145: ...ay en el siste ma Alpha IP y que pueda comunicarse con otros dispositivos primero es necesa rio programarlo La programación del dispositivo de control ambiental Display se efectúa directamente en la estación base Alpha IP o en conexión con termostatos de radiador en el Alpha IP Access Point Para la programación directa la configura ción se produce en el dispositivo la programación en el Access Poi...

Страница 146: ... al modo de programación 1 Seleccionar el canal deseado en la estación base Alpha IP véase el manual de la estación base Alpha IP 2 Activar el modo de programación de la estación base mediante una pulsación larga 9 9 El LED del dispositivo comienza a parpadear en naranja 3 Extraer el dispositivo de control ambiental Display de la base de montaje véase fig 3 la pág 5 4 Extraer la cinta de aislamien...

Страница 147: ... HAP 21001 1 Iniciar la aplicación Alpha IP en el smartphone 2 Seleccionar el punto del menú Programar dispositivo 3 Soltar el dispositivo de control ambiental Display de la base de montaje véase fig 3 la pág 5 4 Extraer la cinta de aislamiento del compartimento de la batería o introducir las baterías véase fig 4 la pág 5 Si hay baterías insertadas apretar la tecla del sistema D para activar el mo...

Страница 148: ...a cinta adhesiva suministrada o en un cajetín empotrado 5 2 1 Montaje en superficie Ö Ö Seleccionar una posición de montaje adecuada 1 Asegurarse de que no pasen conductos por la posición seleccionada 2 En caso necesario soltar el dispositivo de la base de montaje con la ayuda de un destornillador apropiado véase fig 3 la pág 5 3 Sostener la base de montaje en la posición de montaje Prestar atenci...

Страница 149: ...ar el dispositivo en la base de montaje y encajar véase fig 3 la pág 5 5 2 2 Montaje en un cajetín empotrado Los orificios de fijación de la base de montaje pueden utilizarse para el montaje en un cajetín empotrado 1 En caso necesario soltar el dispositivo de la base de montaje con la ayuda de un destornillador apropiado véase fig 3 la pág 5 2 Alinear horizontalmente la base de montaje en el cajet...

Страница 150: ...ana estar en buen estado limpia así como libre de grasas y disolventes 2 Retirar la lámina protectora de uno de los lados de la cinta adhesiva 3 Fijar la cinta adhesiva en los huecos previstos de la parte posterior de la base de montaje véase fig 2c la pág 4 4 Retirar la lámina protectora del otro lado de la cinta adhesiva 5 Alinear el dispositivo horizontalmente en la posición deseada y presionar...

Страница 151: ...nificado 6 1 1 Modo automático 6 1 2 Modo manual 6 1 3 Modo vacaciones 6 1 4 Bloqueo de funcionamiento 6 1 5 Programación de los perfiles de calefacción 6 1 6 Fecha y hora 6 1 7 Temperatura Offset 6 1 8 Selección de la indicación de temperatura humedad del aire 6 1 9 Configuración de la estación base 6 1 10 Prueba de conexión solo puede seleccionarse en modo independiente 6 1 1 Modo automático Par...

Страница 152: ...ebe mantenerse una temperatura fija durante un periodo de tiempo determinado p ej durante las vacaciones o una fiesta Para la activación del modo vacaciones se procede de la siguiente manera 1 Pulsar la rueda de selección E hasta que se abra el menú de configuración 2 Seleccionar el símbolo y confirmar mediante una breve pulsación 3 Ajustar la hora de Inicio Fin y la fecha girando la rueda de sele...

Страница 153: ...de los perfiles de calefacción En esta opción del menú se efectúan los ajustes para los perfiles de calefacción o refrigeración y los perfiles semanales de acuerdo a sus necesidades 1 Pulsar la rueda de selección E hasta que se abra el menú de configuración 2 Seleccionar el símbolo y confirmar la selección mediante una breve pul sación En el menú están disponibles los siguientes subapartados al gi...

Страница 154: ... rueda de selección E y confirmar la selección mediante una breve pulsación 2 Seleccionar día de la semana días laborables fin de semana o todos los días girando la rueda de selección E y confirmar la selección mediante una breve pulsación 3 Confirmar la hora de inicio 00 00 mediante una breve pulsación de la rueda de selección E 4 Seleccionar y confirmar la temperatura deseada para la hora de ini...

Страница 155: ...n refrigeración con el fin de proporcionar exactamente la temperatura establecida en los periodos de tiempo definidos 6 1 6 Configuración de fecha y hora 1 Pulsar la rueda de selección E hasta que se abra el menú de configuración 2 Seleccionar el símbolo y confirmar mediante una breve pulsación 3 Ajustar el año mes día y hora girando y pulsando respectivamente la rueda de selección E 6 1 7 Tempera...

Страница 156: ... abra el menú de configuración 2 Seleccionar el símbolo y confirmar mediante una breve pulsación ACT para mostrar la temperatura real Valor por defecto o SEt para mostrar la temperatura deseada o ACtH para mostrar la temperatura real y la humedad del aire actual 6 1 9 Configuración de la estación base Alpha IP Desde este menú se configura la estación base Alpha IP en modo independiente 1 Pulsar la...

Страница 157: ... de conexión Durante esta prueba el dispositivo de control ambiental Display transmite una orden de conmutación a la estación base Dependiendo del estado de conmutación en el que se encuentre la zona de calentamiento asignada esta confirmará la recepción de la orden activándose o desactivándose 1 Pulsar la rueda de selección E hasta que se abra el menú de configuración 2 Seleccionar el símbolo y c...

Страница 158: ...al y automático En el modo automático está activo el perfil de calefacción establecido en la aplica ción Alpha IP En el modo manual la temperatura puede ajustarse en el dispo sitivo o a través de la aplicación y se mantiene hasta la siguiente modificación manual Función Boost para el uso con termostatos de radiador Pulsar brevemen te la rueda de selección con el fin de activar la función Boost par...

Страница 159: ...Box Ventilar habitación iluminado Indicación de bloqueo de funcionamiento activado Operación imposible Breve parpadeo naranja Radiotransmisión in tento de transmisión transmisión de datos Esperar hasta que la transmi sión se haya completado 1x iluminación verde larga Proceso confirmado Continuar con el manejo Breve parpadeo naranja cada 10 s El modo de programa ción está activo Introducir los últi...

Страница 160: ...ería baja Cambiar las baterías parpadea Fallo de conexión con Alpha IP Access Point Comprobar la conexión Breve iluminación na ranja tras aviso de re cepción Baterías agotadas Cambiar las baterías Larga iluminación roja Error de transmi sión límite de trans misión alcanzado Duty Cycle Transmitir la orden de nue vo en caso de exceder el Duty Cycle después de no más de una hora Comprobar si el dispo...

Страница 161: ...ente pueden explotar y dañar el aparato o herir al usuario Reemplace las pilas sólo con pilas del mismo tipo o de tipo equivalente Nunca recargue pilas No arroje las pilas al fuego ni las exponga a un calor excesivo No cortocircuite las pilas La señal en el display y en la aplicación Alpha IP indica que las baterías están bajas Reemplazar las baterías por otras nuevas 1 Retirar el dispositivo de l...

Страница 162: ...os ajustes de fábrica Al restablecer los ajustes de fábrica se perderán todos los ajustes efectuados Alpha IP Access Point aplicación Ö Ö El dispositivo se encuentra dentro del alcance radioeléctrico del Alpha IP Access Point 1 Asegurar que el dispositivo esté activado 2 Borrar el dispositivo de la aplicación Modo independiente 1 Retirar el dispositivo de la base de montaje véase fig 3 la pág 5 2 ...

Страница 163: ...Volver a soltar la tecla del sistema C 9 9 El dispositivo se reinicia 9 9 Se han restablecido los ajustes de fábrica 12 Puesta fuera de servicio 1 Retirar el dispositivo de control ambiental Display de la base de montaje véase fig 3 la pág 5 2 Extraer las baterías de la parte posterior 3 Desmontar el dispositivo y eliminarlo de la forma apropiada 13 Eliminación No eliminar el dispositivo con los r...

Страница 164: ...133960 1819 ...

Отзывы: