background image

05 of 05

STEP 7

Assembly is complete. The bed is ready to use now!

NOTE: Hardware may loosen over time. Periodically check that all connections are tight.

STEP 8

8.1 Carefully position the assembled bed to the desired location by four adults.

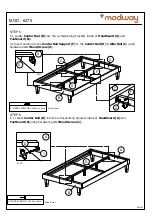
7.1 Insert the Slats (G) into the end Slat cap (4) & (5) and fix it to the corresponding holes
on the Side Rail (C).

4. BED SLAT SIDE FITTER 

x 26pcs

5. BED SLAT CENTER FITTER 

x 13pcs

Palm

Palm

G

4

G

G

5

STEP 7.2

STEP7.1

5

4

G

4

G

MOD - 6270

Содержание MOD-6707

Страница 1: ...n the room that it is intended for Approximate assembly time 20 minutes 3 Please do not use any tools other than those provided or recommended in these instructions 4 Please do not throw away any of t...

Страница 2: ...DBOARD 4 5 6 7 8 9 1 2 3 A B 3 1 2 MOD 6356 Note Hardware may loosen over time Periodically check that all connections are tight 1 1 Open the zip at the Headboard A backing and take out all the parts...

Страница 3: ...2x bolt 4 for the thicker bed frame and 2x Bolt 5 for the thinner bed frame Before inserting each bolt place a Spring Washer 7 and Flat Washer 6 on each bolt Then fit a Flat Washer 6 on the screw as i...

Страница 4: ...til advised to tighten Depending on use it may be necessary to tighten the components from time to time so please save tools that have been provided 6 Please keep all fitting out of reach of children...

Страница 5: ...Rail D attach by screwing the protruding nut into the corresponding holes H 3 A B D E 3 PVC BLACK WASHER x 4pcs 7 PROTECTIVE DISC BLACK x 4pcs MOD 6270 1 1 Insert and secure the Bed leg H to the Headb...

Страница 6: ...s C to the Headboard A Footboard B using hardware part Allen Key 6 3 1 Loosen the pre inserted bolt on the Headboard A Footboard B using hardware part Allen Key 6 6 A B C A B 6 6 M5 ALLEN KEY BALL SHA...

Страница 7: ...ponding brackets inside of Headboard A and Footboard B using hardware parts Wood Screw 1 5 1 Locate Center Rail D into the corresponding brackets inside of Headboard A and Footboard B 5 2 Insert and s...

Страница 8: ...nections are tight STEP 8 8 1 Carefully position the assembled bed to the desired location by four adults 7 1 Insert the Slats G into the end Slat cap 4 5 and fix it to the corresponding holes on the...

Отзывы: