Modern Forms
www.modernforms.com
$4;:1 J-D
Headquarters/Eastern Distribution Center
->.;>$->7>5B1J$;>@+-?45:3@;:",
$4;:1 J-D
Western Distribution Center
>/45.-80B1J#:@->5;
$4;:1 J-D
Modern Forms retains the right to modify the design of our products at any time as part of the company's continuous improvement program.
JUNE 2019
Mounting Screw
Qty: 4pcs + 1 Extra
7601010101
5/32-32x1/2
zinc plating
Washer
Qty: 4pcs + 1 Extra
13005011
zinc plating
Wood block
Qty: 1 Extra
19003127
CHANGING TO DECORATIVE WOOD CANOPY
ACCESSORIES
REMOVING THE FIXTURE AND METAL CANOPY
PREPARATION
1. Shut off the power at the circuit breaker and remove
existing fixture, including the mounting hardware.
2.
Remove the wire nut and separate the wire (shown #1)
.
3.
Remove the Strain Relief (shown #2) and use washer to un-
screw hex nuts (shown #3)
.
4.
Remove the cable and panel from the canopy assembly
.
5.
Install the wire with the cable-gripper thr
ough
the
decorative
wood panel
.
6.
Secure the cable-gripper from the decorative wood panel
onto the canopy with washer and nut.
7.
Install the mounting screw and washer to secure the canopy
with the decorative wood panel.
8.
Wire the cable thr
ough
the strain relief (shown #4)
.
9.
Connect the transformer input wires with supply wires
as shown
(Fig. 2). Make
sure that all wire connectors
are secure.
10.
Place the canopy over the mounting plate,
secure with mounting screws (E).
Cable-gripper
Strain Relief
Mounting
Screw
Washer
Canopy
Cable-gripper
Decorative
W
ood
P
anel
Hex Nuts
Washer
Panel
Canopy
Wire Connector
Washer
Hex Nuts
E
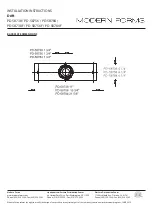
INSTALLATION INSTRUCTION
S
Drift
PD-58738 / PD-58756 / PD-58784
/
PD-58738F / PD-58756F / PD-58784F


