background image

30

10

DISASSEMBLY PROCEDURE

PKH-P35GALH, PKH-P50GALH
PKA-RP35GAL, PKA-RP50GAL

OPERATION PROCEDURE

PHOTOS & ILLUSTRATION

1. REMOVE THE LOWER SIDE OF THE INDOOR UNIT FROM

THE INSTALLATION PLATE. 

(1) Remove the left / right corner box of the indoor unit.
(2) Hold and pull down the lower and both ends of the indoor

unit, and remove the  

section from the square hole.

(Refer to the figure 2.1)
Or remove the front panel and push the  

▼  

section down

by using hexagonal wrench ,etc. from the front side.
(Refer to the figure 2.2).

(3) Unhook the top of the indoor unit from the back plate catch.

2. REMOVING THE FRONT PANEL.

(1) Open the front grille. 
(2) Remove the terminal block cover with a screw. 
(3) Remove the screw 3caps then remove the set 3screws.
(4) After removing the lower side of the front panel a little,

remove it as pulling toward upper. 

3. REMOVING THE INDOOR CONTROLLER BOARD.

(1) Remove the terminal block cover.
(2) Remove the front panel. (see the photo 1)
(3) Remove the electrical parts box(2screws).
(4) Remove the electrical parts box cover(1screw).
(5) Disconnect the connector on the controller board and

remove the controller board by Pulling up the hook of the 
controller case.

w

To smooth works, hang the side hooks of the electrical
parts box on the hook of the motor cover.
(see the photo 3)

(Figure 1)

(Figure2.1)

(Figure 3)

(Photo 1)

(Photo 2)

(Figure 2.2)

Square hole

Up Down

Hook

Square hole

Hook

Terminal block cover

Front grille

Front
panel

Set screw

Set screw

Electrical parts
box

Set screw

Motor cover

Electrical parts
box hook   

w

(Photo 3)

Hook

Electrical parts box

Controller case

Control board

OC330--1.qxp  05.5.9 1:30 PM  Page 30

Содержание PKA-RP35GAL

Страница 1: ...EM DIAGRAM 14 9 TROUBLE SHOOTING 15 10 DISASSEMBLY PROCEDURE 30 11 PARTS LIST 34 Indoor unit Model names PKA RP35GAL PKA RP50GAL Service Ref PKA RP35GAL PKA RP50GAL Indoor unit No OC330 Remote control...

Страница 2: ...P71 100 125 140VHA A PUHZ RP200 250YHA PUHZ RP200 250YHA A PU H P VGAA UK PU H P YGAA UK Service Manual No OC334 OC337 OC338 OC339 OC336 1 1 OUTDOOR UNIT S SERVICE MANUAL Series Outdoor unit PUHZ RP V...

Страница 3: ...ow residual oil piping If there is a large amount of residual oil hydraulic oil etc inside the piping and joints deterioration of the lubricant will result Use ESTER ETHER or HAB as the lubricant to c...

Страница 4: ...6 Use high tension side pressure of 3 43MPa G or over 2 Charge hose Only for R407C Use pressure performance of 5 10MPa G or over 3 Electronic scale 4 Gas leak detector Use the detector for R134a or R4...

Страница 5: ...The following tools are necessary to use R410A refrigerant Keep the tools with care If dirt dust or moisture enter into refrigerant cycle that can cause deterioration of refrigerant oil or malfunctio...

Страница 6: ...Use high tension side pressure of 5 3MPa G or over 2 Charge hose Only for R410A Use pressure performance of 5 09MPa G or over 3 Electronic scale 4 Gas leak detector Use the detector for R134a R407C or...

Страница 7: ...7 3 PART NAMES AND FUNCTIONS Indoor Unit Air intake Air intake grille Filter Air outlet Guide vane Auto vane...

Страница 8: ...rature CLOCK display Displays the current time display Displays the order of timer operation display Displays whether timer is on or off w In case the outdoor unit is cool only type the heating and au...

Страница 9: ...t blow Wireless remote controller built in 36 38 41 43 20 13 16 990 39 235 9 1 4 340 13 3 8 16 35 PKA RP50GAL kW A A kW K min CFM Pa mmAq dB mm in mm in mm in mm in kg lbs Service Ref Mode Power suppl...

Страница 10: ...ating 0 07 0 73 0 33 3 17 0 40 3 17 kW A A kW K min CFM Pa mmAq kW dB mm in mm in mm in mm in kg lbs Single phase 50Hz 230V Munsell 0 70Y 8 59 0 97 Plate fin coil Line flow direct x 1 0 030 9 10 11 12...

Страница 11: ...OXIMATE TERESHOLD OF HEARING FOR CONTINUOUS NOISE NC 60 NC 50 NC 40 NC 30 NC 20 NC 70 OCTAVE BAND SOUND PRESSURE LEVEL dB 0dB 0 0002 bar BAND CENTER FREQUENCIES Hz PKA RP35GAL PKA RP50GAL PKH P35GALH...

Страница 12: ...nock out hole for right rear piping Right rear piping hole Unit center 14 14hole Knock out hole for 425 420 170 190 210 230 0 322 0 35 55 80 130 190 230 272 310 0 35 95 150 205 260 320 345 495 20 75 1...

Страница 13: ...CN32 CONNECTOR REMOTE SWITCH CN41 CONNECTOR HA TERMINAL A CN51 CONNECTOR CENTRALLY CONTROL SW1 SWITCH MODEL SELECTION wSee Table 1 SW2 SWITCH CAPACITY CODE wSee Table 2 SWE SWITCH EMERGENCY OPERATION...

Страница 14: ...thermistor liquid TH2 Distributor with strainer 50 Condenser evaporator temperature thermistor TH5 Room temperature thermistor TH1 Refrigerant flow in cooling Refrigerant flow in heating Strainer 50 S...

Страница 15: ...e action according to TROUBLESHOOTING BY INFERIOR PHENOMENA 9 4 The inferior phenomenon is not reoccurring Logged Not logged 1Consider the temporary defects such as the work of protection devices in t...

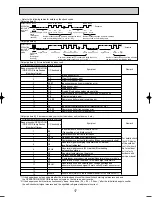
Страница 16: ...nstallation manual If an air conditioner error occurs the indoor unit s sensor emits an intermit tent buzzer sound the operation light flashes and the error code is output It takes 3 seconds at most f...

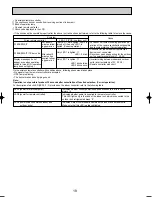
Страница 17: ...flashes 1 Check code Symptom Remark Number of times Wireless remote controller Wired remote controller Beeper sounds OPERATION INDICATOR lamp flashes 1 Check code Number of times Wireless remote contr...

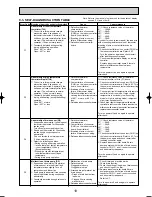
Страница 18: ...tdoor unit s protection device is not con nected Reverse or open phase wiring for the outdoor unit s power terminal block L1 L2 L3 Incorrect wiring between indoor and outdoor units incorrect polarity...

Страница 19: ...ature with remote controller in test run mode If pipe liquid temperature is exclusively low in cooling mode or high in heating mode refrigerant circuit may have defective 5 Check pipe liquid temperatu...

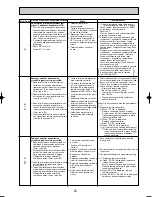
Страница 20: ...n motor is defective Indoor controller board is defective 5 Defective outdoor fan control 6 Overcharge of refrigerant 7 Defective refrigerant circuit clogs 8 Bypass circuit of outdoor unit is defectiv...

Страница 21: ...door units max 16units The number of connecting remote con troller max 2units When it is not the above mentioned problem of 1 3 4 Diagnose remote controllers a When RC OK is displayed Remote controlle...

Страница 22: ...entered into outdoor control wire 1 3 Turn the power off and on again to check If abnormality generates again replace indoor controller board Indoor outdoor unit communication error Signal receiving...

Страница 23: ...between indoor controller board and indoor power board Check the fuse on indoor controller board If no problems are found indoor controller board is defective When LED1 on indoor controller board is l...

Страница 24: ...r wires 4 Defective remote controller Check indoor outdoor unit connecting wire for connection failure 1 Check the connection of remote con troller wires in case of twin triple indoor unit system When...

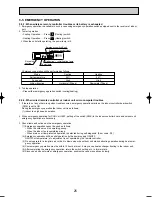
Страница 25: ...s follows When the outdoor unit is something wrong When the indoor fan is something wrong When drain over flow protected operation is detected during self diagnosis Error code P5 2 Emergency operation...

Страница 26: ...stance of each heater element by using a tester Heater Only PKH Normal Abnormal 72 800W 240V Open or short Disconnect the connector then measure the resistance using a tester Surrounding temperature 1...

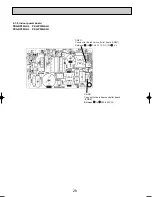
Страница 27: ...N41 Connector HA terminal A CN6V Vane motor output MV CN90 Connect to the wireless remote controller board CNB CN31 Drain sensor DS CN51 Centrally control CN29 Condenser evaporator temperature thermis...

Страница 28: ...board PKA RP35GAL PKH P35GALH PKA RP50GAL PKH P50GALH CNSK Connect to the indoor controller board CNDK Between 1 1 to 3 3 220 240V AC CN2S Connect to the indoor controller board CN2D Between 1 1 to 3...

Страница 29: ...indoor control PCB J41 J42 are given in the table on the left in the table indicates the jumper line is disco nnected There is no jumper JP1 because these models have the cond eva temperature thermist...

Страница 30: ...rew 3caps then remove the set 3screws 4 After removing the lower side of the front panel a little remove it as pulling toward upper 3 REMOVING THE INDOOR CONTROLLER BOARD 1 Remove the terminal block c...

Страница 31: ...istor with set to the pipe Electrical parts box Pipe temperature thermistor TH2 Room temperature thermistor TH1 Condenser evaporator temperature thermistor TH5 7 REMOVING THE NOZZLE ASSEMBLE 1 Disconn...

Страница 32: ...e photo 7 7 Remove the 2screws and the pipe fixture 8 Remove the 2screws and heat exchanger Photo 12 Heat exchanger Set screw Pipe fixture Set screws Photo 9 9 REMOVING THE FAN MOTOR 1 Remove the term...

Страница 33: ...e wireless remote controller 3 Remove the front panel see the photo 1 4 Remove the 2screws and signal receiving p c board cover 5 Remove the signal receiving p c board OPERATION PROCEDURE PHOTOS ILLUS...

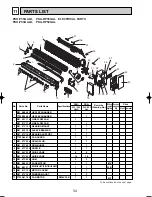
Страница 34: ...6 7 8 9 10 11 12 13 14 15 16 17 HEAT EXCHANGER HEAT EXCHANGER LINE FLOW FAN LINE FLOW FAN BEARING MOUNT SLEEVE BEARING BEARING SUPPORT FAN GUARD DRAIN PLUG DRAIN HOSE NOZZLE GUIDE VANE GUIDE VANE ARM...

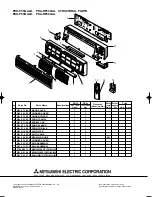
Страница 35: ...OR INDOOR CONTROLLER BOARD CONTROLLER COVER CONTROLLER CASE POWER BOARD FUSE ELECTRICAL PARTS COVER HEATER CONTACTOR SENSOR HOLDER CONDENSER EVAPORATOR TEMPERATURE THERMISTOR ROOM TEMPERATURE THERMIST...

Страница 36: ...ame Specifications P35 P50 GALH PKH RP35 RP50 GAL PKA Remarks Drawing No Wiring Diagram Symbol Recom mended Q ty Unit Amount Price R01 07Y 808 R01 09Y 658 R01 07Y 623 R01 89Y 651 R01 07Y 096 R01 07Y 0...

Отзывы: