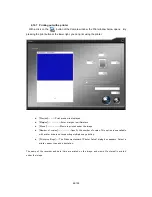
background image

61/100 


4.9.2


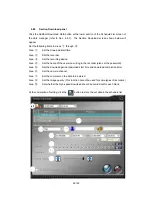
  Call of registered Grouping 

There are 3 methods to make a call of the Grouping. 

When a call of the Grouping is made, the dropdown section of the camera list and the display of the 

camera list are changed simultaneously. 


1.


Call from camera list 

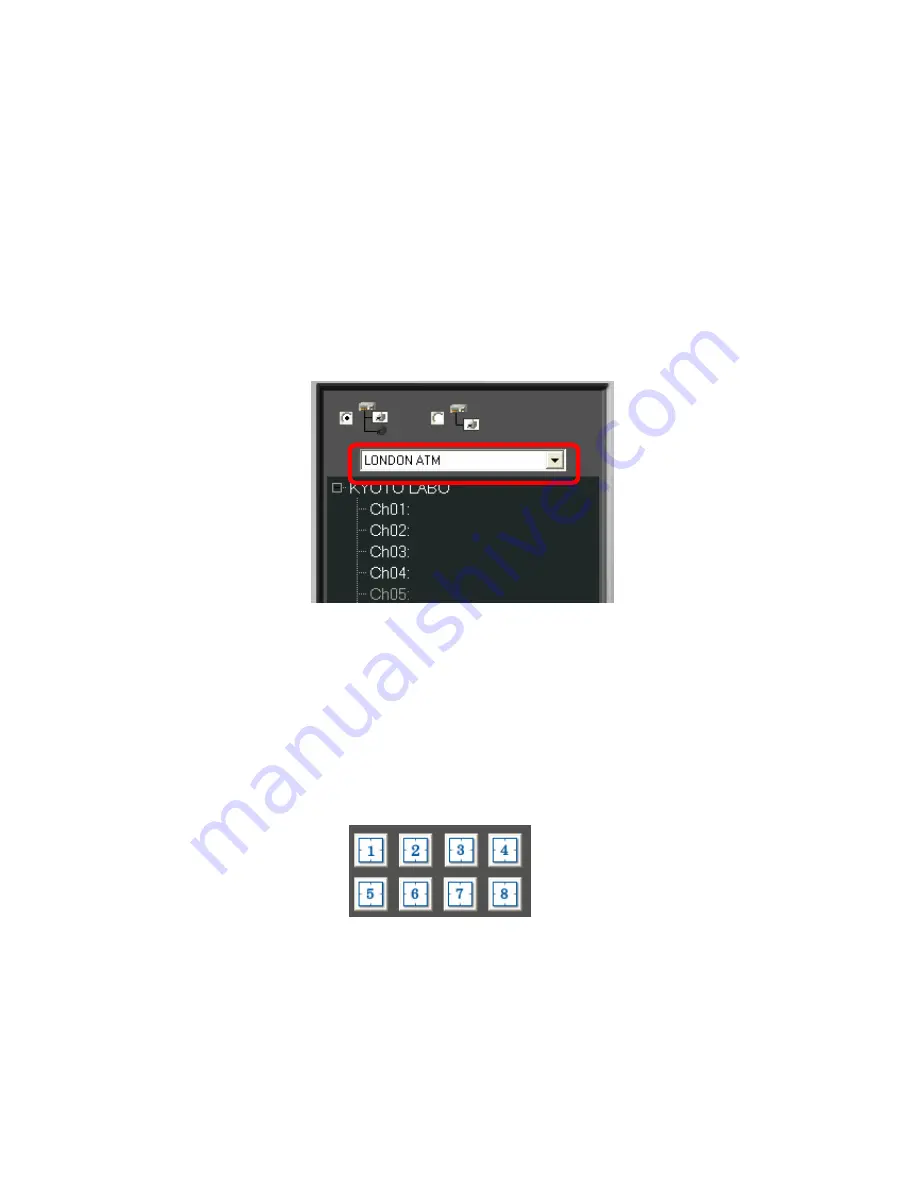
Select a desired Grouping in the Dropdown section of the upper part of the camera list 

(refer to Sec. 3.3.3). 


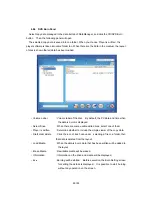
2.  Call from F key (Function key) 

The first 12 buttons from the top of a Grouping list are allocated to the F keys on the 

keyboard. When the F key is pressed together with the Ctrl key, the Grouping is 

changed.    The F keys are allocated in the sequence of registration in the Grouping list. 

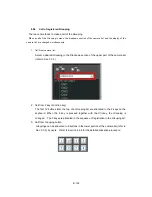
3.  Call from Grouping button 

Groupings can be allocated to 8 buttons in the lower section of the camera list (refer to 

Sec. 3.3.3) by users.    Refer to Section 4.9.4 for the detailed allocation procedure.


Содержание DX-PC200

Страница 1: ...VIEWING COMMUNICATION SOFTWARE OPTION FOR DIGITAL RECORDER MODEL DX PC200 Ver 1 2 OPERATION MANUAL for Windows 2000 for Windows XP Copyright C 2006 Mitsubishi Electric Corporation ALL RIGHTS RESERVED...

Страница 2: ...oftware or its Operation Manual by User in whole or in part is strictly prohibited by this Agreement and Copyright Law Software specifications Software design and the contents of this Operation Manual...

Страница 3: ...uttons 16 3 2 4 Filter Settings button 17 3 2 5 Options button 18 3 2 6 Recorder list 19 3 2 7 Event list 20 3 2 8 Connect button and Disconnect button 21 3 3 Single View screen 23 3 3 1 Camera window...

Страница 4: ...Grouping 61 4 9 3 Sequential display in stored screen layout Patrol function 62 4 9 4 Allocating Groupings to Grouping buttons 63 The grouping function is not shared between SingleView MultiView Set t...

Страница 5: ...5 3 6 Starting the live operation with other method 78 5 5 What you can do during the live monitoring operation 79 5 5 1 Listening to live sound 79 5 6 Searching for a desired image from the image da...

Страница 6: ...indows operating system Compact Flash is trademark of SanDisk This software is partly based on the work of the Independent JPEG Group All other company names and product names appearing herein are the...

Страница 7: ...n other media to the extent supported by Windows Explorer Playback of data recorded in the FSMS format on SCSI copy media Printing by a Windows supported printer Bookmark function Audio replay functio...

Страница 8: ...this software is changed according to the screen resolution of PC used This manual uses the screen design of SXGA 1280 1024 The button shape and button arrangement are slightly different However the i...

Страница 9: ...existing in your personal computer PC 2 2 Uninstallation To uninstall this software select Control Panel ADD Remove Programs DX PC200 Alternatively select the DX PC200 UnInstall command from the Star...

Страница 10: ...Three main screens The DX PC200 has three main function screens Switch these screens as required Each screen enables remote monitoring of various scenes Main View screen Single View screen Multi View...

Страница 11: ...e sentences will appear to describe the function of the button or to describe why the button is invalid If it is not necessary to display these sentences change the condition set in the Control Descri...

Страница 12: ...ion Enter the user name and the password and then click the button to log in the DX PC200 If it is not necessary to log in click the button When a first user name is entered the message shown in the f...

Страница 13: ...l item of options The system ends the application and start up in the user restriction mode Application login with another user name password stops the automatic login function from the next time Appl...

Страница 14: ...communication line On this screen the registered recorders are listed Use this screen to control the connection conditions and operation conditions of all the recorders Click an item to sort the list...

Страница 15: ...era titles log in to the recorder under the user ID having the Regist authority and check that the setting port of the recorder is not being used by other user When camera titles are imported the came...

Страница 16: ...n you want to remotely control a recorder select the recorder from the list and then click this button The Recorder Control panel will be opened The front design of the corresponding recorder is adopt...

Страница 17: ...the Main View screen Use this button to set various filters When the Filter Settings button is clicked the panel shown in the following figure will be opened and you can set the filter data for the r...

Страница 18: ...section of the Main View screen Use this button to display the Options panel Using the Options panel you can set the detailed operations of the DX PC200 For a detailed description of options refer to...

Страница 19: ...his area using lamps and characters Some of the lamps can be turned on and off when the lamps are double clicked From right to left the items are power timer record playback lock menu alarm hold The b...

Страница 20: ...the bell to stop sounding the bell On the Single View and Multi View screens click the bell to switch the list between the camera list and the event list Click the camera icon at the upper right sect...

Страница 21: ...panel will also appear if a recorder line is double clicked on the Main View screen In this case the double clicked recorder will be selected as the recorder to be connected So just click the Connect...

Страница 22: ...d the DX PC200 will select connected recorders from all the registered recorders to display the connected recorders only From the displayed list of connected recorders select a recorder you want to di...

Страница 23: ...rch button and carry out search by specifying the time etc to obtain the image If the image is not obtained the DX PC200 will not go to the Single View screen The Single View screen displays the live...

Страница 24: ...specified camera only MODE OUT Control button Sec 4 10 6 Opens the ModeOut Control panel 3 3 1 Camera window Each camera image is displayed in the camera window At the upper section of this window th...

Страница 25: ...to call up the ModeOut Control panel and to call up the PTZ Control panel Click the Next Page button to go to the time search area In the time search area set the time using the calendar dropdown men...

Страница 26: ...t the quality of the live images the data size will be set for the live image data to be sent from the recorder The live image quality should be adjusted mainly depending on the bandwidth of the commu...

Страница 27: ...s and all the registered cameras of the currently connected recorders will be displayed using the tree structure If a camera name is displayed in gray the camera is not currently displayed on the scre...

Страница 28: ...s the displayed camera position data and the camera size data at a time Display the desired camera layout and then use the grouping button to store the layout data as a group For grouping you can use...

Страница 29: ...control buttons at the upper section can adjust the image quality and the speed in 3 stages Note that increase in the image quality will reduce the speed and increase in the speed will reduce the ima...

Страница 30: ...ave the full screen mode To leave the full screen mode click the right button of the mouse on the screen Several buttons will appear at the center of the screen Click the Fullscreen Close button to le...

Страница 31: ...creen enables seamless processing of image data sent from multiple recorders On the Multi View screen you can change the image data display method and can control the PTZ camera etc If you use the Cam...

Страница 32: ...e Main View screen click the Edit Recorder List button refer to Sec 3 2 2 A menu will appear Select Register recorder from the displayed menu To edit data on an already registered recorder the same ty...

Страница 33: ...rom the check box if you do not use the camera If the check mark is erased from the check boxes of all the unnecessary cameras the camera list will be simplified and the layout switching operation wil...

Страница 34: ...the zip code address etc as the detailed information Freely use this function When starting you connect auto Enter a check in this box The recorder will be automatically connected when the DX PC200 is...

Страница 35: ...he specified date and time Using the slide bar displayed at the lower section roughly specify the date and time After that using the dropdown menu and the spin control function specify the detailed da...

Страница 36: ...er to one of these thin lines The alarm information such as the alarm number on the thin line will appear Click the fine line to carry out search On the alarm distribution bar if you click the right b...

Страница 37: ...start sorting Double click the desired item line to start searching Alarm list is stored in text Select the device which you want to search Alarm records after before the alarms during list selection...

Страница 38: ...k the Search button to carry out search Use the Recycle Bin button the button at the lowermost position on the right side to erase each bookmark from the list The bookmark erased however may be retain...

Страница 39: ...b to obtain data from the recorder equipped with the data protective function Click the Update button to obtain the protected data list from the recorder and then specify the desired record area After...

Страница 40: ...button at the lower section of the Main View or Single View screen and then select User Settings The User Settings panel will appear During user data setting operation the live recorder image display...

Страница 41: ...ed forcedly In addition while the interrupt user is accessing the recorder other network users cannot access the recorder In addition note that connection to a communication port and the total number...

Страница 42: ...a setting right data cannot be registered or stored z To delete a user just erase the user name and then carry out registration or storage z In default the exclusion right does not exist z Exclusion r...

Страница 43: ...is that the set data can be sent to the recorder without turning off the power This button however has a demerit Use of this button can send the set data to the recorder even if the data is unacceptab...

Страница 44: ...ing this function may answer incorrectly This function is available only while this software is accessing the recorder Motion detection Use the following methods to enable or disable the motion detect...

Страница 45: ...this panel work in the same way as those by the buttons of the recorder Before using the functions on this panel check their operations with the status indicators on the recorder controlled In additio...

Страница 46: ...t takes more than one second to switch modes is used as the Copy 2 device it becomes difficult to detect the status of the Copy 2 device precisely such as at the time of its startup and termination Be...

Страница 47: ...ned Click the Read button to obtain the system log list from the recorder On the System Log List panel click an item to start sorting Click the Save button to store the logged data in the format of a...

Страница 48: ...tions button on the Main View screen The Options panel will be opened On the Options panel select an item from the dropdown menu at the top of the screen and then set or change the operation data on t...

Страница 49: ...a recorder is connected the recorder data will be automatically updated at the intervals of 10 seconds and the interval data set in this box will be ignored Authorize setting Use this box to restrict...

Страница 50: ...pecified base number of images Clicking the button again will skip the images by the base number of images 2 Clicking the button once more will skip the images by the base number of images 4 Clicking...

Страница 51: ...etting Enter a check in the Image Size and Mode Icon check boxes to display the image size and the operation status on the right side of the Camera window If it is not necessary to display the image s...

Страница 52: ...e boxes The image data will be stored in the set files during the scene capture operation File format Set a file format in this box The image data will be stored in the files using the set file format...

Страница 53: ...up DX PC200 Specify the saving period of any duration between 1 to 999 days Database Recovery and Optimization If data in the database the event list etc is damaged the data can be recovered and opti...

Страница 54: ...ar Using the Data Manager panel you can download and store the recorder images and can export the downloaded images to the outside In addition you can schedule the image downloading operation For exam...

Страница 55: ...55 100 Copy data list Import Data button Export Data button DataViewer button Filtering Delete Copy Data button DVD CD Burn button 4 8 2 Data List tab...

Страница 56: ...rea Set the recording device Area Set the name of the user who will log in the recorder also set the password Area Set the download period download start time and download completion time Area Set the...

Страница 57: ...series recorder is in use you can t use the section download function in blocks Advantages of block download The downloading speed is high Recorded audio data can be downloaded simultaneously Restrict...

Страница 58: ...burnt is displayed Select Drive When there are some usable write drives select one of them Player is written Determine whether to include the simple viewer of the copy data File Folder delete Click t...

Страница 59: ...used by only DX PC200 Writing data on a medium may generate a write error If it is the case export the downloaded data and try writing it through the application software attached to the personal com...

Страница 60: ...can not use other user s Grouping with the other DX PC200 user In addition the registered Grouping can be allocated to the user Grouping button in the right section on the SingleView MultiView screen...

Страница 61: ...t of the camera list refer to Sec 3 3 3 2 Call from F key Function key The first 12 buttons from the top of a Grouping list are allocated to the F keys on the keyboard When the F key is pressed togeth...

Страница 62: ...below the patrol monitor button Notice If a short patrol interval is set for a PC with small capacity or in the slow speed networks the next Grouping screen may appear before the live image is correct...

Страница 63: ...you want to allocate to that button When the mouse cursor is located on the button after setting allocated Grouping is displayed in the tree When you click in that status the screen layout changes to...

Страница 64: ...pture function When an important scene appears on the camera window you can capture the scene by clicking the button at the right of the window The captured image is saved in the cap_img folder in the...

Страница 65: ...mages from the recorder Therefore when the recorder has no images that were recorded the specified time before no images are displayed When images have been recorded sparsely in the recorder this func...

Страница 66: ...g the NET alarm recording function such as DX TL5000 series 4 10 5 Controlling the PTZ camera PTZ control function With a click on the PTZ control panel button of the Camera Window panel refer to Sec...

Страница 67: ...amera models do not have these functions As USB joystick may not be useable perform sufficient test in advance During this operation live recorder image playback with the corresponding recorder are di...

Страница 68: ...eration of each button is shown in the figure below When MODEOUT on the recorder side is set to LAN the right button becomes effective By clicking the button you can control polarity of the MODEOUT te...

Страница 69: ...Margins Enter margins in millimeters Memo Memo is printed under the image Number of copies Specify the number of copies This option is unavailable with printer drivers not supporting multiple copy pr...

Страница 70: ...ing this software and a recorder both linked by a LAN cross cable You can connect more than one recorder using a LAN network with a switching hub Alternatively you can include more than one recorder b...

Страница 71: ...100 Subnet mask 255 255 255 000 In this example the first block containing the numbers 192 168 000 in the IP address is recognized as a network address The last 100 is a host address which represents...

Страница 72: ...rt numbers check whether the communication is carried out successfully using a ping command Ping command is a command to check whether the terminals can communicate each other over the network Most Wi...

Страница 73: ...the following message is displayed the network address of the recorder is not identical to that of the PC or the default gateway of the PC has been set incorrectly Check the settings Pinging 192 168 0...

Страница 74: ...s added to the recorder list of the main window Select the model name of the recorder which you want to register Unless this item is correctly set connection may fail Enter the IP address of the recor...

Страница 75: ...Two users root admin000 and guest guest are registered as the default in the recorder A root user holds almost all right in relation to the recorder A guest user can obtain only the live image As for...

Страница 76: ...l of the live images of 4 screens starts automatically 5 3 4 Changing the screen layout As for the DX PC200 7 types of basic layouts are available When the Basic Layout button below the Grouping butto...

Страница 77: ...splayed image and speed are adjusted from the Camera Window panel refer to Sec 3 3 2 Use the control area in Section 3 3 5 to adjust all the displayed cameras simultaneously Notice In DX TL2500 series...

Страница 78: ...used does not have sufficient processing power reduce the refresh speed 5 3 6 Starting the live operation with other method In addition to the procedures mentioned above you can start live monitoring...

Страница 79: ...he network function On the SingleView screen select the desired sound channel from the dropdown menu at the lower right of the image displaying area The slide bar in the dropdown menu serves to determ...

Страница 80: ...detection by the recorder is underway it may be impossible to load clear live audio Further the PC s capacity may affect loading of live audio In these cases secure the communication band by disconnec...

Страница 81: ...on data function This function serves to search for the recorder data in the protected section Search by book mark Sec 4 2 3 By registering the book mark not in the recorder but in the DX PC200 you ca...

Страница 82: ...d and camera name In addition the image format for storage can be selected from Bitmap and JPEG To change settings open the optional setting from the MainView screen and add a change with the scene ca...

Страница 83: ...s explained Export the computer data under control of DataManager The DataManager manages in its original method the continuous image data which have been section downloaded Use the data export functi...

Страница 84: ...ue you need to change the receiving port setting refer to the following section of the receiver PC Item of AlarmNotify Sorting of items and the number of items are determined by the recorder model For...

Страница 85: ...boxes are indicated on the event list and are informed to the PC users on the screen refer to the following section Colors of the right lamps serve to identify each event content in the event list The...

Страница 86: ...armNotify and its content are displayed If you need to immediately check the recorder where an event has occurred and its recorder image click the Connect button on the right to start the DX PC200 Aft...

Страница 87: ...kes place on the SingleView screen 5 9 5 Adjusting the event list display Filtering Display of the event list can be adjusted using the filtering function All kind of filter settings such as refining...

Страница 88: ...pears input the user name and password which are used for startup of DX PC200 Time Synchronize Setting panel The Time Synchronize Setting panel appears and the recorders registered by the login user a...

Страница 89: ...ake sure to login under the user name having the authority for this function Note 1 These user name and password are used to access the recorder Use setting Specify the date and time for performing th...

Страница 90: ...w the procedures below while the selected recorder is highlighted in blue Click the PC s clock button The clock of the recorder selected and highlighted in blue is synchronized with the PC s clock Cli...

Страница 91: ...e directly copied from the recorder to an external medium are first read by the PC and then can be played back by being placed under control of DataManager In order to place data copied to an external...

Страница 92: ...a viewer DX Viewer After the copy data is loaded select the channel number you want to play You can select the channel by dragging and dropping it from the camera list to the camera window or selectin...

Страница 93: ...play on the title bar can be selected Print The image being displayed is printed by the printer Payback related buttons REW button Every time this button is pressed during reverse search playback x1 t...

Страница 94: ...the sound data playback depends on the frame rate of the recorded images Adjust it for each playback occasion Synchronous playback applicable for some types of recorders only Set the playback to sync...

Страница 95: ...The asynchronous data playback is not available for data copied from a recorder through using the section download However it can play back the data downloaded from the network in blocks 6 3 2 Searchi...

Страница 96: ...ns button You can change the number of frames for fast forward and rewinding This setting is valid for the operations on all the channels The concept is the same as that of section 4 7 2 6 3 5 Display...

Страница 97: ...PEG or AVI button 6 3 7 Converting into JPEG format Click the JPEG button on the Convert dialog box A dialog box appears to select a directory to save the converted files to When you click OK after sp...

Страница 98: ...ert a dialog box appears to select a directory to save the converted files to Specify the directory and click Save Conversion starts and a dialog box appears showing the progress When the conversion c...

Страница 99: ...h functions may not work correctly depending on the recording condition of the searched media Images or characters may not be printed correctly depending on the printer or printer driver to be used Th...

Страница 100: ...images are being searched on the digital recorder s side the search may be interrupted In addition if images are searched on the digital recorder s side while the network function is in use the searc...

Отзывы: