


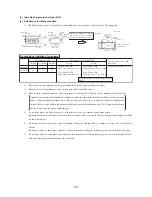


-
202
-
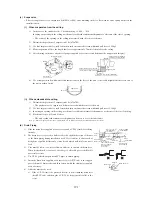
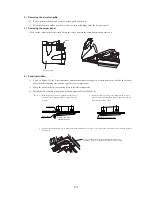
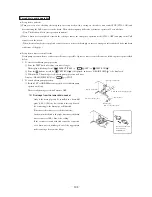
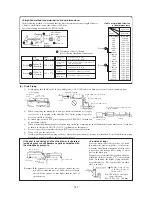
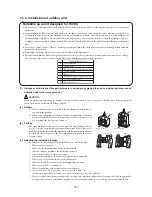
1. Remove the drain hose.
2. Remove the drain cap.
3. Insert the drain cap.
4. Connect the drain hose.
b) Procedure for changing drain hose
• Pull the drain hose off while
turning the end around.
• Remove by hand or pliers.
• Insert the drain cap which
was removed in procedure 2
securely using a hexagonal
wrench, etc.
Note(1) When it is not inserted
securely, water leakage
may occur.
• Push the end of the drain hose
onto the fitting while turning
it around.
Note(1) When it is not inserted
securely, water leakage
may occur.
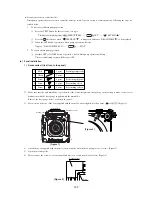
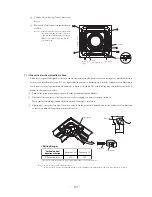
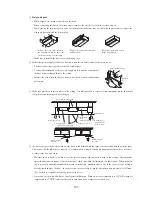
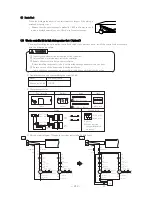
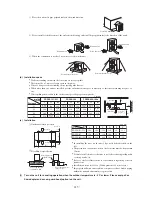
(f) Installation of unit
Installation work procedure
(1) Hang the upper portion of in-door
unit on the mounting plate.
(2) The
indoor unit can be fixed
with one action by pushing its
lower portion slightly.
• To remove the unit from the
mounting plate, remove the
right and left lids then remove
the claw at the lower portion
of base.
Lid (right hand)
Mounting plate
Wall
Claw at the lower portion of indoor unit base.
Indoor unit
Claw (2 places)
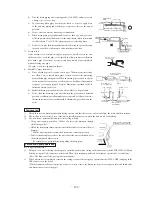
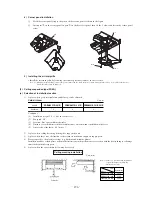
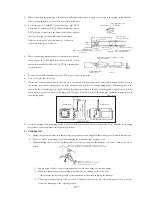
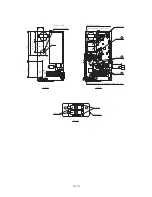
(g) Drain
piping
1) Lay the drain piping with downgrade to facilitate flow of drain,and do not make a trap or chevron-shaped bend. (The drain
piping can be taken out from the unit to the left, right, rear and down direction.)
2) Wrap the thermal insulator on the hard vinyl chloride pipe (VP-16) laid in the room.
3) Run the drain piping in a place where there is no fear of abnormal odors being generated at the end of the drain hose.
4) Do not run the drain piping directly into a sewer where sulfur-based poisonous or flammable gases are generated. There is
danger of poisonous or flammable gases penetrating into the building through the drain piping.
5) Pour water into the drain pan below the heat exchanger to chech that water is drained outdoors.
No chevron-shaped bend is allowed.
No trap is allowed.
The end shall
not be sub-
m e r g e d i n
water.
Illustration showing the end of drain hose
For left rear take-out piping
For right rear take-out piping
For left running horizontal piping
For right running horizontal piping
For left running horizontal piping
For right running horizontal piping
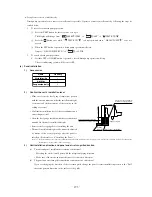
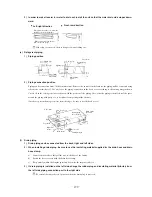
2) Cautions for left take-out and rear take-out case
a) Looking
down
b) The piping can be taken out from the
rear, left, left rear, right and down.
Right
Rear
Down
Left rear
Left
Down
(1)
Mounting plate
Содержание FDCVA1002HESAR
Страница 107: ... 106 60 17 150 b Wireless remote controller Unit mm ...
Страница 119: ... 118 Model FDCVA1002HESAR Polar white ...
Страница 133: ......


