EN – 24
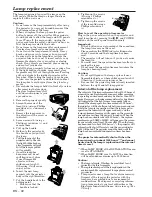
About the terminal cover (with Anti-Theft Alarm device)
This projector includes a terminal cover with Anti-
Theft Alarm device. Once the terminal cover is
installed, its Anti-Theft Alarm device will detect
vibration caused by the projector being moved and
emit an alarm.
• Mitsubishi assumes no responsibility or liability
for theft or other damages.
Procedure for setting the Anti-Theft
Alarm device
Insert dry cell batteries into the theft warning
device
1. Open the battery cover of the theft warning
device.
2. Check the (+) and (-) ends of the battery, and
insert it from the (-) end first.
• Inserting the battery from the (+) end makes it
difficult to fit the (-) end into the coil spring.
Forcing in the battery in such a position may
shred the outside label, causing a short circuit
and overheating.
• Please refer to page 8 for information on how to
handle dry cell batteries.
3. Close the battery cover.
4. Insert the included safety pin into the safety pin
hole.
• If the safety pin is not inserted, the vibrations
and shocks of normal use may cause the alarm to
sound.
5. Turn the power switch ON.
Install the terminal cover
1. Insert the four tabs on the terminal cover into the
holes on the projector’s side.
2. Slide the terminal cover toward the back of the
projector.
3. Tighten the three screws that keep the terminal
cover in place.
4. Install the projector in a specified location.
5. Press the battery level check button until you
hear a buzzer sound.
6. Remove the safety pin.
The Anti-Theft Alarm device is now in standby.
• This package includes a sticker which shows that
the Anti-Theft Alarm device is active. Visible
placement of this sticker is recommended.
• To temporarily halt the Anti-Theft Alarm device,
insert the safety pin.
• Vibrations will not cause the alarm to sound for
several seconds after the power switch is turned
ON.
• Vibrations will not cause the alarm to sound for
several seconds after the safety pin is removed.
• Vibrations and shocks from earthquakes may
cause the alarm to sound. In such situations,
insert the safety pin to halt the alarm.
• Batteries may come loose during transportation.
Please remove them beforehand.
Procedure for changing batteries
How to check battery level
Use a pointed object to push the battery level check
button.
• A buzzer will sound while the button is being
pushed. If there is no buzzer sound, then batteries
need to be changed.
• Sounding the buzzer for a long time will consume
battery power.
Change the dry cell batteries
1. Insert the safety pin into the safety pin hole.
2. Loosen the three screws that keep the terminal
cover in place.
3. Slide the terminal cover toward the front of the
projector.
4. Pull the terminal cover toward you and remove it.
• Attention must be paid when removing the
terminal cover as there could be foreign objects
inside.
• Removal of dust found inside the terminal cover is
recommended when changing batteries.
5. Open the battery cover and remove the old dry cell
batteries.
6. Check the (+) and (-) ends of the new battery, and
insert it from the (-) end first.
• Use alkaline AA batteries.
• Standard battery life is approx. six months (when
using alkaline dry cell batteries). Please check the
battery level and change batteries regularly.
7. Close the battery cover.
Tabs
Power switch
Battery cover
ON
safety pin hole
safety pin
Screws
battery level check button.

