
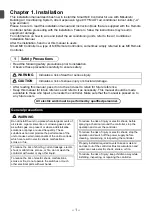
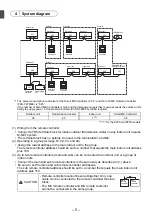
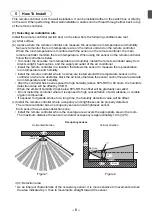
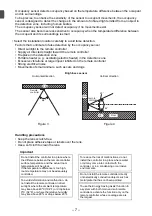

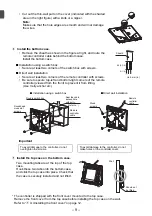


– 14 –
Chapter 2. Initial Setting
This chapter contains information about the settings to be made at the time of installation. Please read
the instructions carefully and make the settings accordingly. Refer to Chapter 1 “Installation” for how to
install the Remote Controller, and refer to the air conditioning unit installation manuals for how to
connect the controller cable to the air conditioning units, or how to install the air conditioning units.
Please remember to give all manuals to the end users after installation is complete.
(1) Initial startup settings
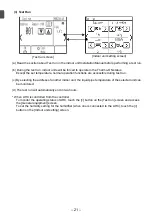
Before turning on the controller, first make sure that the controller, indoor units, and outdoor units
have been installed properly according to the instructions detailed in the respective manuals. Turn on
the controller and the units.
• This manual is intended for the first startup after the unit has been shipped from the factory. If the
setting has been changed even once, the popup window or setting screens explained below may
not appear.
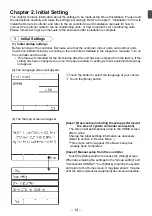
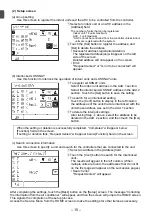
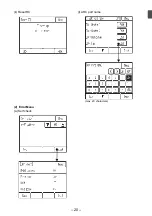
1
Initial Settings
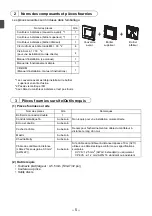
(a) The Language screen will appear.
1
Touch the button to select the language of your choice.
2
Touch the [Done] button.
(b) The Start-up screen will appear.
[Case 1] Basic setup (including the setup performed at
the time of system controller connection)
The screen will automatically jump to the HOME screen
after a while.
Change the initial settings information as necessary.
(Refer to section 2 “Service Menu.”)
*This screen will not appear if the Basic setup has
already been completed.
[Case 2] Manual setup from the controller
Touch the [Setup] button to access the [Setup] screen.
When done making the settings for the "Group setting" and
"Interlocked LOSSNAY," touch [Back] to startup the system
and return to the Home screen. It may take about 7 minutes
until the screen [General equipment] becomes accessible.
WT06829X02.book Page 14 Wednesday, June 26, 2013 4:03 PM
Содержание par-u02meda
Страница 21: ... 20 k Reset RC l AHC port name 2 Error Menu a Self check max 20 characters ...
Страница 49: ... 24 2 Menu d erreurs a Auto contrôle ...
Страница 102: ... 23 2 Menu errori a Autodiagnosi ...
Страница 105: ... 26 ...
Страница 129: ... 22 k Restaurar CR l Nome da porta AHC 2 Menu de erro a Self Check máx 20 caracteres ...
Страница 158: ... 25 2 Μενού Error σφαλμάτων a Self check αυτοδιάγνωση ...
Страница 161: ... 28 ...
Страница 185: ... 22 2 Error Hata Menüsü a Self check Kendiliğinden kontrol ...
Страница 212: ... 23 2 Meni Error napaka a Self check samodejni pregled ...
Страница 215: ... 26 ...
Страница 239: ... 22 2 Izbornik Error Pogreška a Self check Samoprovjera ...
Страница 266: ... 23 2 Meniul Error Eroare a Self check Verificare individuală ...
Страница 269: ......
Страница 270: ......
Страница 271: ......