- 12 -
6.4 Creating the stitching data
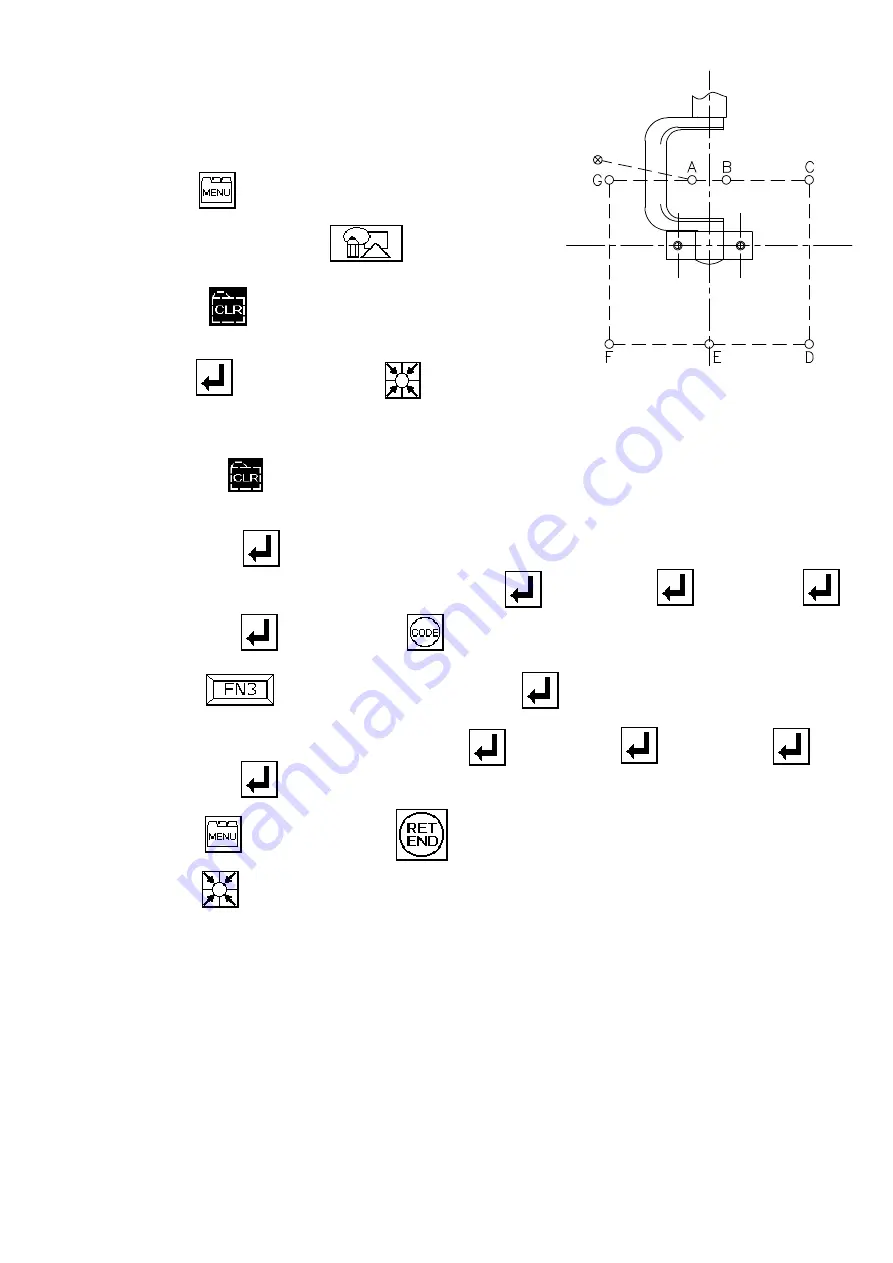
Refer to the pattern in Fig. 1, and set points A
to G as shown in Fig. 3.
(1) Press on the operation panel's standard
screen.
(2) Press the menu icon . The Pattern
Input Mode screen will open.
(3) Select , and set the stitching data type,
speed and stitch length.
Press , and then press . The Arrow
Input Mode screen will open.
(If there is no stitching data in the internal
memory, will not appear.)
(4) Input dry feed from the home position to point A with the arrow keys, and
then press .
(5) Next using the arrow keys, input point B
→
point C
→
point D
→
point E . Then, select . The Code Input screen will open.
(6) Press (reverse signal), and press . The Arrow Input screen will
reopen.
(7) Using the arrows keys, input point F
→
point G
→
point A
→
point B .
(8) Select , and then press .
(9) W hen is pressed, the stitching data will be created and written in.
This completes creation of the stitching data.
Reverse
Home position
Fig . 3


