English
English-33
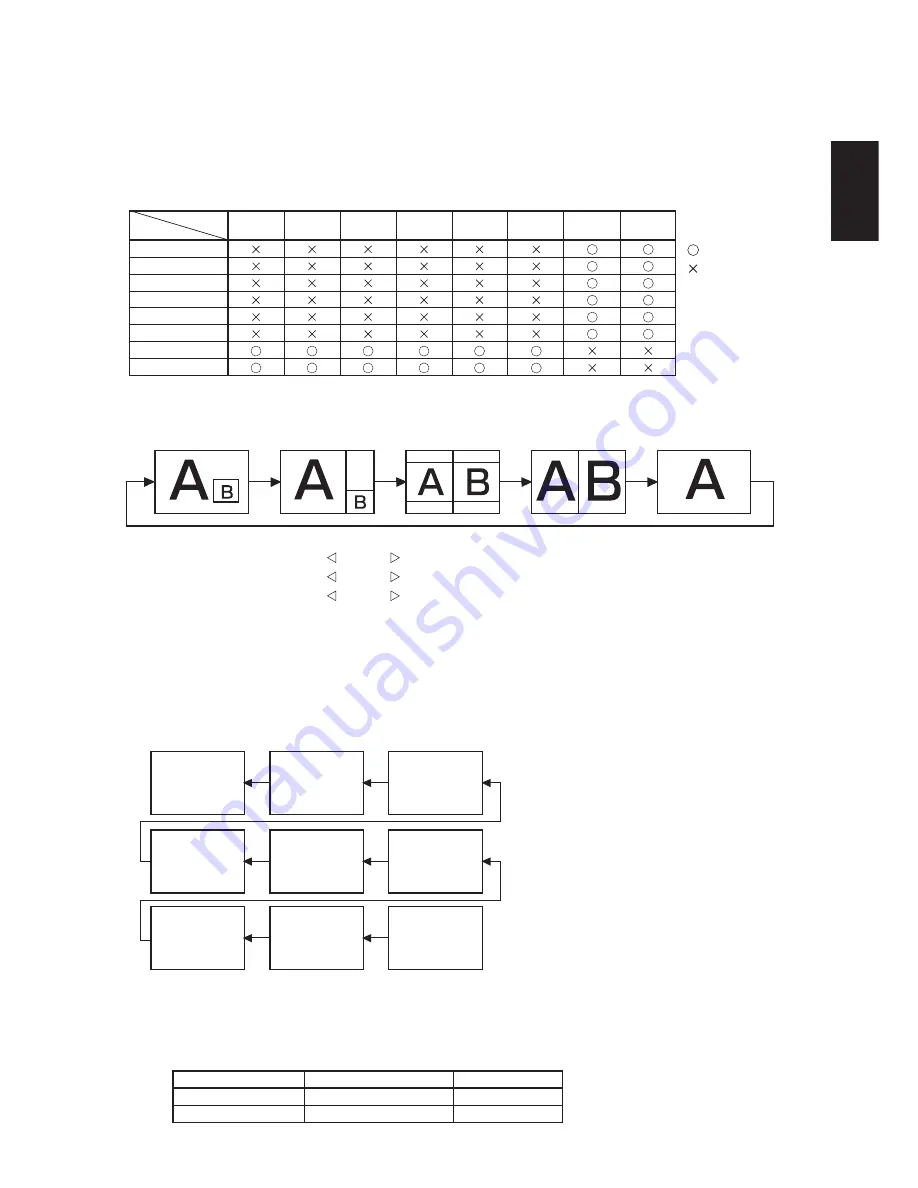
< PIP, POP and SIDE BY SIDE >
The following table shows the combination of signal inputs under which the “PIP” and “POP” modes function. These modes do
not function, however, when the screen size is “CUSTOM” or “REAL”.
< Supplemental information of the auto brightness function >
To control multiple monitors collectively
In such a case where the tiling function is used, you can control the auto brightness function by sharing the detection result of
the brightness sensor of a certain monitor among the connected monitors.
1. Multi-connect the monitors using RS-232C or CAT5 cables as shown by the example below.
Monitor
ID = 9
(Slave)
Monitor
ID = 8
(Slave)
Monitor
ID = 7
(Slave)
Monitor
ID = 6
(Slave)
Monitor
ID = 5
(Slave)
Monitor
ID = 4
(Slave)
Monitor
ID = 3
(Slave)
Monitor
ID = 2
(Slave)
Monitor
ID = 1
(Master)
Master: Monitor configured as Master that detects
the outside light (Monitor ID is “1”.)
Slave: Monitor controlled by the Master monitor
(Monitor ID is other than “1”.)
2. Assign a monitor ID to each multi-connected MDT521S using MONITOR ID.
Monitor ID is selectable from 1 to 26.
The monitor ID of the Master monitor should be “1” and those of the Slave monitors should be other than “1”.
You are recommended to assign IDs to the monitors consecutively from 1, 2, 3, and on.
3. Set AUTO BRIGHTNESS on the OSD screen (PICTURE) as follows.
LOCAL
REMOTE
PRIMARY
SECONDARY
Master monitor
Slave monitors
AUTO BRIGHTNESS
CONTROL
RGB1
(HDMI)
RGB1 (HDMI)
RGB2 (DVI-D)
RGB3 (D-SUB)
RGB4 (BNC)
RGB5 (CAT5)
DVD/HD (YPbPr)
VIDEO<S>
VIDEO
RGB2
(DVI-D)
RGB3
(D-SUB)
RGB4
(BNC)
RGB5
(CAT5)
DVD/HD
(YPbPr)
VIDEO
VIDEO<S>
SUB
MAIN
: Supported
: Not supported
PIP SIZE
SMALL
MIDDLE
LARGE
: 450 dots X 338 dots
: 675 dots X 450 dots
: 900 dots X 675 dots
: 450 dots X 338 dots
POP SIZE
“PIP”, “POP” mode resolution (Reference)
Press the “PIP ON/OFF” buttons on the remote control to change between “PIP”, “POP” and “SIDE BY
SIDE” mode as shown in the diagram below.
PIP
POP
OFF
SIDE BY SIDE
ASPECT
SIDE BY SIDE
FULL


