background image

Page 33 

MODELS:  WD-73640 / WD-73740 / WD-73840 / WD-73C11 / WD-73CA1 /  

WD-82740 / WD-82840 / WD-82CB1 / WD-92840 

Versi

on 3.0


2.  Manual Geometry Alignment  

  Note: 

Upon entering the Manual Geometry Alignment Mode the first time, the geometry may appear distorted 


because all factory geometry correction is automatically disabled.  Press <EXIT> to quit and re-enable 


the factory geometry correction.  Pressing <1> <ENTER> and <EXIT> will cause the TV to operate with


out factory geometry correction (distortion will be present).   


Note:    At any time the original factory geometry data can be restored from backup: 



From the Data Transfer & Geometry Menu <MENU><2-4-5-7><0>, select “RESTORE  


GEOMETRY DATA FROM BACKUP” <ENTER>. 

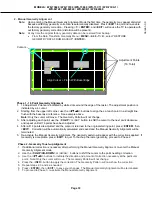
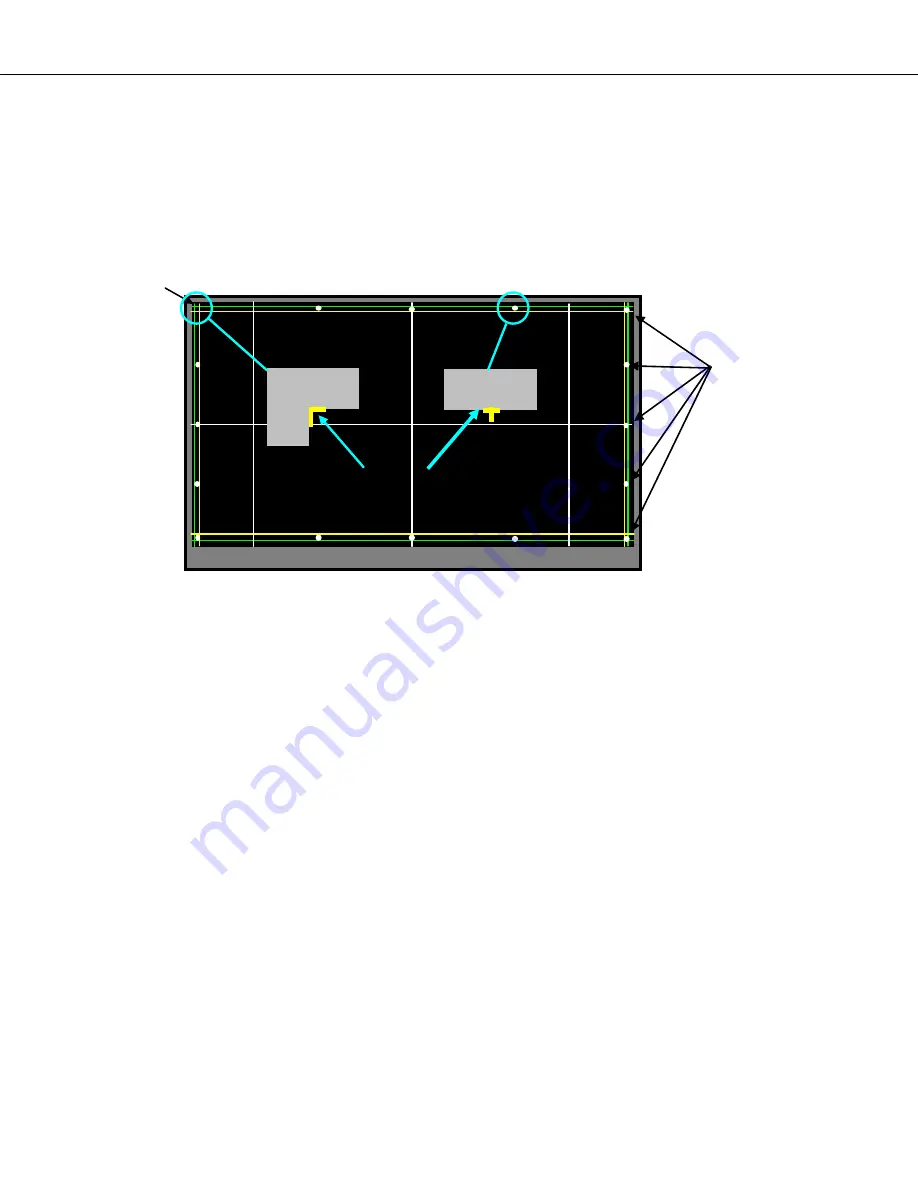
Cursor +

Adjustment Points 

(16 Total)

Align  Flush With Bezel Edge

+

Phase 1 - 16 Point Geometry Alignment 
1.  16 Adjustment Points are indicated by white dots around the edge of the raster. The adjustment position is 

indicated by a + cursor.  

2.  Starting from the upper left corner, use the <



> buttons to align the + at each point in a straight line, 

flush with the bezel as a reference.  See example above.  

   Note: Only the cursor will move.  The Geometry Pattern will not change. 
3.  After adjusting each point, use the <CH-UP> or 

<

button to shift the cursor to the next point clockwise 

    and repeat until all 16 points have been adjusted. 
4.  After all 16 points are adjusted and the cursor is returned to the original starting point, press <ENTER> then 

<EXIT>.  Correction will be automatically calculated and saved and the Manual Geometry Alignment will be 
terminated. 

5.  Re-activate the Manual Geometry Alignment. The geometry pattern will appear with the corrections applied.  If 

Geometry is acceptable, press <EXIT> to quit. To touchup the raster geometry, proceed to Phase 2. 

Phase 2 - Geometry Touch-up Alignment 
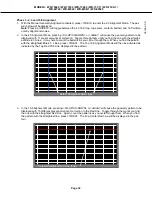
1.  If additional correction is necessary after performing the Manual Geometry Alignment, re-enter the Manual 

Geometry Alignment mode. 


2. 

Use the <CH-UP/CH-DOWN> or 

<

/

 buttons to shift the cursor to the point needing correction.


3.


Use the <



> buttons to indicate the direction and amount of correction necessary at the particular 


  point.  Note: Only the cursor will move.  The Geometry Pattern will not change. 


  4.  Press the <INFO> button to apply the correction. The Geometry Pattern will now show the correction. 


  5.  Repeat steps 2, 3 and 4 as needed. 


6. 

Press 

<ENTER> then <EXIT> to save your changes. The Manual Geometry Alignment will be terminated. 


  7.  To proceed to Phase 3, re-activate the Manual Geometry Alignment. 

Содержание DLP WD-82CB1

Страница 1: ...nalog Cable 1 125 Digital Cable 1 135 Speakers 10W x 2 except V45 2W x 16 V45 Analog Input Composite Component Level RCA Type Y Video 1 0 Vp p Cr Cb 700mVp p 75 unbalanced AUDIO IN JACK RCA Type 4 7dBm 43k unbalanced Analog Output AUDIO SUBWOOFER OUT JACK Level RCA Type 4 7dBm 4 7k unbalanced Digital AC 3 PCM Digital Audio Output Inputs Outputs RCA Type HDMI USB PC use HMDI Wired IR Input Output V...

Страница 2: ......

Страница 3: ...ment 15 Screen Replacement 16 Mirror Replacement 20 SERVICE PROCEDURES 23 Remote Control 23 Option Menu 24 Reset and Initialization 26 LED Indications Self Diagnostics 27 Error Codes 28 Error Code Log 28 Sound Projector Transducer Test 29 Service Adjustments 30 Equipment Test Signals 30 Service Menu 30 Horizontal Vertical Position Adjustment 31 Index Delay Adjustment 31 Manual Geometry Alignment 3...

Страница 4: ...82740 WD 82840 WD 82CB1 WD 92840 Version 3 0 Digital Light Processing Digital Micro Mirror Device and DLP are Trademarks of Texas Instruments HDMI the HDMI logo and High Definition Multimedia Interface are trademarks or registered trademarks of HDMI Licensing LLC ...

Страница 5: ...safety related characteristics These char acteristics are often not evident from visual inspection nor can the protection afforded by them necessarily be ob tained by using replacement components rated for higher voltage wattage etc Replacement parts which have special safety characteristics are identified on the schematic diagrams and parts list of this service manual The replacement for any safe...

Страница 6: ...ongs Connect one lead of an ohm meter to the AC plug and touch the other lead to each exposed metal part i e antennas handle bracket metal cabinet screw heads metal overlay control shafts etc particularly any exposed metal part that has a return path to the chassis The resistance of the exposed metal parts hav ing a return path to the chassis should be a minimum of 1Meg Ohm Any resistance below th...

Страница 7: ...on 3 0 DISASSEMBLY PARTS REPLACEMENT BACK COVER REMOVAL Back Cover Removal 1 Remove screws A and remove the Lamp Cover 2 Remove screws B from behind the Lamp Cover 3 Remove Screws C 4 Remove the back cover from the TV C A ASSEMBLY LOCATIONS CHASSIS OPTICAL ENGINE ASSEMBLY DMD FAN LAMP PWB BALLAST B C ...

Страница 8: ...ASSEMBLY Chassis Removal 1 Remove screws A 2 Slide the chassis back and disconnect all cables 3 Remove the chassis from the cabinet A A Rear Terminal Cover Removal To Replace PWB MAIN 1 Remove nut A from the ANT input 2 Remove screws B and C 3 Disconnect the connectors to the PWB SOUND V45 4 Remove the Terminal Cover from the chassis V45 Only C V45 Only B ...

Страница 9: ...N from the chassis A After PWB MAIN Replacement See Data Transfer in Service Procedures section 1 V45C V45 V45CA Perform Restore Engine Data From Backup 2 V45 V45 V45CB Perform Restore Engine Data From Backup and Restore Geometry Data From Backup V45 V45 V45CB IMPORTANT REPLACEMENT NOTE If the customer has subscribed to VUDU Internet program provider the customer must be instructed to contact VUDU...

Страница 10: ...y 3 Disconnect the electrical locking connectors indicated 4 To reinstall first connect the connectors Then slide the PWB under the Retaining Hooks Then press the rear edge of the PWB down onto the guide pins to engage the latch LATCH CJ1 Lamp Power CJ3 Lamp Control CJ4 HV to Lamp RETAINING HOOKS PWB BALLAST REMOVAL PL Lamp Power OPTICAL ENGINE ASSEMBLY REMOVAL 1 Disconnect the PL connector from t...

Страница 11: ... Remove screws C and the Engine Plate 4 Disconnect the Exhaust and Sirocco Fan Connectors J4 and J8 from the back of the Engine and loosen the wiring harnesses from the looms 5 Release the Latches to remove the Fan Holder B J4 Exhaust Fan LATCH J8 Sirocco Fan LATCH OPTICAL ENGINE ASSEMBLY REMOVAL Continued 1 Disconnect the PE and J12 connectors from the Engine 2 Remove screws A 3 Slide the Engine ...

Страница 12: ...the Optical Engine transfer all Duct and Duct Interior Components from the old Engine to the new Engine The Exhaust Fan must be installed so the Label is facing inside the Duct The Sirocco Fan must be installed so the Label is facing up with the Flanges aligned onto the Guide Pins SIROCCO FAN Label Facing Up Label Facing In EXHAUST FAN PWB LAMP DOOR SW Sirocco Fan Flanges Align Onto Guide Pins ...

Страница 13: ... 2 Connect the HV Lamp Wiring to the Ballast and dress the wiring through the guides as shown 3 Remove the Protective Lens Cover from the face of the Lens and place it on the old Engine for return 4 Install the Engine Assembly in the cabinet 5 Perform the following procedures as described in the Data Transfer section of the Service Procedures Restore Index Delay Save Engine and Geometry Setting to...

Страница 14: ...bnormalities in the picture This procedure should be performed in a dust free environment Wear lint free cotton or rubber gloves while performing this procedure 1 Remove Optical Engine Assembly 2 Remove screw A and remove the Lens Collar 3 Remove screws B 4 Lift out the Projection Lens 5 Install the replacement lens so the key is oriented towards the top as shown KEY LENS B B B B LENS COLLAR A ...

Страница 15: ... cable for re assembly Silver Contacts towards the Lens 4 Access the optical compartment by removing screws A and the Engine Base from the bottom of the Opti cal Engine 5 Remove the 3 screws B from the Color Wheel Assembly 6 Use the metal Handle to lift the Color Wheel from the compartment 7 For installation reverse the procedure above CAUTION Avoid touching or scratching the Color Wheel 8 After r...

Страница 16: ...V45 Remove the ORNAMENT LEFT RIGHT first by pinching up and pulling away from the bottom Then remove the ORNAMENT CENTER using the same method 3 Remove screws A 4 Remove screws B around the rear edge of the screen bezel 5 During re assembly replace screws in their original locations B B B B B 73 INCH V45 73 ORNAMENT CENTER Speaker Cover ORNAMENT RIGHT ORNAMENT LEFT A A A V45C V45 V45 73 A Number a...

Страница 17: ...ezel Front 1 Remove screws A and remove the top bottom and side rails NOTE The number and location of screws vary by model 2 Lift the Fresnel Lens and Lenticular screen from the Bezel Front 3 During re assembly replace screws in their original locations SCREEN REPLACEMENT 73 Models continued Example Diagrams The number and location of screws varies by model ...

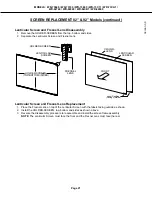
Страница 18: ...lar Screen from the Fresnel Lens use caution while prying the Screen and Lens apart Use a slot type screw driver and remove the pressure sensitive double sided tape Lenticular Screen and Fresnel Lens Replacement 1 Apply LENS TAPE along the rear top edge of the Lenticular Screen 2 Place the Fresnel Lens on top of the Lenticular Screen and apply pressure along the top edge 3 Place the screens in the...

Страница 19: ...crews B 3 V45 Pull off ornamental Front Covers and Speaker Grill 4 Remove the Speaker Box and Pedestal by removing screws B 5 Remove screws C from the bottom front of the screen assembly 6 Remove screws D from the top rear edge of the cabinet NOTE Leave one screw secured at the top Then support the assembly to prevent it from falling while removing the remaining screw B B D D D C A A SPEAKERBOX B ...

Страница 20: ...nger prints Do not place Fresnel Lens in the sun This may cause fire and heat related injuries Lenticular Screen and Fresnel Lens Removal 1 Remove four screws A in all four corners of the Screen Bezel 2 Remove the Screen Bezel components from the Screen Lens Assembly A X4 CORNER S T CORNER COVER HOLDER T CORNER CAP S L FRONT SCREEN LENS ASSEMBLY CORNER S T HOLDER SCREEN TOP R CORNER CAP TOP L LABE...

Страница 21: ...ULAR SCREEN FRESNEL LENS HOLDER SCREEN TOP BOTTOM SIDES HOLDER SCREEN LENTICULAR SCREEN LENS Label Position Facing Outside FRONT Lenticular Screen and Fresnel Lens Replacement 1 Place the Fresnel Lens on top of the Lenticular Screen with the labels facing outside as shown 2 Install the HOLDER SCREEN top bottom and sides as shown above 3 Reverse the disassembly procedure to reassemble and install t...

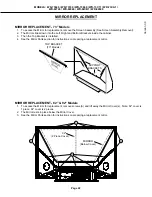
Страница 22: ...inside the cabinet 3 Then the Top Bracket is installed 4 See the Mirror Parts section for instructions on preparing a replacement mirror SUPPORT BRACKETS TOP BRACKET 73 Models MIRROR REPLACEMENT 82 92 Models 1 To access the Mirror for replacement remove screws A and lift away the Mirror Cover s Note 82 cover is 1 piece 92 cover is 2 pieces 2 The Mirror rests in place below the Mirror Cover 3 See t...

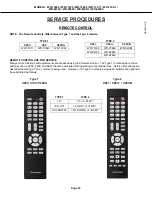
Страница 23: ... connected devices Service Procedures are described assuming a Type 1 remote is being used However if a Type 2 remote is being used buttons can optionally be substituted as follows REMOTE CONTROL SERVICE PROCEDURES NOTE The Remote Controls differ between Type 1 and the Type 2 models Type 1 V45C V45 V45CA Type 2 V45 V45 V45CB TYPE 1 V45C V45 V45CA WD 73C11 WD 73640 WD 73CA1 TYPE 2 V45 V45 V45CB WD ...

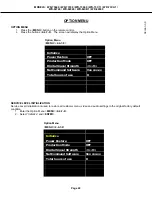
Страница 24: ...nitialization is used to restore all customer menu video and audio settings to the original factory default condition 1 Enter the Option Menu MENU 2 4 7 0 2 Select Initialize and ENTER Option Menu MENU 2 4 7 0 Initialize Power Restore OFF Production Mode OFF Digital Signal Strength 1 9 NetCommand Software Vxx xxx xx Total hours of use 0 Option Menu MENU 2 4 7 0 Initialize Power Restore OFF Product...

Страница 25: ...the Option Service Menu MENU 2 4 7 0 Option Menu MENU 2 4 7 0 Initialize Power Restore OFF Production Mode OFF Digital Signal Strength 1 9 NetCommand Software Vxx xxx xx Total hours of use 0 Digital Signal Information Digital Signal Strength ENTER Tuner Frequency MHz 749 Signal Level 1 9 Modulation 8VSB Air Carrier Lock Locked SNR 29 09 Correctable errors 0 Un Correctable errors 0 1 Select Digital...

Страница 26: ...set ENTER All Audio and Video settings for the individual input are reset except for the Listen To Language Balance and Closed Caption settings A V Reset all inputs When the audio or video performance or settings for more than one input seem to incorrect While viewing the TV press the front panel buttons INPUT VOL at the same time and hold for 10 sec All Audio and Video settings are reset to the f...

Страница 27: ... following page for a list of Error Codes To perform a System Reset press and hold the Power button for 10 seconds Or unplug the set for 10 seconds then restore power NORMAL INDICATIONS STATUS LED Indication Condition Off Off Standby Green Power On Slow Blinking Green Power Off with Timer Set Power On normally Fast Blinking Green 1 to 3 minutes after Power Restored from AC interrupt Power On Syste...

Страница 28: ...B MAIN Failure 18 Engine will not accept data ASIC READY signal from Engine is not detected LDVS circuitry Engine Failure 32 Lamp Cover is open Check CD connector 34 Lamp turns Off while the TV is playing Lamp Failure Lamp Enable signal from engine is lost Lamp Cartridge Failure 36 Exhaust Fan rotation not detected Check Exhaust Fan Check J4 circuitry 37 Engine DMD fan rotation not detected Check ...

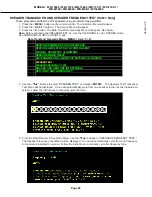
Страница 29: ...lect SPEAKER TEST and press ENTER The Speaker Test Transducer Test Menu will be displayed A tone will automatically cycle from one speaker to the next as indicated on screen Follow the instructions to manually cycle the tone 5 From the Data Transfer Geometry Menu use the buttons to SPEAKER FREQUENCY TEST The Speaker Frequency Test Menu will be displayed A tone will automatically cycle from one fre...

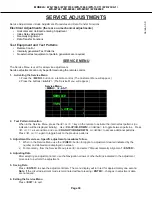
Страница 30: ...he remote to activate the internal test patterns no indication will be displayed initially Use CH UP CH DOWN or to toggle between patterns Press 2 or a second time and use CHAN UP CHAN DOWN or to access additional patterns Press 2 or again to toggle back to the previous patterns 3 Adjustment Overview Specific adjustment procedures follow 1 When in the Service Menu use the VIDEO button to toggle to...

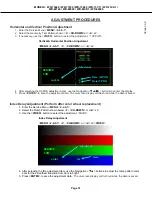
Страница 31: ...o save the adjustment data The on screen display will turn red while the data is saved MENU 2 4 5 7 2 CH DOWN or x2 Vertical Horizontal Position Adjustment 60 IDL 201 Data Adjustment SERVICE TVM MENU 2 4 5 7 2 CH DOWN or x3 VIDEO Index Delay Adjustment 1 HVPOS Data HPOS Adjustment SERVICE TVM Data VPOS 3 4 Horizontal and Vertical Position Adjustment 1 Enter the Service Menu MENU 2 4 5 7 2 Select t...

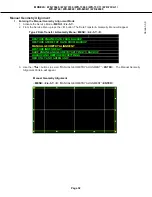
Страница 32: ...ansfer Geometry Menu will appear 3 Use the buttons to select MANUAL GEOMETRY ALIGNMENT ENTER The Manual Geometry Alignment Pattern will appear Manual Geometry Alignment MENU 2 4 5 7 0 MANUAL GEOMETRY ALIGNMENT ENTER Type 2 Data Transfer Geometry Menu MENU 2 4 5 7 0 RESTORE GEOMETRY DATA FROM BACKUP MANUAL GEOMETRY ALIGNMENT RESTORE INDEX DELAY SAVE ENGINE AND GEOMETRY SETTING TO BACKUP BACKUP AND ...

Страница 33: ...n will not change 3 After adjusting each point use the CH UP or button to shift the cursor to the next point clockwise and repeat until all 16 points have been adjusted 4 After all 16 points are adjusted and the cursor is returned to the original starting point press ENTER then EXIT Correction will be automatically calculated and saved and the Manual Geometry Alignment will be terminated 5 Re acti...

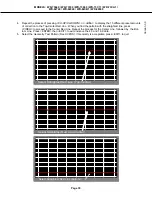
Страница 34: ...th 11 preset amounts of correction Toggle through them until you find the one with the straight est Blue 4 3 Lines It may help to count the patterns as you cycle through them When you find the pattern with the straightest Blue 4 3 Lines press VIDEO The Top 16 9 Alignment Mode will then be activated as indicated by the Top Red 16 9 Line displayed in the pattern 3 In the 16 9 Alignment Mode pressing...

Страница 35: ...e process of pressing CH UP CH DOWN or to display the 15 different preset amounts of correction to the Top Center Red Line When you find the pattern with the straightest line press VIDEO to proceed to the Center Red Line Repeat the process for the Center Line followed by the Bot tom Line Press ENTER then EXIT to exit and save the 4 3 and 16 9 data 5 Select the Geometry Test Pattern See HVPOS If Ge...

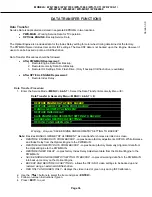
Страница 36: ...F Calibration 2 Use the buttons to select the item and press ENTER 3 Follow on screen instructions if given 4 Press EXIT to quit DATA TRANSFER FUNCTIONS Data Transfer Service Data is duplicated and stored in separate EEPROMs in two locations PWB MAIN Working Service Data for TV operation OPTICAL ENGINE Backup Service Data The Optical Engine also includes data for the Index Delay setting for color ...

Страница 37: ...ys LEDs electrolytic capacitors to melt or warp Higher temperatures can cause surface oxidation resulting in poor solder spread ability and wet ability The flux is more corrosive The time required for a good solder connection may take longer Poor wet ability can cause solder balls Higher temperatures can cause flux spattering Soldering iron tip life is shortened Dull finish solder joints not shiny...

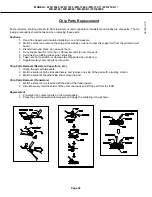
Страница 38: ...or more than 3 three seconds to new chip parts 5 Avoid using a rubbing stroke when soldering 6 Take care not to scratch or damage the chip parts when soldering 7 Supplementary cementing is not required Chip Parts Removal Resistors Capacitors etc 1 Grasp the part with tweezers 2 Melt the solder at both sides alternately and remove one side of the part with a twisting motion 3 Melt the solder at the...

Страница 39: ...e indicated in the schematic diagrams by a red hatch and a symbol The replacement for any safety critical part should be identical in value and characteristics PWB POWER V45C V45 V45CA V45 V45CB F9000 125V 10A F9004 125V 5A F9003 125V 5A PWB MAIN Fuse Replacement Warning Caution For continued protection against risk of fire replace only with the same type fuse See parts list F9A01 24V 6 3A F9001 1...

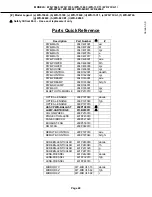
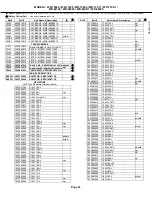
Страница 40: ...60 fgh OPTICAL ENGINE 938P197070 i ASSY PWB BALLAST 938P198010 LAMP CARTRIDGE 915B455011 COLOR WHEEL 938P215010 PROJECTION LENS 491P245010 FAN SCIROCCO 299P321020 EXHAUST FAN 299P356010 DMD FAN 299P382010 REMOTE CONTROL 290P187010 ade REMOTE CONTROL 290P187040 bcfghi SCREEN LENTICULAR 491P243030 abcde SCREEN LENTICULAR 491P243040 fh SCREEN LENTICULAR 491P231020 g SCREEN LENTICULAR 491P247010 i LEN...

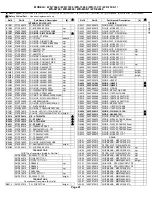
Страница 41: ...876010 FDS6298 cgi 261P877010 FDC655BN 261P878010 RT3Y97M T111 1 cgi 261P937010 2SC3440 T112 F bcfghi TRANSISTORS Conventional Transistors By Ref Q9012 261P227010 TR FQPF27P06 bcfghi DIODES D2A11 262P904070 DIODE CHIP DZ2J051M0L D2A12 262P830010 D CHIP MC2850 T111 1 D2A13 262P830010 D CHIP MC2850 T111 1 D2A21 262P904070 DIODE CHIP DZ2J051M0L D2A22 262P830010 D CHIP MC2850 T111 1 D2A23 262P830010 D...

Страница 42: ...HIP BEADS MPZ2012S102A cgi L3P01 409P975010 CHIP BEADS MPZ2012S221A cgi L3P02 409P975010 CHIP BEADS MPZ2012S221A cgi L3P03 409P975010 CHIP BEADS MPZ2012S221A cgi L3P04 409P975010 CHIP BEADS MPZ2012S221A cgi L3P06 409P975010 CHIP BEADS MPZ2012S221A cgi L3P08 409P975010 CHIP BEADS MPZ2012S221A cgi L3P09 409P975010 CHIP BEADS MPZ2012S221A cgi L3P12 351P314010 COIL CHOKE CHIP MPLC1040L2R2 cgi L4A01 32...

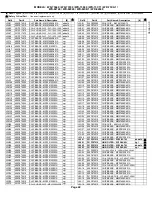
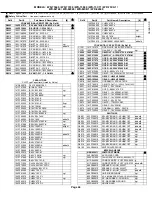
Страница 43: ...3070 1 16W 10K J abdefh 103P503070 1 16W 10K J bcfghi 103P703070 1 16W 10K J 103P690030 1 16W 120 F 103P701040 1 16W 120 J 103P697050 1 16W 120K F 103P705000 1 16W 120K J 103P703080 1 16W 12K J 103P690050 1 16W 150 F 103P703090 1 16W 15K J cgi 103P701060 1 16W 180 J 103P495050 1 16W 18K F 103P695050 1 16W 18K F 103P692050 1 16W 1K F cgi 103P492050 1 16W 1K F 103P692050 1 16W 1K F 103P702050 1 16W ...

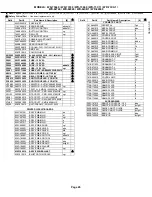
Страница 44: ...5D122040 C ELEC H200V 820M M C9018 185D122040 C ELEC H200V 820M M C9019 154P260030 C CERAMIC R1KV 470P K C9020 181P784010 C ELECTROLYTIC 250V 4 7M M 105C C9021 181P555080 C ELEC 50V 10M M C9031 142P010090 C CER B500V 470P K C9033 181P734000 C ELEC 16V 2200M M 105C C9034 181P734000 C ELEC 16V 2200M M 105C C9035 181P734000 C ELEC 16V 2200M M 105C C9047 181P555030 C ELEC 50V 0 47M C9073 189P280010 C ...

Страница 45: ...56010 COOLING FAN T92T12MHA7 53J811 299P382010 DMD FAN 938P215010 COLOR WHEEL 623D259010 SNAP RIVET i PRINTED CIRCUIT BOARDS 934C407001 ASSY PWB MAIN ad 934C407002 ASSY PWB MAIN bf 934C407003 ASSY PWB MAIN cgi 934C408001 ASSY PWB SOUND cgi 934C409001 ASSY PWB POWER ade 934C409002 ASSY PWB POWER bfh 934C409003 ASSY PWB POWER cgi 934D162001 ASSY PWB CONTROL abdefh 934D162002 ASSY PWB CONTROL cgi 934...

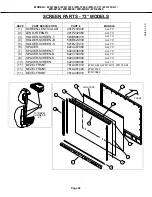
Страница 46: ...30 2 LENS FRESNEL 491P242060 3 HOLDER SCREEN T 593B666010 4 HOLDER SCREEN B 593B623030 5 HOLDER SCREEN S 621B272010 6 SPACER 622C487080 7 SPACER SCREEN T 622C836030 8 SPACER SCREEN B 622C709050 9 SPACER SCREEN S 622C608040 10 SPACER SCREEN 622C489080 11 BEZEL FRONT 761A461010 11 BEZEL FRONT 761A461020 MODELS ALL 73 ALL 73 ALL 73 ALL 73 ALL 73 ALL 73 ALL 73 ALL 73 ALL 73 ALL 73 WD 73 640 WD 73C11 W...

Страница 47: ...REEN 623D673020 623D513020 623D673020 623D654020 5 FRAME SCREEN T 711B073010 711B073020 711B073010 711B073030 6 FRAME SCREEN 701B575010 701B575010 701B575010 711B074050 7 FRAME SCREEN 701B575020 701B575020 701B575020 711B074060 8 FRAME SCREEN B 711B075010 711B075010 711B075010 711B075020 9 JOINT S T 635B135010 635B135010 635B135010 635B135010 10 JOINT S B 635B136010 635B136010 635B136010 635B13601...

Страница 48: ...TY KIT MIR V45 73 1 MIRROR Rear View 767D091030 1 2 HOLDER MIRROR EDGE 623D439040 3 3 HOLDER MIRROR EDGE 623D439080 1 4 STIFFENER 1100mm 601D001040 1 Place the longer side of HOLDER MIRROR EDGE REF 2 3 towards front SCREEN SIDE and shorter side towards the rear Date Code is printed on the rear 1 2 2 10 1 4 6 1 4 2 4 REAR 160mm 3 260mm Date Code SIDE LONG EDGE ...

Страница 49: ...ROR EDGE 623D512030 1 3 HOLDER MIRROR EDGE 623D512040 1 4 HOLDER MIRROR SIDE 623D515020 2 KIT MIR V45 92 1 MIRROR Rear View 767D089050 1 2 HOLDER MIRROR EDGE 623D512050 1 3 HOLDER MIRROR EDGE 623D512060 1 4 HOLDER MIRROR SIDE 623D515030 2 Place the longer side of HOLDER MIRROR EDGE REF 2 3 4 towards front SCREEN SIDE and the shorter side towards the rear Date Code is printed on the rear 1 2 3 3 4 ...

Страница 50: ...Page 50 MODELS WD 73640 WD 73740 WD 73840 WD 73C11 WD 73CA1 WD 82740 WD 82840 WD 82CB1 WD 92840 Version 3 0 ...

Страница 51: ...Page 51 MODELS WD 73640 WD 73740 WD 73840 WD 73C11 WD 73CA1 WD 82740 WD 82840 WD 82CB1 WD 92840 Version 3 0 ...
Страница 52: ...Page 52 MODELS WD 73640 WD 73740 WD 73840 WD 73C11 WD 73CA1 WD 82740 WD 82840 WD 82CB1 WD 92840 Version 3 0 ...
Страница 53: ...Page 53 MODELS WD 73640 WD 73740 WD 73840 WD 73C11 WD 73CA1 WD 82740 WD 82840 WD 82CB1 WD 92840 Version 3 0 ...
Страница 54: ...Page 54 MODELS WD 73640 WD 73740 WD 73840 WD 73C11 WD 73CA1 WD 82740 WD 82840 WD 82CB1 WD 92840 Version 3 0 ...
Страница 55: ...Page 55 MODELS WD 73640 WD 73740 WD 73840 WD 73C11 WD 73CA1 WD 82740 WD 82840 WD 82CB1 WD 92840 Version 3 0 ...
Отзывы: