background image

11 


6. Advanced colour settings. 

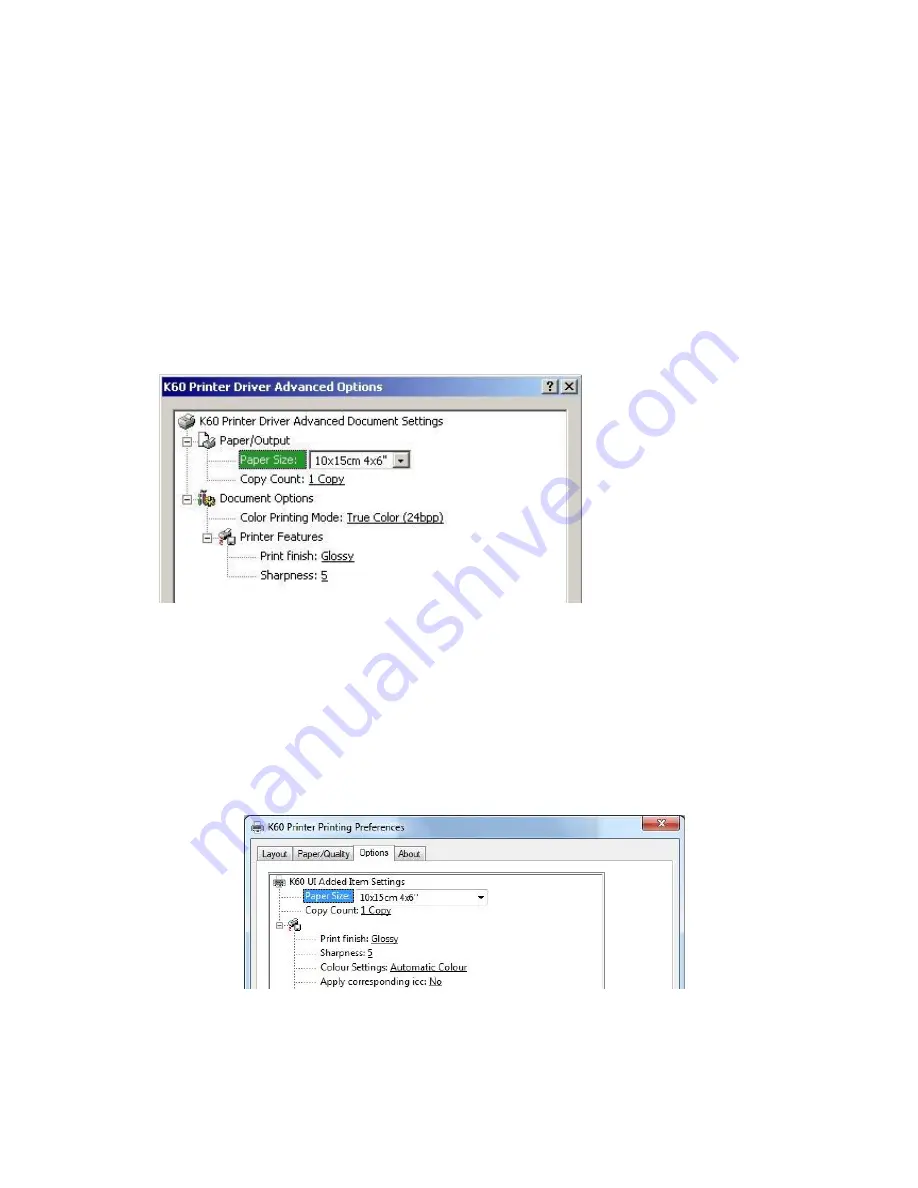
In the “K60 Printer” panel in the section “Advanced printing characteristics” the following 
parameters can be defined.  

Paper size:

 Your can select from among the following formats: 

10x15cm / 4x6”, 15x20cm / 

6x8” and 13x18cm (centred on a 15x20cm) / 5x7” in 6x8”. 

Type of finish:


You can select either a “Matte” or a “Glossy” finish. 

Sharpness:

 Make your selection within a scale of 0 to 8. 


Colour settings: 

You can choose between the following options: 

Automatic 

(pre-  

determined)


and 

Manual


Automatic  colour  settings:

  This  setting  uses  the  predetermined  colour  curve  but 

without using an icc profile. It is recommended for printing photos taken by amateurs. 
 

Apply  associated  icc:

  You  can  choose  between 

No 

(predetermined)


and 

Yes

.  If 

checking the option 

Yes

 it allows you to apply an associated icc to the colour curve that 

is  predetermined.  Currently  no  icc  profile  is  associated  with  the  predetermined  colour 
curve. 


Содержание CPK60

Страница 1: ...1 MITSUBISHI Photo Suite User Manual CPK60 Printer Version 1 1 ...

Страница 2: ...2 Content 1 MITSUBISHI Photo Suite 3 2 System requirements 4 3 Printer specifications 5 4 Installation 5 5 Printing of files 9 6 Advanced colour settings 11 7 Uninstalling 13 ...

Страница 3: ...gs administration panel When the PrintModule has been initiated it can be seen on the Windows toolbar You can control all the print orders requested from the PrintModule In addition you can view the printer status In the Advanced Settings module you can control the PrintModuleService which deletes orders already completed You can also define the interval in minutes during which the completed order...

Страница 4: ... version Windows Vista 3 GHz processor 2 GHz processor Windows 7 3 GHz processor 2 GHz processor RAM Windows XP Service Pack 3 1 GB 2 GB Windows Vista 1 GB 4 GB Windows 7 1 GB 4 GB Free space on disk Windows XP Service Pack 3 500 MB 1 GB Windows Vista 2 GB 4 GB Windows 7 2 GB 4 GB CD drive CD or DVD drive Software Windows XP Service Pack 3 Service Pack 3 NET Framework 4 0 Windows Vista NET Framewo...

Страница 5: ...ft NET Framework 4 0 included with the installer The MITSUBISHI Photo Suite application Follow the instructions shown below to completely install the MITSUBISHI Photo Suite solution Before continuing to install the MITSUBISHI Photo Suite read the system requirements section carefully and uninstall any previous version Starting with the Mitsubishi Photo Suite 1 1 version use the same installer to u...

Страница 6: ...d in the Windows devices administration panel as Other devices To install the controller execute the USB Driver Updater programme which is in the C Program Files MITSUBISHI Photo Suite USB Driver folder and select Update If the controller is correctly installed the printer will be displayed in the Windows devices administration panel as MITSUBISHI USB Printer Once the above steps have been complet...

Страница 7: ...ted please cancel it To install the printer controller go to the Windows devices administration panel and locate the device as USB Printing Support in Universal Serial Bus Controllers To install the controller select the USB Printing Support device and then right click and select the option Update controller software Then select the option Locate controller software in the equipment The controller...

Страница 8: ... controller is correctly installed the printer will be displayed in the Windows devices administration panel as MITSUBISHI USB Printer Once the above steps have been completed the printer will now be installed and ready to use You will find the application In the Windows home menu in If once installed you connect the printer to another 2 0 USB port in your computer you must reinstall the controlle...

Страница 9: ...dows assistant Go to a folder in the system select an image or several images and then press print A Microsoft Windows printing assistant will appear Follow the steps indicated by the assistant to print it In the K60 Printer panel in the section Advanced printing characteristics the following parameters can be defined Paper size Your can select from among the following formats 10x15cm 4x6 15x20cm ...

Страница 10: ...10 Follow the steps indicated by the assistant to print the selected photographs Select the photographs to be printed ...

Страница 11: ...our selection within a scale of 0 to 8 Colour settings You can choose between the following options Automatic pre determined and Manual Automatic colour settings This setting uses the predetermined colour curve but without using an icc profile It is recommended for printing photos taken by amateurs Apply associated icc You can choose between No predetermined and Yes If checking the option Yes it a...

Страница 12: ...electing the Predetermined curve this setting uses the same curve as that used in the Automatic mode The other curves available use different CPG files When the manual mode is active you can use other ICC profiles When using other ICC profiles all settings associated with the K60 printer ICC are overwritten To obtain the best results combine Chart0 and Gamma1 When changing automatic colour setting...

Страница 13: ...ninstaller assistant instructions to complete the process Once the process has been completed the MITSUBISHI Photo Suite will be completely uninstalled from your computer Starting with the Mitsubishi Photo Suite 1 1 version use the same installer to uninstall the previous versions During the installation process the existence of previous versions will be verified and the uninstalling process will ...

Страница 14: ...ws Vista and Windows 7 are registered trademarks of Microsoft Corporation in the USA and or in other countries Adobe and Adobe Photoshop are registered trademarks of Adobe Systems The different software packages mentioned in the manual are commercial marks registered in their respective companies ...

Отзывы: