32
GB
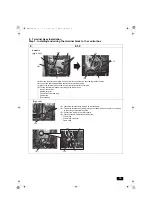
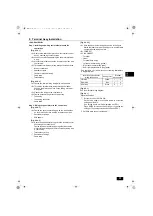
6. Installation Procedures
<PAC-PH01EHY-E>
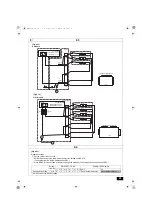
[Fig. 6.0.1]
0
[Fig. 6.0.2]
[Fig. 6.0.3]
[Fig. 6.0.4]
[Fig. 6.0.5]
[Fig. 6.0.6]
[Fig. 6.0.7]
[Fig. 6.0.8]
[Fig. 6.0.9]
[Fig. 6.0.10]
[Fig. 6.0.11, 6.0.12]
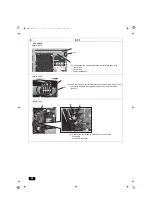
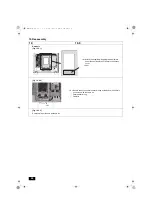
<PAC-PH02EHY-E>
[Fig. 6.1.1]
0
[Fig. 6.1.2]
[Fig. 6.1.3, 6.1.4]
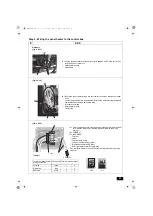
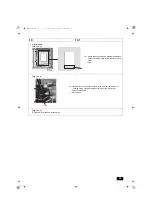
<PAC-PH03EHY-E>
[Fig. 6.2.1]
0
[Fig. 6.2.2]
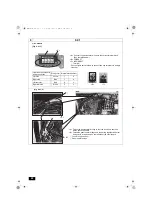
[Fig. 6.2.3]
[Fig. 6.2.4]
[Fig. 6.2.5, 6.2.6]
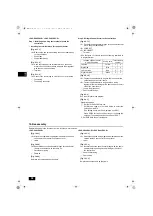
<A> Remove the front panel from the unit by unscrewing the
eight screws.
<B> Remove the fan guard by unscrewing the six screws.
* Remove the snow protection hood (optional parts), if any.
<A> Remove the drain pan cover by unscrewing the screws
and cutting the cable tie.
<B> Remove the front drain pan by unscrewing the two
screws.
Be sure to remove the two rod holders holding the
check joints to the drain pan.
A
Drain pan cover
B
Drain pan
C
Rod holder
<A> Remove the top attachment and the bottom attachment
connecting the main control box and inverter control
box by unscrewing the two screws.
<B> Remove the cover from main control box by unscrewing
the three screws.
A
Top attachment
B
Bottom attachment
C
Main control box
D
Inverter control box
<A> Cut the two cable ties holding the weak electrical wiring
inside the main control box in place.
<B> Loosen the four cable straps holding the weak and
strong electrical wirings.
<C> Cut the two cable ties holding the rubber bush at the
bottom of the main control box.
A
Cable tie
B
Cable strap
Cut the three cable ties and loosen the two cable straps
holding the weak electrical wiring outside the main control
box.
A
Cable tie
B
Cable strap
<A> Loosen the three cable straps holding the motor wiring
outside and the bottom of the main control box.
<B> Remove the wiring from the two wire saddles.
A
Cable strap
B
Wire saddle
<A> Loosen the two cable straps holding the strong
electrical wiring outside and the bottom of the main
control box.
A
Cable strap
<A> Cut the cable tie and loosen the two welding clamps
holding the strong electrical wiring at the bottom of the
main control box.
A
Cable tie
B
Welding clamp
<A> Unscrew the two screws holding the main control box.
<A> Make sure that no undue force is applied to the wirings
from which cable straps were removed. Attach the
bottom attachment that was removed from the fin
guard, and then hook the main control box on the
attachment.
A
Bottom attachment
B
Main control box
<A> Remove the screws above the side and rear panels.
<A> Remove the front panel from the unit by unscrewing the
14 screws.
<B> Remove the fan guard by unscrewing the 12 screws.
* Remove the snow protection hood (optional parts), if any.
<A> Remove the control box front cover by unscrewing the
five screws.
A
Control box front cover
<A> Remove the external temperature sensor wiring from
the left drain pan by cutting the two cable ties.
<B> Unhook the pipe cover from the left drain pan.
<C> Remove the left drain pan by unscrewing the two
screws.
A
Left drain pan
B
External temperature sensor wiring
C
Cable tie
D
Pipe cover
* When re-placing
B
to the left drain pan after installing the
panel heater, use the supplied cable tie (100 mm).
<A> Remove the right drain pan by unscrewing the two
screws.
A
Right drain pan
<A> Remove the screws above the side and rear panels.
WT08867X01.book 32 ページ 2018年1月22日 月曜日 午後3時17分
Содержание CITY-MULTI PAC-PH01EHY-E
Страница 221: ...WT08867X01 book 221 ページ 2018年1月22日 月曜日 午後3時17分 ...
Страница 222: ...WT08867X01 book 222 ページ 2018年1月22日 月曜日 午後3時17分 ...
Страница 223: ...WT08867X01 book 223 ページ 2018年1月22日 月曜日 午後3時17分 ...


