S y s t e m U p g r a d e s
LS/VS 550 OWNER’S HANDBOOK 5/7
connected.) Disconnect any cables connected to the cards,
remove the screws that secure the cards at the rear of the system
unit, then remove the cards from the system unit.
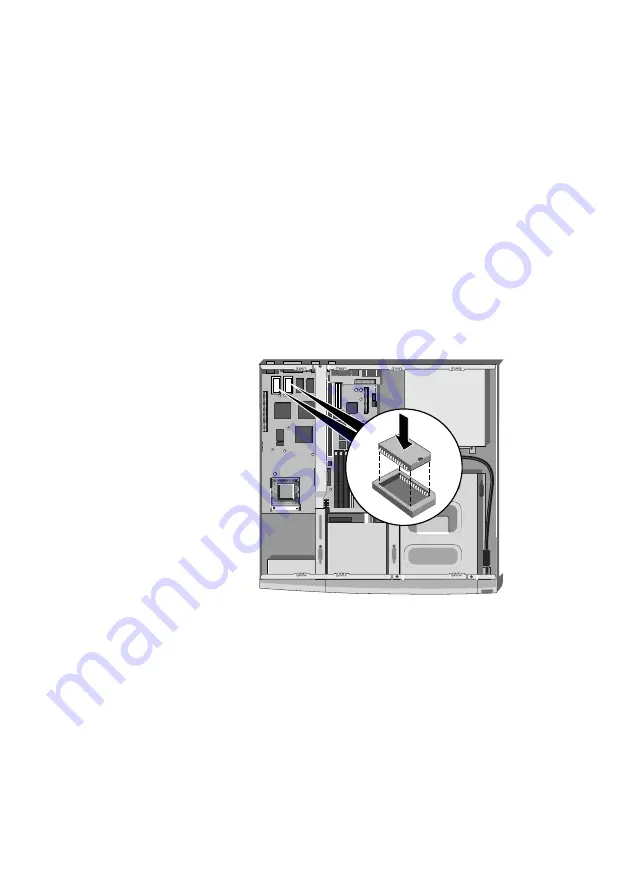
4. Use the illustration at the beginning of this chapter to identify
the two video memory upgrade sockets.
5. Unpack the upgrade kit and lay the memory chips out on an
anti-static surface. Hold each chip by its edges and be careful
not to touch the metal pins. These memory chips are
particularly static sensitive. Handle with extreme caution.
6. It is vital that the chips are fitted the right way round. Each chip
has a notch at one end
or
small bevel at one corner,
corresponding to the notch or bevel on the socket corner. These
must be
aligned as shown below.
7. One at a time, press the chips in the sockets, push firmly home.
8. If necessary, replace any expansion cards you removed earlier
and reconnect any cables, etc.
9. Refit and secure the system unit cover.
10. You can now reconfigure your operating system to use the
expanded capabilities of the video controller. See your operating
system documentation for details.


