Physical installation
15
1
2
3
4
15NP160
2.
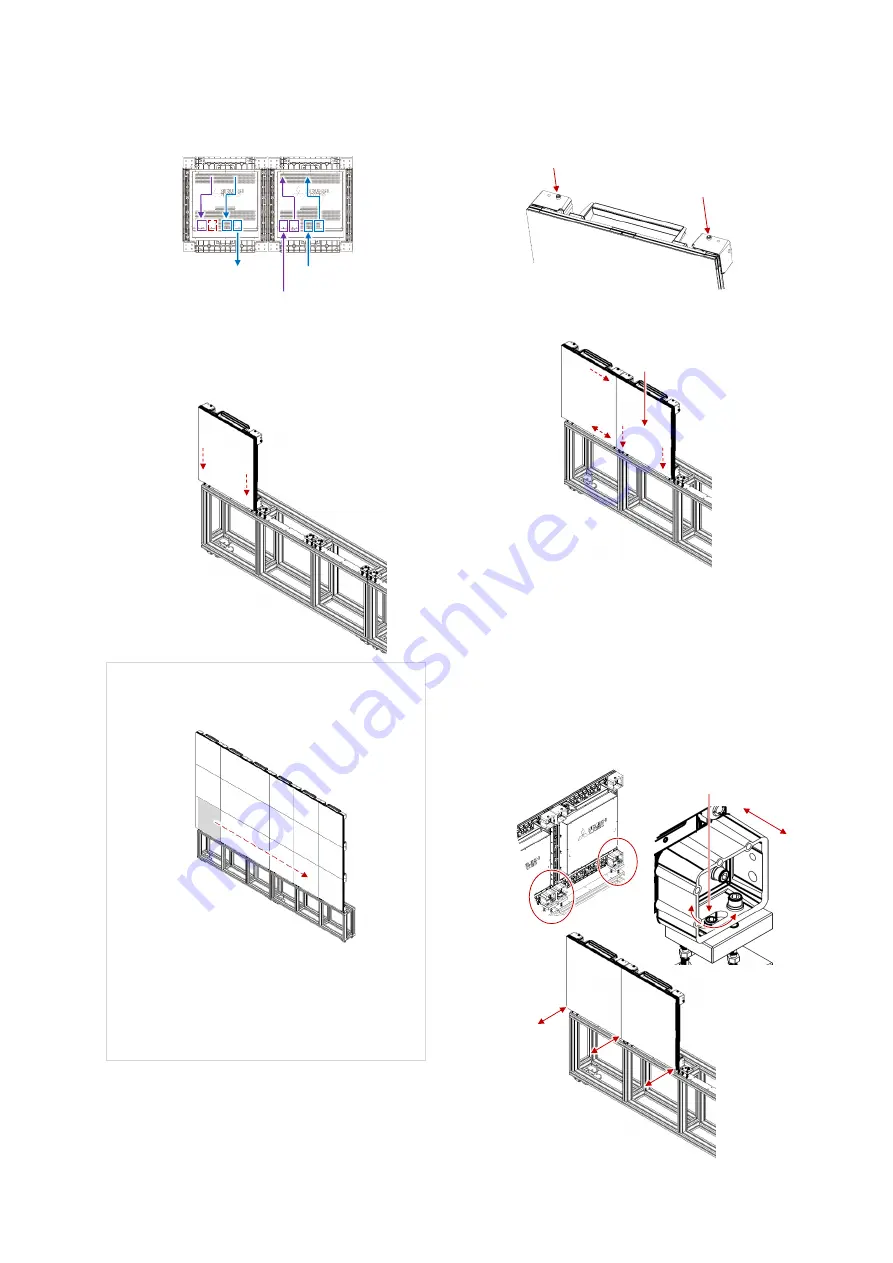
Place the first LED unit on the base stand and
lightly fix it on with 2 fixing screws, which are
supplied with the LED unit.
Starting from the left of the bottom row in the
LED wall, spread to the other side and go to
upper rows.
When the LED wall is horizontally long such as
over 10 units, it is recommend to start from the
center of the bottom row and spread to both
sides. It will reduce the accumulative assembling
tolerance.
3.
Insert 2 supplied adjustment screws to the top
part of the LED unit and lightly fix them with the
supplied nuts from the other end.
4.
Place the second LED unit and fix it with 4 fixing
screws lightly as the unit can still move.
The screw to fix their lower border can be
inserted from either side.
5.
Turn the adjustment screws on the base stand
to align the lower LED surfaces on the 2 LED
units to be flat.
By turning the screws, which have decentered
screw heads, the LED unit moves in front-back
direction.
Adjustment screw x2
Even column
Odd column
Power unit
Control unit
Control unit
Adjustment screw


