Physical installation
11
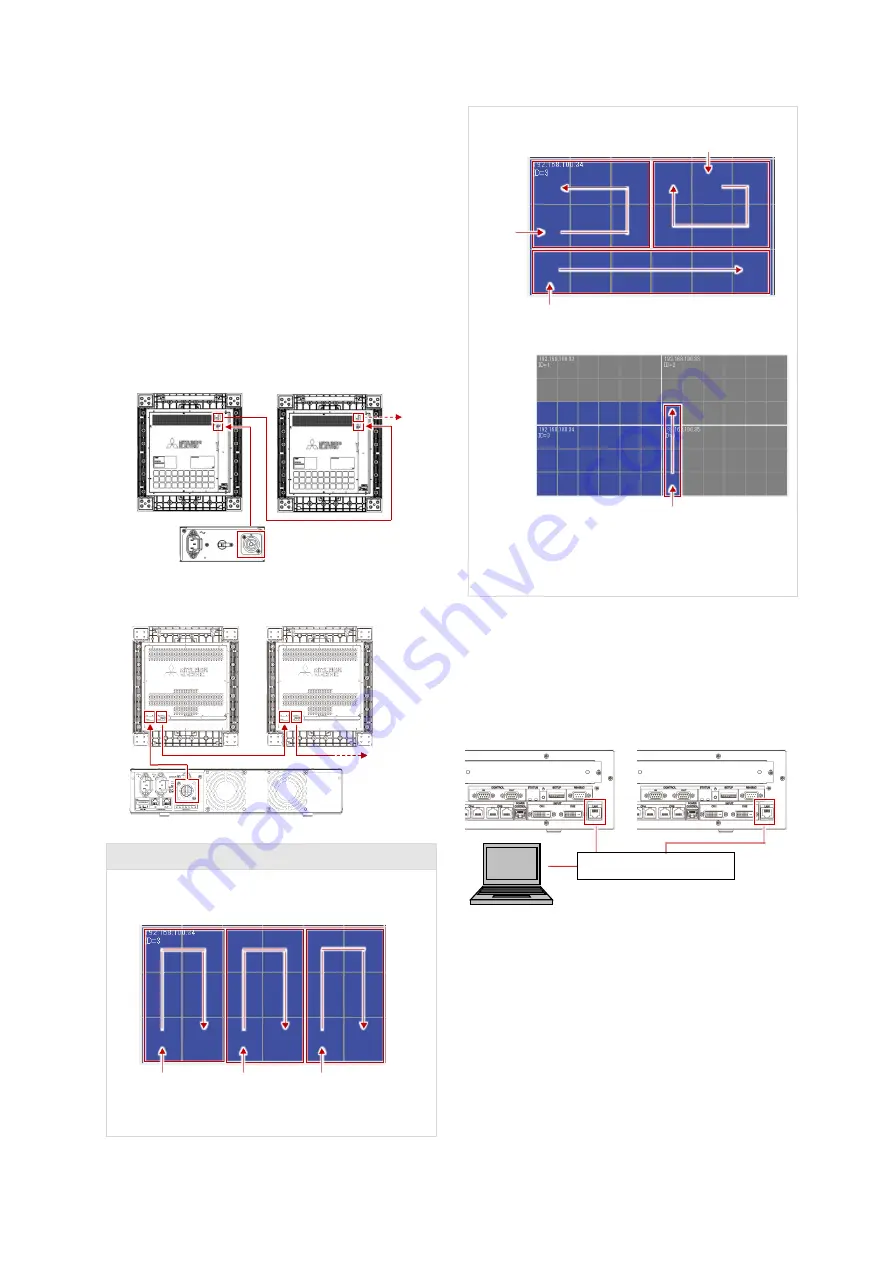
Power cords
Create an open loop from each adapter in 180
Series or power unit in 160 Series through the LED
units.
Choose suitable length of the optional power
cords (p. 3) according to where to place the
power units / adapters and connect them with the
first LED units.
The power cords that connect between the LED
units are supplied with each LED unit in 180 Series
or power unit in 160 Series.
180 Series
160 Series
Connection rules
One power unit / adapter can be connected up
to 6 LED units.
Despite the smaller display area, a VS-
12NP180FH or VS-12NP180RH is also counted as
one unit.
The power units / adapters can be connected to
any LED units in any order.
The power unit / adapter loop can be connected
across control unit display area borders.
When connected across the borders, do not
use the “active power peak saving” function (p.
33). It wouldn’t work properly.
Control lines
Control unit to computer
With the store-bought network cables (p. 6),
connect the LAN port on each control unit to a
network switch for external controlling such as
Wallaby-installed computer (p. 22).
When using a single control unit, it can be directly
connected to the computer without a network
switch. A crossover cable may be needed
depending on the computer.
0
1080
2160
0 1920 3840
Network switch
Adapter
Power
unit


