22
NP180/160 Series Setup Manual
Wallaby setup
“Wallaby for NP” is a software program that sets up the LED walls. It works with Microsoft
®
Windows
®
7 or
later.
Installation
1.
Execute the installation file on a computer to install the Wallaby software. Follow the messages to complete
the installation.
2.
Onto the Wallaby-installed computer, assign an appropriate IP address that can comminute with the
control unit(s).
3.
Connect the computer to the control unit(s) (p. 11).
4.
Run the Wallaby software.
Adjustment memories
Wallaby has the following adjustment memories.
System memory (p. 28): The general setting of the LED wall. The detailed setting menus (p. 32) can customize
the LED wall more as necessary.
Input memory (p. 29): Scans input signals to display the image precisely. Detailed setting by signal is also
available according to the necessity.
Display memory (p. 30): sets displaying image sizes. For instance, a smaller resolution image can be displayed
full-screen on a bigger size of an LED wall and vice versa.
Color calibration memory (p. 26): Stores calibrated luminance and color data. It is independent from the
system memory.
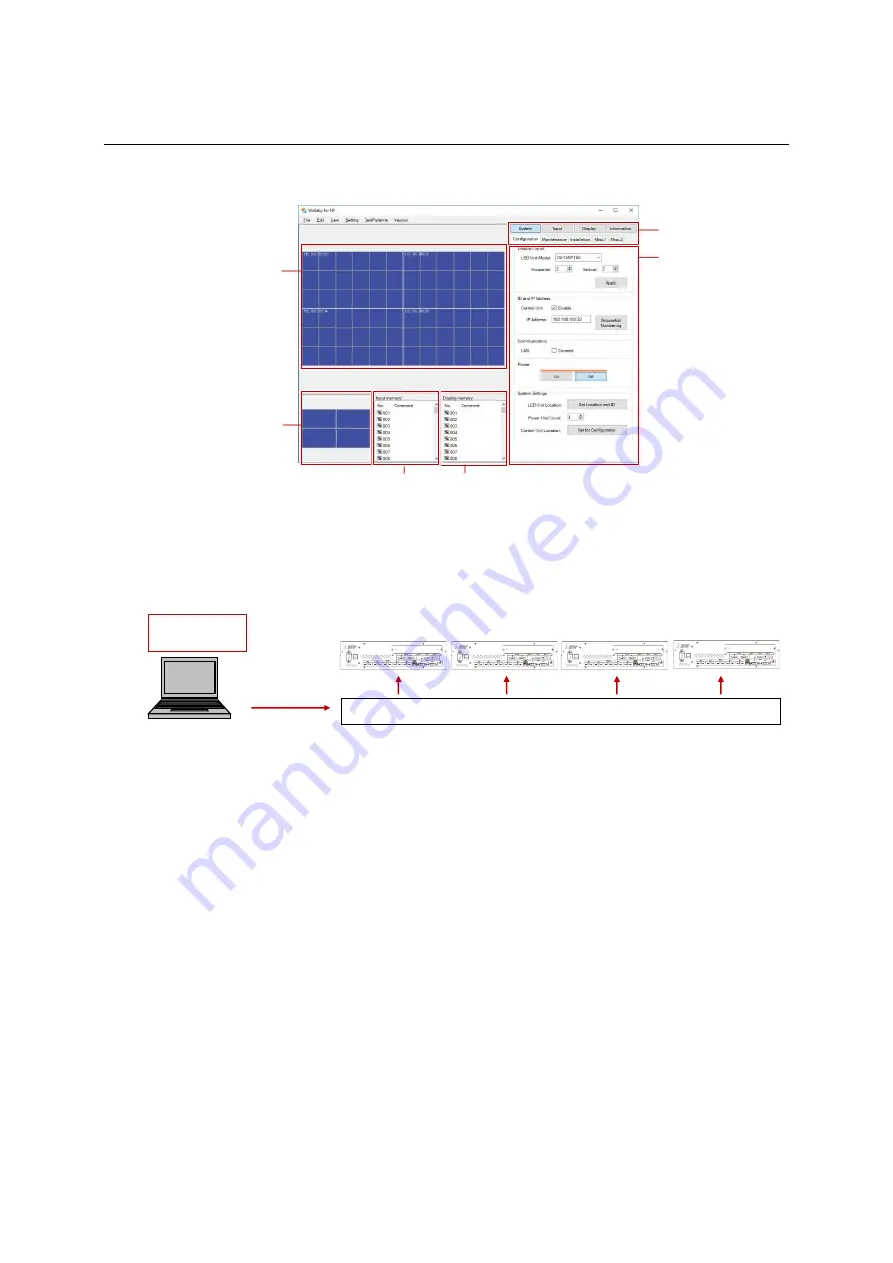
Panel area
Control unit
select area
Display memory list
Input memory list
Adjustment menus
Menu tabs
192.168.100.31
(an example)
192.168.100.32 192.168.100.33 192.168.100.34 192.168.100.35
Network switch


