6
NP180/160 Series Setup Manual
2.
Preparation
Necessary network cables
Prepare the following commercially-available network cables. The length and quantity vary depending on the
system configurations.
For video
transmission
control unit to LED units
Up to 10 m:
Up to 15 m:
Up to 20 m:
CAT 7 network cables
CAT 7 solid conductor or CAT 7A network cables
Mitsubishi confirmed network cables
between LED units
Recommended:
0.7 m or longer
CAT 7 network cables
For controlling
(160 Series)
control unit to power unit
Up to 60 m*:
CAT 5 or higher network cables
between power units
Recommended:
0.2 m or longer
*: It is the total length between the control unit and the last cascaded power unit.
Necessary tools
Hex key
5 mm
Philips screwdriver
#2
Wrench
13 mm (for nuts that fix the adjustment screws)
Digital level
Recommended: accuracy: 0.05° or finer, length: 600 mm or longer
Spacers
(for edge protection at
LED unit mounting)
S-160SP (p. 3): a set of 0.075, 0.100, 0.125, 0.188 mm thickness spacers
Recommended thickness when using store-bought spacers: 0.07 mm to 0.19 mm
Thin spacers
(for LED unit height alignment)
Recommended thickness: 20
μ
m to 50
μ
m, tapes or shim rings etc. (p. 17)
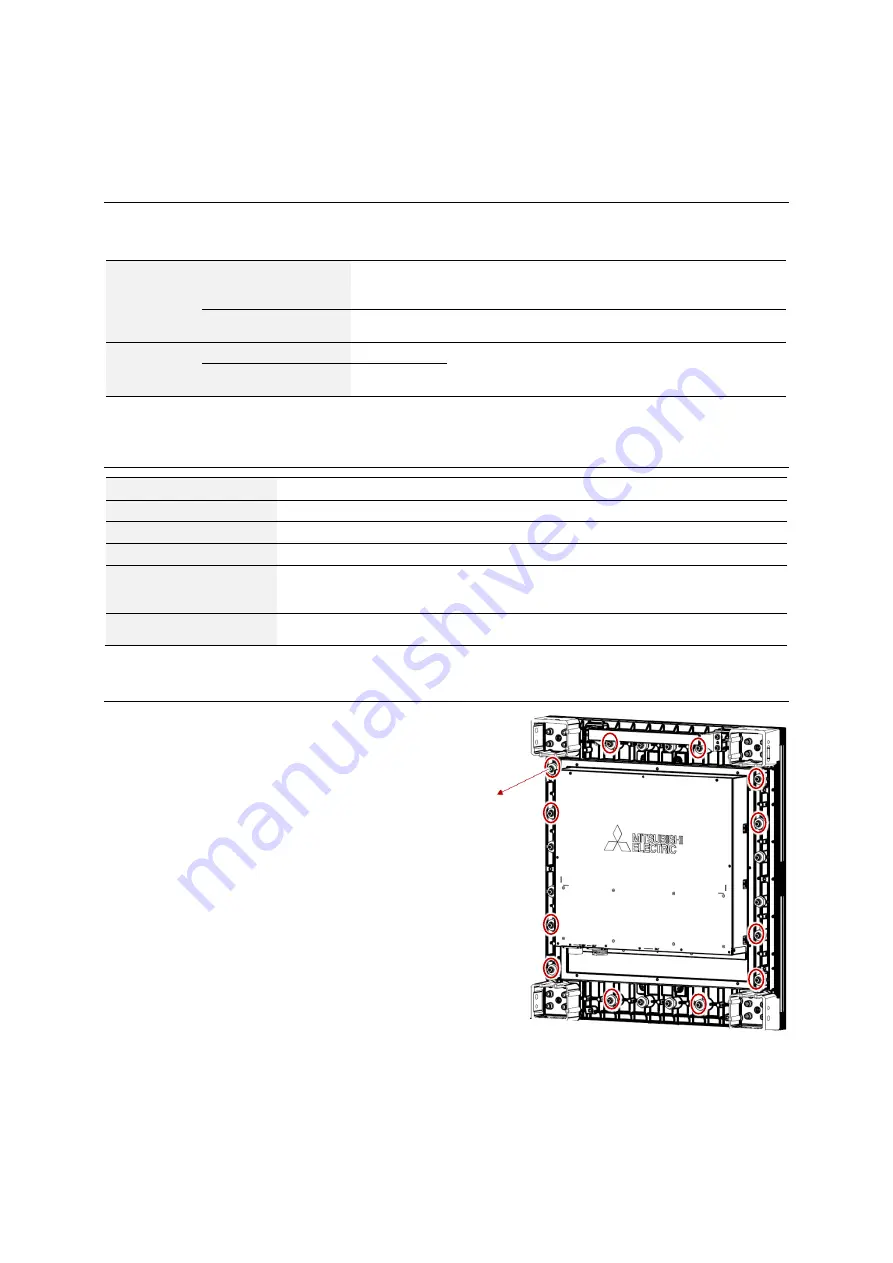
Lock screw releasing (front models)
Before installation, remove 12 lock screws for transportation
with a screw driver from each LED unit of the front
maintenance models.
Without releasing, you may not able to remove an LED
module (p. 39) if the LED wall doesn’t have enough back
space.
The rear maintenance models don’t have such lock screws.


