


42
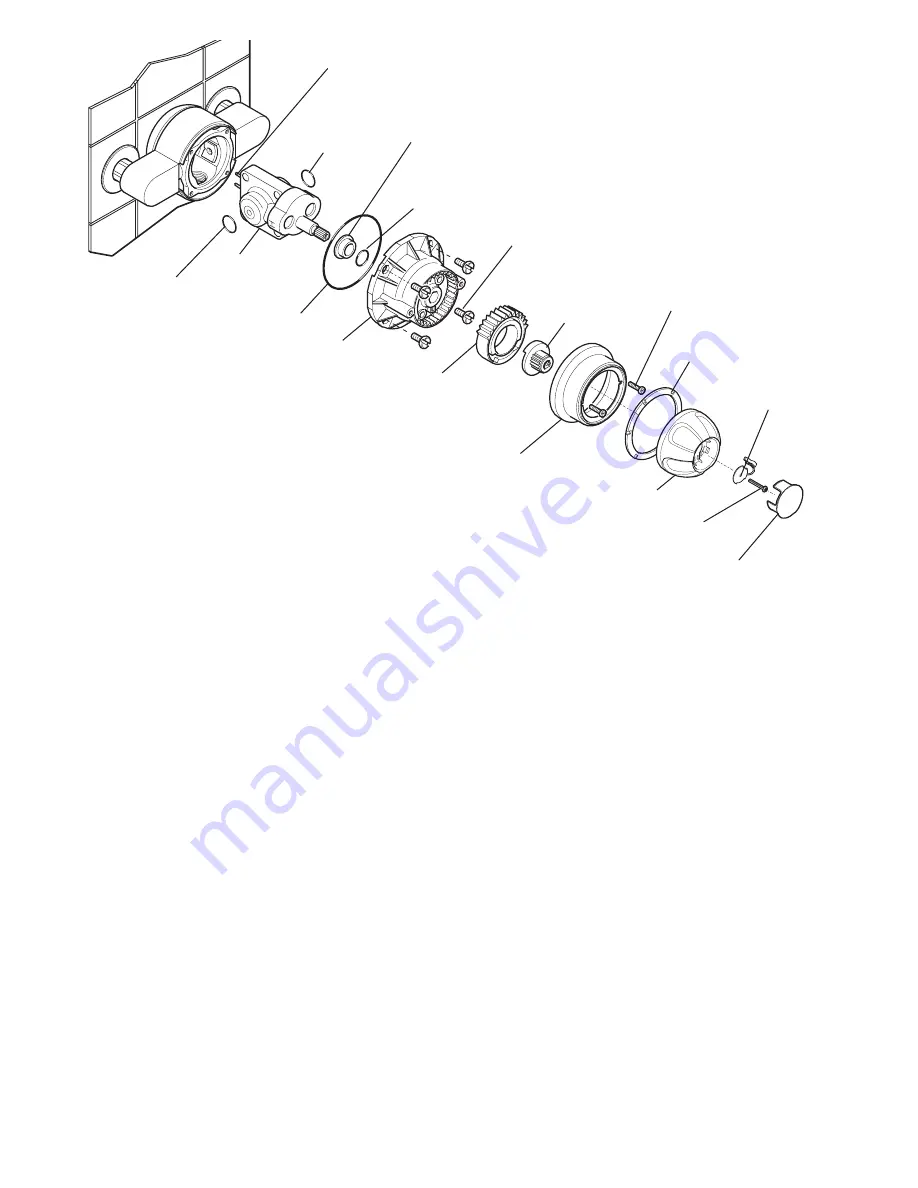
Cover Shroud
Cover Shroud
Retaining Screws
Cartridge
Concealing Cap
Cover
Hub
Cover Retaining
Screws
Control Knob
Plastic
Override
Stop
Retaining Screw
Adjustable
Temperature
Stop
Plastic Pins
Cover 'O' Seal
Retaining Bush
'O' Seal
'O' Seal
'O' Seal
5.
Pull the pressure balancing cartridge from the shower control body.
6.
Identify which is the hot inlet of the shower control and fit the new cartridge
accordingly. The inlets on the new cartridge are marked
“H”
for Hot,
“C”
for Cold.
7.
Push the cartridge fully into the shower control body. Ensure the two plastic pins
locate in the brass body recess.
Make sure that the arrow on the end face of the cartridge points to the letter
"C"
(refer
to Figure 2).
Important!
Ensure that the two inlet seals are well-lubricated and correctly located
before refitting the cartridge.
8.
Ensure that the cover “O” seal is correctly located on the cover.
9.
Refit the cover, and secure with the four cover retaining screws. Make sure that the
flat on the spindle is lowermost (refer to Figure 2).
Note!
There is a one-way cartridge location feature on the cover which ensures the
cover is correctly fitted.
10.
Push the hub onto the spindle.
11.
Turn on the water supplies, and check for any leaks.
Figure 1
Skid
Washer
Содержание Combiforce 415
Страница 51: ...51 Appendix Notes ...


