background image

8

Operating basics

Using the POWER button

•  Turning on the device

Press and hold the POWER button for 3 seconds to turn on 

your device.

•  Turning off the backlight

You can set the device to turn off the backlight automatically 

to reduce the battery consumption: 

Main menu > Settings > 

System > Screen > Backlight Timer

.

Resume using the device to turn on the backlight.

•  Turning off the device

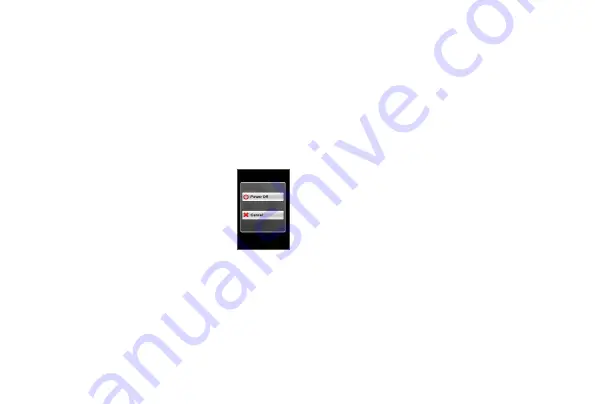
Press and hold the POWER button for 3 

seconds to pop up the Power Off/Cancel 

screen. Choose 

Power Off

 to turn off the 

device or 

Cancel 

to continue operating the 

device.


   Press and hold the POWER button for 5 seconds 

to power off the device if it is not responding.

Your device will automatically turn off after 10 minutes (by 

default) of inactivity. The Power Off/Cancel screen will pop 

up and the device will be turned off if you do not make a 

selection.


   You can change the auto power off setting by tapping 

Main menu > 

Settings > System > Screen > Auto Power Off Timer

.

•  Navigating through the screens

While the device is turned on and you are navigating through 

the menu screens, press the POWER button briefly to return 

to the previous screen.

Using the touch screen

To operate your device, touch the screen with your finger. You 

can perform the following actions:

• Tap

Quick touch the screen once to open menus or select on-

screen button/option.

• Drag

While navigating on the map, tap and hold on the screen 

without releasing your finger to move the map to the desired 

position.

Unlocking the screen

Your device will automatically lock the screen after 30 seconds 

(by default) of inactivity. When the screen is locked, press the 

POWER button briefly to unlock the screen.


   You can change the screen lock setting by tapping 

Main menu > Settings 

> System > Screen > Screen Lock Timer

.

Содержание Cyclo Discover

Страница 1: ...Cyclo Discover User Manual...

Страница 2: ...es a policy of ongoing development Mio reserves the right to make changes and improvements to any of the products described in this document without prior notice Mio does not warrant that this documen...

Страница 3: ...menu 9 System icons 9 Keyboard screen 10 Managing data on the device 10 MioShare 10 CycloAgent 10 Planning your tour 11 Starting the tour 11 NeverMiss Notifications of POI Point of Interest 11 Viewing...

Страница 4: ...4 Troubleshooting 22 What is GPS 23 IPX5 24 Safety precautions 24 Regulatory information 24 WEEE 25 End user license agreement 25...

Страница 5: ...menu commands or enter information 4 Bike mount socket For the device mount 5 Memory card slot 6 Micro USB connector Connects the USB cable The memory card slot is reserved for debugging purposes onl...

Страница 6: ...for 3 seconds to turn your device on 3 Follow the prompts to personalise your device including Select your preferred language Set the date and time Set the units format Create your user profile You c...

Страница 7: ...ter to start synchronising data with the MioShare website For the detailed information on using CycloAgent refer to the CycloAgent documentation Installing the device Mounting the device on your bike...

Страница 8: ...nd the device will be turned off if you do not make a selection You can change the auto power off setting by tapping Main menu Settings System Screen Auto Power Off Timer Navigating through the screen...

Страница 9: ...ons available to enhance your riding experience You can customise the system settings user profiles and more System icons Various System icons in the title bar at the top of the screen provide the sta...

Страница 10: ...en done tap The device supports Russian Bulgarian and Greek keyboard for local users You can enable or disable the desired keyboard from Main menu Settings System Keyboard Managing data on the device...

Страница 11: ...the icon easy moderate difficult very difficult Tap to zoom in out the elevation plot Tap the Left Right button to scroll through the plot when it is zoomed in Select the Nearby mode to navigate to t...

Страница 12: ...ed by the actual product The Map displays the map screen to navigate your trip To access the Map tap Main menu Navigation screen Direction and distance of next turn Current route Current position Curr...

Страница 13: ...ahead Tap to save the current location as a new place and upload it to Place Manager of the MioShare website Viewing the dashboard screens The Map also provides the extended dashboard screens that ca...

Страница 14: ...ion by searching for an address 1 To access the Navigate wizard tap Main menu 2 Select the desired navigation function 3 When searching is complete the Searching Result screen displays the information...

Страница 15: ...public venue which can be displayed as an icon on the map POIs are grouped by category such as bike stores restaurants shopping centres and more The POI s that you have searched previously will be dis...

Страница 16: ...s of the location Tap the Coordinate Format option to change the input method for the latitude longitude coordinate Tap to change between North and South tap to change between East and West Other navi...

Страница 17: ...mount of distance time to ride in the Distance Time field While generating the routes using Time mode you can set the estimated average speed of your trip in the Average Speed field The device will ca...

Страница 18: ...w details of the trip 3 Tap GO to start navigating Viewing the summary of recorded data On the History screen tap the Summary button to view statistics about the recorded data over a defined period of...

Страница 19: ...e and enter the personal data including Name Birth date Weight Gender and profile Type to create a new profile entry You can select the profile Type as City bike Mountain bike Race bike or Run Walk Th...

Страница 20: ...fo in map view When tapping you can see the number of satellites your current position and the strength of the signals Manage This setting allows you to manage the recorded data on the device includin...

Страница 21: ...on The Date Time screen lets you set the date time format Set Date format Tap the button to select the displayed date format Day Month Year Month Day Year or Year Month Day Set Time format You can set...

Страница 22: ...the screen from minor scratches Never clean your Mio when it is turned on Use a soft lint free cloth to wipe the screen and the exterior of your Mio Do not use paper towels to clean the screen Never a...

Страница 23: ...nsibility to place secure and use your Mio in a manner that will not cause accidents personal injury or property damage Always observe safe driving practices On main roads the distance to an exit calc...

Страница 24: ...of in fire or water Important instructions for service personnel only Caution Risk of explosion if battery is replaced by an incorrect type Dispose of used batteries according to the instructions Repl...

Страница 25: ...EE TO THE TERMS OF THIS END USER LICENSE AGREEMENT PLEASE DO NOT USE THIS PRODUCT AND DO NOT COPY ANY SOFTWARE INSTALLED THEREIN IN SUCH CASE PROMPTLY CONTACT MIO OR ANY AUTHORIZED DEALER FOR INSTRUCT...

Страница 26: ...not be binding upon Mio its suppliers and licensors if any product model or sample was shown to you such model or sample was used merely to illustrate the general type and quality of the product and n...

Страница 27: ...or licensors own all intellectual property rights in and to the Product the Software and the Documentation and any copies thereof Except as expressly provided herein this Agreement does not grant you...

Страница 28: ...all be still valid legal and enforceable without being affected or impaired in any way and a valid legal and enforceable provision of similar intent and economic impact shall be substituted therefore...

Отзывы: