


63
DATE IMPRINTING
Previous cameras printed date and time information directly onto the film. Your camera uses
the film’s magnetic data-strip to record date and time information which your photofinisher
can imprint on the front and back of your photographs.
• Some labs can not imprint date and/or time information on the front of your photographs. See your
photofinisher for a full description of available services.
• Date and Time information is always recorded on the films magnetic data strip.
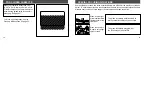
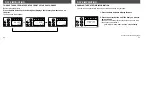
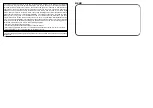
LCD DISPLAY
PRINT FRONT
'Y M D
Hr:Min (24 Hr)
No imprinting
PRINT BACK
'Y M D
Hr:Min (24 Hr)
'Y M D H M
PRINT QUANTITY SELECTION
62
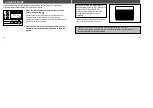
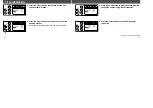
Setting the Print Quantity to Zero
After taking the picture and before taking the next
frame -
1. Press and hold the print button until 0 blinks to
the right of the print mark.
2. Press the select button.
• The camera winds the film back to rewrite the data, then
readvances the film to the next frame.
• Once zeroed, this quantity can not be changed until
reprints are ordered.
• It takes approximately 5 seconds for the camera to start
rewind after the last frame is exposed. To set the print
quantity of the last frame to zero, perform steps 1 and 2
before the camera rewinds the film.