Setting the White Point
38
IMAGE CORRECTION – TONE CURVES/HISTOGRAM
1. Double-click the Black
Point
button.
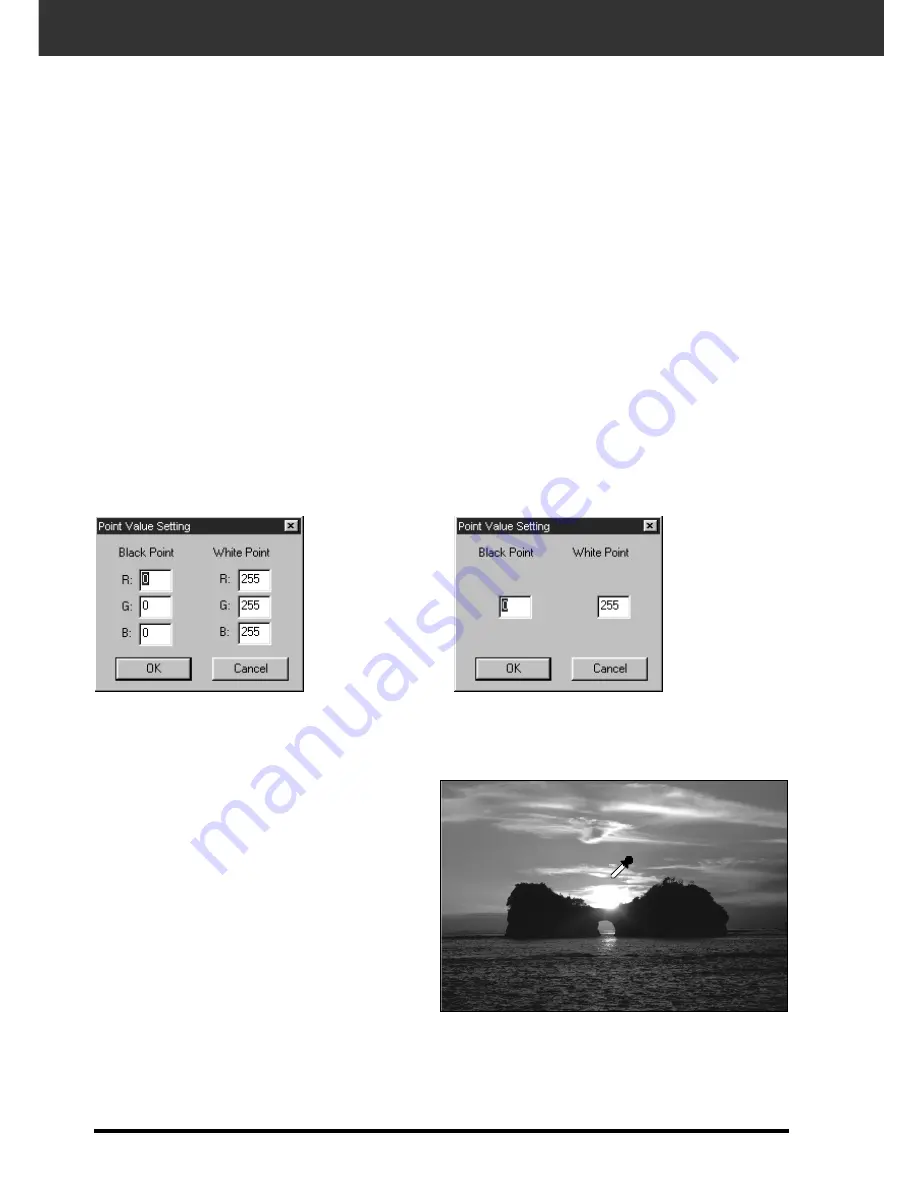
• The Point Value dialog is displayed.
2. Input the desired black point value.
3. Click the Black Point button.
• The cursor changes to the black dropper shape.
4. Click the desired shadow point of
the image.
• The image is corrected so that the point you
clicked is the shadow point. The color of the shadow point is the black point value you input in step 2.
• The change will be reflected in the preview image.
Setting the White or Black Points
This function allows you to correct the highlight or shadow point to the specified value.
• Changes are automatically applied to the preview image.
1. Double-click the White
Point
button.
• The Point Value dialog is displayed.
2. Input the desired white point value.
3. Click the White Point button.
• The cursor changes to the white dropper shape.
4. Click the desired highlight point of the image.
• The image is corrected so that the point you clicked is the highlight point. The color of the highlight point is the
white dropper value you input in step 2.
• The change will be reflected in the preview image.
Point Value Setting dialog box
When the film
type is set to
the color mode.
When the film
type is set to
the
monochrome
mode.
Setting the Black Point
Содержание Dimage Scan Elite F-2900
Страница 1: ...9224 2885 11 H A909 E INSTRUCTION MANUAL...
Страница 7: ...SCANNER SETUP...


