background image

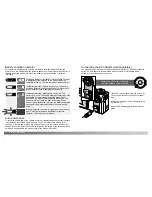
Press the shutter-release button all the way down (2) to
take the picture.

• The access lamp will turn red and blink indicating image

data is being written to the memory card. Never remove a
memory card while data is being transferred.

27

A

UTO

-

RECORDING MODE

BASIC OPERATION

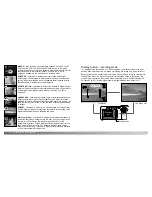
This digital camera has a quick, accurate autofocusing system. The focus icon in the
lower right corner of the LCD monitor and the green focus lamp next to the viewfinder
indicate the focus status. The shutter can be released even if the camera cannot focus
on the subject.

Subject locked. The camera will continue the track
the subject within the focus frames.

Focus icon: white
Focus lamp: steady

Focus icon: red
Focus lamp: blinking

The camera may not be able to focus in certain situations. If the autofocus system
cannot focus on a subject, the focus icon will turn red. In this situation, focus-lock with
Focus Area Selection can be used to focus on an object at the same distance as the
main subject and then the image can be recomposed on the monitor (p. 52, 53).

The subject in the
focus frame is low in
contrast.

The subject is too dark.

Two subjects at differ-
ent distances overlap
in the focus frame.

The subject is near a
very bright object or
area.

Cannot focus. The subject is too close or a special
situation is preventing the AF system from focusing.

If the subject lock is lost, the monitor icon will change from white to red, but the focus
lamp will continue to glow steadily. For more about Subject Tracking AF, see page 64.

When the AF system cannot focus, focus lock with Focus Area Selection can be used
(p. 52, 53).

Focus signals

Special focusing situations

With the mode dial set to auto recording, the camera will be on and the
LCD monitor will activate. Auto recording mode uses two advanced AF
systems, Area AF and Subject Tracking AF, to locate and track the
subject in the the extra-wide focus frames.

Place the subject anywhere within the focus frame.

• Make sure the subject is within the focus range of the lens:

0.5m - 

(1.6ft - 

). For subjects closer than 0.5m, use the

macro function (p. 29).

• If the subject is closer than 1m at the wide-angle lens

position or 3m at the telephoto position, use the monitor to
frame the subject.

Basic recording operation

Press the shutter-release button partway down (1) to
lock onto the subject and fix the exposure.

• The focus signals on the monitor will confirm subject lock. If

the focus signal is red, the camera was unable to locate the
subject. Repeat the previous steps until the signal is white. 

• When the subject lock engages, an AF sensor will appear

on the live image to indicate the subject. If the subject
moves within the focus frames, the AF sensor will change to
track the subject.

• The shutter speed and aperture will appear indicating the

exposure is locked.

• See page 28 for information on Automatic Digital Subject

Selection.

1

26

2

Содержание DiMAGE F300

Страница 1: ...INSTRUCTION MANUAL E...

Страница 2: ...e the eye with plenty of fresh water and contact a doctor If fluid from the batteries makes contact with your skin or clothing wash the area thoroughly with water Tape over lithium battery contacts to...

Страница 3: ...heat or smoke discontinue use Immediately remove the batteries taking care not to burn yourself as the batteries become hot with use The continued use of a damaged product or part may cause injuries...

Страница 4: ...ewing and deleting images 35 Display button playback mode 36 Display button Quick View 36 Enlarged playback 37 Auto recording mode advanced operation 38 Navigating the auto recording mode menu 38 Digi...

Страница 5: ...ring an index print 91 Copy and E mail Copy 92 Viewing images on a television 94 Setup mode controlling the camera s operation 95 Navigating the setup menu 96 LCD monitor brightness 98 Formatting memo...

Страница 6: ...cated behind the terminal cover Self timer Remote control lamp p 42 Flash p 32 Digital subject program button p 29 Strap eyelet p 15 Viewfinder p 12 LCD monitor Menu button Flash mode Information butt...

Страница 7: ...indicator p 70 77 87 Exposure mode indicators p 58 Because the optical viewfinder and the lens are slightly separated the image seen through one is not exactly the same as the other this is called pa...

Страница 8: ...hem with a battery charger suitable for complex electronic equipment Consult your vendor about an appropriate charger Installing AA batteries Install the AA batteries as shown in the diagram make sure...

Страница 9: ...uring periods of heavy use Always turn off the camera before changing between power supplies Connecting the AC adapter sold separately Auto power save To conserve battery power the camera will turn of...

Страница 10: ...ll automatically be displayed on the monitor and three dashes will be displayed on the data panel frame counter Open the card slot door 1 from the fingernail notch at the bottom of the camera Insert t...

Страница 11: ...he menu language may also have to be set To change the language see the camera notes on the following page Turn the mode dial on the top of the camera to the setup position The camera will turn on and...

Страница 12: ...g vertical pictures hold the camera so that the flash is above the lens with the grip to the top Take care not to cover the lens with your fingers or the strap Handling the camera This section covers...

Страница 13: ...auto recording mode uses advanced technology to make photography as effortless as possible Automatic Digital Subject Program Selection optimizes exposure color and image processing settings for each...

Страница 14: ...ing If the subject lock is lost the monitor icon will change from white to red but the focus lamp will continue to glow steadily For more about Subject Tracking AF see page 64 When the AF system canno...

Страница 15: ...ect programs cannot be used in the multi function recording mode For information on individual subject programs see page 30 Digital subject program button 1 Press the shutter release button partway do...

Страница 16: ...optimized to produce sharp colorful landscapes With bright outdoor scenery Automatic Digital Subject Program Selection activates this mode with distant subjects a wide angle lens setting The flash wi...

Страница 17: ...odes The orange flash lamp next to the viewfinder indicates the status of the flash When the lamp blinks quickly the flash is charging and the shutter will not release The lamp glows steadily when the...

Отзывы: