background image

81

Files and folders on the memory card can be deleted using the computer. Do not change the name
of a file on the card or add a date to the card with a computer. Never format the memory card from
the computer; always use the camera to format the card (p. 58, 70).

The number in the image file name may not correspond to the frame number of the image on the
camera. As images are deleted on the camera, the frame counter will adjust itself to show the
number of images on the memory card and reassign the frame numbers accordingly. The file
numbers will not change when an image is deleted. When a new image is recorded, it will be
assigned a number one greater than the largest file number in the folder.

When the file number exceeds 9,999, a new folder will be created with a number one greater than
the greatest folder number on the memory card: e.g. from 100MLT15 to 101MLT15. When a DPOF
file is created for a print order (p. 64), a misc. folder is automatically made for the file.

Image files contain exif tag data. This data includes the time and date the image was recorded

as well as the camera settings used. This data can be viewed with the camera or the DiMAGE
Viewer software.

If an image is opened in a image-processing application that does not support exif tag data,
and then the image is saved overwriting the original data, the exif tag information will be erased.
When using software other than the DiMAGE Viewer, always rename the image file to protect

the exif tag data.

CAMERA NOTES

Содержание Dimage Dimage Xi

Страница 1: ...INSTRUCTION MANUAL E 9222 2783 11 SY A209...

Страница 2: ...200 Lithium ion battery charger BC 200 Hand strap HS DG100 16MB SD Memory Card AV cable AVC 200 USB cable USB 500 DiMAGE software CD ROM PDF DiMAGE Image Viewer Utility manual on CD ROM PDF Camera man...

Страница 3: ...amage the internal battery safe ty devices and cause the battery to overheat ignite rupture or leak Do not store the battery near or in metallic products Do not use the battery with any other products...

Страница 4: ...ger Electric shock may cause injury if a high voltage circuit inside the product is touched Immediately remove the battery or unplug the AC adapter and discontinue use if the camera is dropped or subj...

Страница 5: ...product exposed to liquids may cause damage or injury through fire or electric shock Do not use these products near inflammable gases or liquids such as gasoline benzine or paint thinner Do not use i...

Страница 6: ...contact with people or objects The flash unit discharges a large amount of energy which may cause burns Do not apply pressure to the LCD monitor A damaged monitor may cause injury and the liquid from...

Страница 7: ...tion covers how to prepare the camera for use It contains important information about power supplies and memory cards The basic operation of this camera is covered in the recording mode section betwee...

Страница 8: ...te balance 38 Preset white balance 39 Auto reset 40 Digital zoom 41 Instant playback 42 Voice memo 43 Camera sensitivity ISO 44 Flash range and camera sensitivity 44 LCD brightness 45 Auto power off m...

Страница 9: ...levision 71 Data transfer mode 72 DiMAGE Xi system requirements 72 Connecting the camera to a computer 73 Connecting to Windows 98 and 98SE 75 Automatic installation 75 Manual installation 76 Connecti...

Страница 10: ...aces clean Please read the care and storage instructions in the back of this manual p 90 Flash p 26 Self timer lamp p 32 Lens Main switch Microphone Tripod socket Battery Card chamber door p 13 16 DC...

Страница 11: ...t cover Viewfinder Indicator lamp p 87 Mode switch Left key Right key Zoom lever p 21 LCD monitor Display button p 52 56 Flash mode delete button p 26 55 Menu button Enter button Speaker Recording mod...

Страница 12: ...harged before each shooting session See page 91 for battery care and storage Plug the power cord into the charger unit 1 With the battery terminals toward the front and the label face up slide the bat...

Страница 13: ...e the safety catch 8 After installing the battery the set time date message may appear on the monitor The clock and calendar is set in the setup 1 section of the menu p 18 An internal battery protects...

Страница 14: ...w this level when the camera is on the battery exhausted message will appear just before the camera shuts down Auto power off To conserve battery power the camera will shut down if an operation is not...

Страница 15: ...r areas Insert the mini plug of the AC adapter into the DC terminal 1 Insert the AC adapter plug into an electrical outlet Do not change the power supply while the camera is on Always turn off the cam...

Страница 16: ...ry card press the card into the slot and release 4 The card can now be pulled out Close the battery chamber door 5 and slide it toward the top of the camera to engage the safety catch 6 Slide the batt...

Страница 17: ...rd is protect ed images cannot be recorded If an attempt is made to record or delete an image with the camera the card locked message will appear and the LED lamps near the viewfinder will turn red an...

Страница 18: ...ge may also have to be set To change the language refer to page 69 Turn the camera on by pressing the main switch near the shutter release button 1 Slide the mode switch to the playback posi tion 2 2...

Страница 19: ...keys to select the item to be changed Use the zoom lever to adjust the item Press the enter button to set the clock and calendar The playback menu will be displayed Press the menu button to close the...

Страница 20: ...n Handling the camera While using the viewfinder or LCD monitor grip the camera firmly with your right hand while supporting the camera body with your left Keep your elbows at your side and your feet...

Страница 21: ...d to as wide angle the angle of view is larger than that of the human eye Above 50mm is referred to as telephoto and makes distant objects appear closer The effect of the optical zoom is visible in bo...

Страница 22: ...n of the lens than at the wide angle position Although the warning appears the shutter can still be released If the warning appears place the camera on a tripod or use the built in flash Camera shake...

Страница 23: ...icating image data is being written to the memory card Never remove a memory card while data is being transferred The image can be previewed after it is captured by continuing to hold down the shutter...

Страница 24: ...tter release button partway down to lock the focus The focus signal on the monitor and the viewfinder indicator lamp will indicate if the focus is locked Without lifting your finger from the shutter r...

Страница 25: ...to focus on another object at the same distance as your main subject and then the image can be recomposed to take the picture The subject in the focus frame is low in contrast The subject is too dark...

Страница 26: ...shadows caused by strong direct light or sunshine Flash modes The flash can be used when taking still images To set the flash mode simply press the flash mode delete button 1 on the back of the camera...

Страница 27: ...flash is charging and the shutter will not release When the lamp turns green the flash is charged and ready to fire Flash cancel the flash will not fire Use flash cancel when flash photography is proh...

Страница 28: ...the option whose setting needs to be changed With the menu option to be changed highlighted press the right key the settings will be displayed with the current setting indicated by an arrow To return...

Страница 29: ...Image size Basic Quality Auto reset 1600 X 1200 1280 X 960 640 X 480 Super fine Fine Standard Economy Auto Fluorescent Tungsten Cloudy Daylight Custom Instant playback Voice memo On Off 2X On Off Setu...

Страница 30: ...ding mode menu p 28 If auto reset p 40 is active the drive mode is reset to single frame advance when the camera is turned off Drive modes Movie recording p 33 Audio recording p 34 Single frame advanc...

Страница 31: ...lock the exposure and focus for the series Press and hold the shutter release button all the way down 1 to begin taking pictures When the shutter release button is pressed and held the camera will beg...

Страница 32: ...se focus and exposure are determined when the shutter release button is pressed do not stand in front of the camera when taking a self timer image Always confirm the focus with the focus signals befor...

Страница 33: ...ntil the recording time is used or the shutter release button is pressed again When recording the frame counter will countdown the recording time Take care not to cover the microphone while recording...

Страница 34: ...le To begin recording press the shutter release button 1 A bar graph and the frame counter 2 will display the amount of recorded time The recording will stop when the shutter release button is pressed...

Страница 35: ...basic section of the recording mode menu p 28 Four image sizes are available 2048 X 1536 FULL 1600 X 1200 UXGA 1280 X 960 SXGA and 640 X 480 VGA Image size is defined by the image s horizontal and ver...

Страница 36: ...number of pixels in the image The higher the image quality the lower the rate of compression and the larger the file sizes If the economical use of the memory card is important use the economy mode St...

Страница 37: ...1MB 0 17MB 0 48MB 0 32MB 0 09MB 0 25MB 0 17MB 0 05MB Approximate file sizes Image size Image quality 2048 X 1536 9 2MB 1 6MB 0 80MB 0 40MB 1 image 9 images 18 images 36 images The frame counter indica...

Страница 38: ...eset p 40 is active the white bal ance will be reset to automatic white balance when the camera is turned off White balance Automatic white balance The automatic white balance compensates for the colo...

Страница 39: ...on the monitor To record the ambient light set the flash mode to flash cancel p 26 The built in flash can be used with preset white balance but will create a pinkish or blueish cast with the fluoresce...

Страница 40: ...ded period An internal battery will protect the clock calender and camera settings for more than 24 hours if the camera is used for at least 5 minutes before the battery is removed Exposure compensati...

Страница 41: ...ital zoom are interpolated to the set image size the quality of the images may not be equal to images taken without the digital zoom the greater the power of the digital zoom the lower the image quali...

Страница 42: ...tivated in the custom section of the recording mode menu p 28 When used with voice memo the audio recording will begin after the image is played back 42 Images can be previewed immediately after they...

Страница 43: ...ording has started A bar graph 1 will display the amount of recording time remaining To stop the recording press the shutter release button or enter button 2 The recording will automatically stop when...

Страница 44: ...ng can be selected As the ISO value doubles the camera sensitivity doubles Like grain in silver halide film that increases with speed noise increases with the sensitivity in digital imaging an ISO set...

Страница 45: ...n period To restore power press the main switch The length of the auto power off period can be changed in the setup 1 section of the recording and playback mode menu p 28 58 1 3 5 10 and 30 minutes Th...

Страница 46: ...nc tion is active Date imprinting is activated in the custom sec tion of the recording mode menu Every time a still image is recorded it is stored with an exif tag that contains the date and time of r...

Страница 47: ...and the zoom lever 2 is used to change the value From left to right the screen shows the year month day hour and minute When the date and time have been adjusted set the clock by pressing the enter bu...

Страница 48: ...as much as 2Ev in 1 3 increments with still image and movie recording The exposure compensation value will remain in effect until it has been reset The exposure compensation must be set before the im...

Страница 49: ...Ev will result in an image with normal tonal val ues In this example the dark scene appears bright and washed out on the LCD monitor By decreasing the exposure by 1 5 Ev the richness of the sunset is...

Страница 50: ...er release button partway down to lock the focus and the exposure Focus lock p 24 is active for off center compositions The focus signals p 25 will confirm the image is in focus Press the shutter rele...

Страница 51: ...set to the wide focus frame when the camera is turned off The spot focus area can be used with movie recording The focus area must be set before recording When used with the digital zoom p 41 spot foc...

Страница 52: ...m lens wide angle position or 3m 10ft at the telephoto position When the flash mode or menu button is pressed the monitor will automatically turn on The battery condition and date imprinting indicator...

Страница 53: ...ion to the subject the depth of field becomes shallower separating the subject from the background Many portraits are taken with tele photo lenses Zooming the lens out to the wide angle position makes...

Страница 54: ...Lock indicator p 63 Magnification display p 57 Image size display p 35 Image quality indicator p 36 Battery condition indi cator p 14 Frame number total number of images Audio track indicator Print i...

Страница 55: ...ess the enter button Pressing the menu button cancels the playback During playback the zoom lever adjusts the volume The left key rewinds the audio track and the right key forwards in audio recording...

Страница 56: ...image are displayed at the bottom of the screen The accompanying audio track of the highlighted image can be played by pressing the enter button When the display information button is pressed again t...

Страница 57: ...age can be enlarged in six steps for closer examination 1 5X 2 0X 2 5X 3 0X 3 5X and 4 0X Pressing the zoom lever up increases the image magnification Pressing the zoom lever down decreases the image...

Страница 58: ...to display the setting screen The Basic tab at the top of the menu will be highlighted Use the left right keys to highlight the appropriate menu tab the menus will change as the tabs are highlighted 5...

Страница 59: ......

Страница 60: ...removing the icon The menu button cancels the screen and any operation made The garbage can icon indicates the frame is selected for deletion The key icon indicates the image or audio file is locked...

Страница 61: ...ice memo audio track recorded with an image Audio captions cannot be attached to movie clips nor can they over rewrite audio recordings The audio caption can be stopped during the fif teen second reco...

Страница 62: ...file to be deleted Pressing the zoom lever up will mark the frame with the garbage can icon To deselect a file for deletion highlight it with the yellow border and press the zoom lever down the garbag...

Страница 63: ...nd right keys to highlight the image or audio recording to be locked Pressing the zoom lever up will mark the frame with the key icon To unlock a file highlight it with the yellow border and press the...

Страница 64: ...ies of that image will be printed Pressing the zoom lever up will increase the number of copies pressing the zoom lever down will decrease the number A maximum of nine copies can be ordered To deselec...

Страница 65: ...een printed the DPOF file will still remain on the memory card The DPOF files must be canceled manually DPOF files cannot be created for images captured with another camera DPOF data created on other...

Страница 66: ...to mark it with the check icon To deselect a file to be copied highlight the selected thumbnail and push the zoom lever down the check icon will disappear Continue until all the files to be copied ar...

Страница 67: ...number and is followed by one register for the year two register for the month and two registers for the day 101YMMDD The folder 10121012 was created in 2002 on October 12th With the date folder form...

Страница 68: ...anged the first file saved to the new card will have a number one greater than the last file saved on the previous card if the new card does not contain an image with a greater file number If it does...

Страница 69: ...uage Press the enter button to set the selected language The playback menu will be dis played Press the menu button to close the play back menu The menu language is set on the setup 2 section of the p...

Страница 70: ...and entered a confirmation screen will appear Choosing Yes will format the card choosing No will cancel the formatting operation A screen will appear to indi cate the card has been formatted If the un...

Страница 71: ...e mode switch to the playback position The camera s monitors will not activate when the camera is attached to a television The playback mode display will be visible on the television screen Set the te...

Страница 72: ...perating systems are compatible with the camera DiMAGE Xi system requirements Check the Minolta web site for the latest compatibility information North America http www minoltausa com Europe http www...

Страница 73: ...omputer s USB port Attaching the camera to a USB hub may prevent the camera from operating properly A fully charged battery should be used when the camera is connected to a computer The use of the AC...

Страница 74: ...ate the USB connection While the camera is connected to a computer the data transfer screen will be displayed 5 5 If the computer does not recognize the camera disconnect the camera and restart the co...

Страница 75: ...he screen No special driver software is required for other Windows operating systems Before connecting the camera to the com puter place the DiMAGE software CD ROM in the CD ROM drive The DiMAGE insta...

Страница 76: ...dow click Next The driver should be located in the CD ROM drive at Win98 USB Manual installation To install the Windows 98 driver manually follow the instructions in the connecting the camera to a com...

Страница 77: ...R inf or USBSTRG inf The letter designating the CD ROM drive will vary between computers The last window will confirm the driver has been installed Click Finish to close the add new hardware wizard Re...

Страница 78: ...o save power When the camera shuts down an unsafe removal of device warning may appear on the com puter monitor Click OK Neither the camera or computer will be damaged in this operation Unplug the USB...

Страница 79: ...2000 professional and XP Macintosh 1 Stop the USB connection using the unplug or eject hardware routine p 74 2 Turn off the camera 3 Disconnect the USB cable 4 Change the memory card 5 Reconnect the U...

Страница 80: ...an be accessed by double clicking on icons To copying images and audio recordings simply drag and drop the file icon into a location in the computer Image file names begin with PICT followed by a four...

Страница 81: ...one greater than the largest file number in the folder When the file number exceeds 9 999 a new folder will be created with a number one greater than the greatest folder number on the memory card e g...

Страница 82: ...stop the device The safe to remove hardware window will open Turn off the camera and then disconnect the USB cable Disconnecting the camera from a computer Windows Me 2000 professional and XP Confirm...

Страница 83: ...ete the first step before disconnecting the USB cable Macintosh The hardware devices to be stopped will be dis played Highlight the device by clicking on it then click Stop A confirmation screen will...

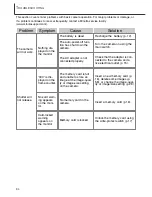
Страница 84: ...n For major problems or damage or if a problem continues to reoccur frequently contact a Minolta service facility www minotasupport com Shutter will not release 000 is dis played on the frame counter...

Страница 85: ...the subject p 24 Pictures are taken indoors or in low light situations with out flash Slow shutter speeds result in blurred images when the camera is hand held Use a tripod or the built in flash p 26...

Страница 86: ...Solution The lens was partially covered with an object or finger When using the viewfinder take care not to cover the lens Part of the image area is hidden behind a dark object Viewfinder was used to...

Страница 87: ...hutter speed is below the limit where the camera can be safely hand held Use flash p 26 or tripod The camera cannot focus The subject is closer than 0 25m 0 8ft or a special situation is preventing th...

Страница 88: ...in the universal serial bus controller or other devices loca tion of the device manager Click on the locations to display the files The driver should be indicated with the camera name Under certain c...

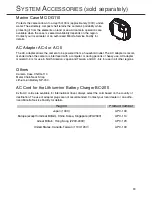
Страница 89: ...en the camera is interfaced with a computer or during periods of heavy use AC adapter model AC 4 is for use in North America Japan and Taiwan and AC 5 is for use in all other regions Others Camera Cas...

Страница 90: ...before removing it from the bag SD Memory Cards and MultiMediaCards are manufactured with precision electronic components The following may cause data loss or damage Improper use of the card Bending d...

Страница 91: ...ght container with a silica gel drying agent Remove the battery and memory card from the camera when not in use for extended periods Do not store the camera in an area with naphthalene or mothballs Du...

Страница 92: ...formances exhibitions etc is prohibited without approval and can infringe on copyright Images protected by copyright can only be used under the provisions within the copy right laws Copyright Although...

Страница 93: ...on If this equipment does cause harmful interfer ence to radio or television reception which can be determined by turning the equipment off and on the user is encouraged to try to correct the interfer...

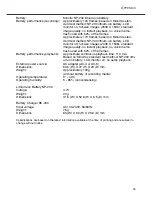
Страница 94: ...nge 0 25 m infinity from the front of the camera Autofocusing system Video AF Shutter CCD electronic shutter plus mechanical shutter Shutter speeds 2 1 1000s Built in flash recycling time Approximatel...

Страница 95: ...the frames Battery performance playback Approximate continuous playback time 110 min Based on Minolta s standard test method NP 200 lithi um ion battery LCD monitor on no audio playback External power...

Страница 96: ...Printed in Germany 2002 Minolta Co Ltd under the Berne Convention and the Universal Copyright Convention 1AG6P1P1419 9222 2783 11 SY A209 0 43325 53116 3...

Отзывы: