background image

SELECTING THE PRINT METHOD (DPOF) - CONT’D

- 95 -

SELECTING THE PRINT METHOD (DPOF) - CONT’D

- 94 -

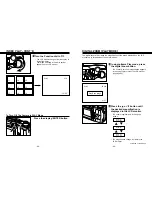
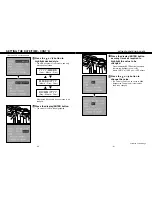
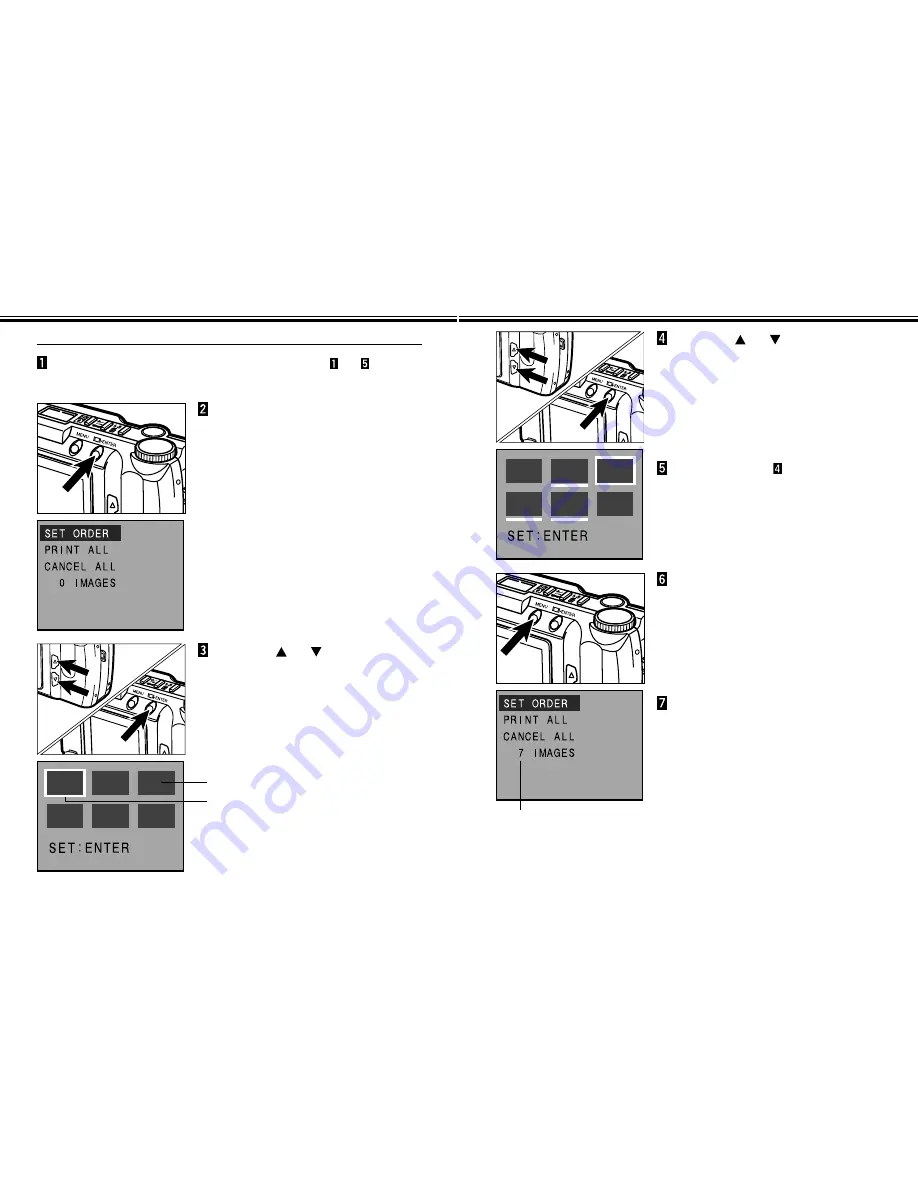
SELECTING THE IMAGES TO BE PRINTED

Select the Print Type according to the steps 

to 

on

pages 92 - 93.

Press the display/ENTER button.

• The Print order menu will appear.

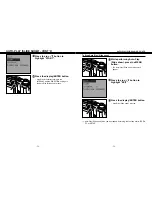
Press 

the or button 

to

highlight “SET ORDER” and
press the display/ENTER button.

• The thumbnail of the images (6 images at a

time) in the CF card will be displayed. A white
border will appear around a thumbnail.

Press 

the or button 

to

move the white border around
the thumbnail to be printed, then
press the display/ENTER button.

• A cursor appears under the selected

thumbnail.

• Pressing the display/ENTER button again

disappears a cursor to cancel the selection.

Thumbnail of the images in the CF card

White border

Repeat the step 

until all of the

images you want to print have
been selected.

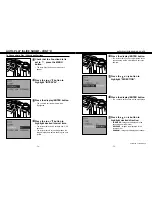
Press the MENU button.

• The print order selection performed in the

steps 4 and 5 will be confirmed and the LCD
monitor will return to the print order menu.

• The number of images you have selected will

be displayed in the LCD monitor (in this
example, 7 images have been selected to
print).

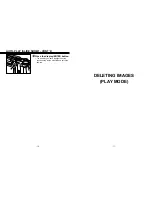
Press the MENU button again.

• The LCD monitor will return to the Play mode

menus.

The number of images selected
to be printed

Содержание DIMAGE 2300

Страница 1: ...the requirements of the EU European Union concerning interference causing equipment regulations CE stands for Conformit Europ enne European Conformity Digital Camera 2300 Tested To Comply With FCC Sta...

Страница 2: ...strange smell heat or smoke Do not walk while looking at the monitor Do not disassemble Electric shock may occur if a high voltage circuit inside the camera is touched Take your camera to a Minolta S...

Страница 3: ...ISO SENSITIVITY 62 TABLE OF CONTENTS 4 FOR PROPER AND SAFE USE 2 BEFORE YOU BEGIN 3 TABLE OF CONTENTS 4 NAMES OF PARTS CAMERA BODY 8 BOTTOM OF BODY 10 VIEWFINFER 10 DATA PANEL 11 GETTING STARTED RIGHT...

Страница 4: ...AY MODE MENUS PLAY MODE MENUS PLAY MODE MENUS LCD Monitor 85 PLAY MODE MENU ITEMS AND EACH SETTING 85 DELETING ALL IMAGES 86 LOCKING PROTECTING ALL IMAGES 88 UNLOCKING UNPROTECYING ALL IMAGES 90 SELEC...

Страница 5: ...s Viewfinder window Flash sensor Self timer lamp Flash Function dial Data panel Remote control receiver Shutter release button Strap eyelet Flash mode Delete button Exposure compensation Lock button D...

Страница 6: ...is being written to or Subject is too close the compact flash card or Image is being loaded from the compact flash card Glows Focus confirmed Flash lamp orange Glows Flash charged and will fire Blinks...

Страница 7: ...tor if desired Turn the Function dial to Press the shutter release button part way down The green focus lamp will glow if focus is confirmed The orange flash lamp will glow if the flash is charged and...

Страница 8: ...ding to the operations between step 1 and step 4 shown at the left display the desired image in the LCD monitor Press the display ENTER button The LCD monitor will return to the step shown above after...

Страница 9: ...17 ATTACHING THE HAND STRAP 16 PREPARATION Put the other end of the strap through the small loop Insert the smaller loop of the strap through the strap eyelet...

Страница 10: ...t of the camera Then while using a downward pressure slide it back to the rear of the camera until it clicks The Minolta Dim ge 2300 uses four AA sized alkaline batteries You may also use AA sized Ni...

Страница 11: ...ld display Enter button about 1 second When you are using the batteries you can change the time that the Auto Power Off feature will activate in the SETUP mode See pages 107 108 of this manual When yo...

Страница 12: ...oving the compact flash card into or from the camera The data in the card will be lost or the card itself may be damaged if the compact flash card is inserted or removed while the camera is on Open th...

Страница 13: ...en open the door Lift the card release lever until it is straight out Press the card release lever to eject the card Pull the compact flash card straight out Be careful not to open the card slot batte...

Страница 14: ...Continued on Next Page Center the subject in the LCD monitor or place the viewfinder s focus frame on the subject Use Focus Hold for off center subjects See page 32 When holding the camera make sure y...

Страница 15: ...card While the image is being saved to the compact flash card the focus lamp green blinks slowly To prevent loss of image data do not remove the compact flash card from the camera or remove the AC ada...

Страница 16: ...See next page FOCUS RANGE The green focus lamp will blink if your subject is closer than the minimum focus distance Normal mode 0 6m 1 97 ft Macro mode See page 44 0 3m 0 6m 0 98 ft 1 97 ft Continued...

Страница 17: ...ight level is low or your subject is backlit FILL FLASH The flash will fire every time a picture is taken regardless of lighting Use fill flash to reduce harsh shadows on your subject s face FLASH CAN...

Страница 18: ...on the data panel You do not have to press and hold the flash mode delete button just press Press the or button until the desired indicator is displayed in the data panel When you press the button the...

Страница 19: ...time is same Turn the Function dial to Move the lens cover slide to to open the lens cover The camera will be turned on and be set to REC Record mode Press the display ENTER button to turn on the LCD...

Страница 20: ...ENTER button to turn on the LCD monitor if desired Arrange the camera and subject positions and compose your picture Press the shutter release button all the way down to start timer The self timer lam...

Страница 21: ...and subject positions and compose your picture Emitter window Delay button Release button Point the emitter window toward the remote control receiver on the front of the camera Press the release butt...

Страница 22: ...emains after the picture is taken The digital zoom will return to X1 0 when you turn the camera off and turn it on again The larger the zoom magnification is the smaller is the file size of the captur...

Страница 23: ...ra will be set to the Macro mode The flash mode will be set to flash cancel and can not be changed while the camera is in the macro mode While looking at the LCD monitor frame your picture For best re...

Страница 24: ...lect the exposure compensation value The exposure can be biased as much as 2 EVs in 1 2 EV increments The exposure change is visible in the LCD monitor REC 1 5 X 1 0 28 LCD Monitor Live View Press the...

Страница 25: ...image capturing like Image Quality and Image Size settings RECORD MODE MENU ITEMS AND EACH SETTING QUALITY S FINE Super Fine FINE STD Standard ECON Economy IMAGE SIZE FULL HALF SHARPNESS HARD NORMAL S...

Страница 26: ...image quality decreases in order super fine fine standard economy The lower the rate of compression of the image the higher its quality If image quality is important use the super fine or fine modes N...

Страница 27: ...ta panel Press the MENU button to clear the Record mode menus and the LCD monitor will return to the live view Image quality may be changed while the capacity of compact flash card remains One compact...

Страница 28: ...e Record mode menus will appear Press the or button to highlight IMAGE SIZE Press the display ENTER button The currently set image size will be highlighted Press the or button to highlight desired ima...

Страница 29: ...w is a list of average file sizes Super Fine Fine Standard Economy FULL size 6380KB 850KB 330KB 170KB HALF size 1430KB 190KB 70KB 40KB Approximate File Sizes The number of images that can fit on a com...

Страница 30: ...The Record mode menus will appear Press the or button to highlight WB Press the display ENTER button The currently set white balance will be highlighted Press the or button to highlight desired white...

Страница 31: ...ll appear Press the or button to highlight SHARPNESS Press the display ENTER button The currently set sharpness will be highlighted Press the or button to highlight desired sharpness The sharpness wil...

Страница 32: ...t HIGH ISO 340 equivalent In Record mode press the MENU button The Record mode menus will appear Press the or button to highlight ISO Press the display ENTER button The currently set ISO sensitivity w...

Страница 33: ...AY MODE Play Mode Screen LCD monitor Single frame Play PLAY 13 25 X3 0 X1 0 X2 0 X3 0 Frame counter Total number of Images taken Digital zoom Protect icon Play Mode Indicator Play Mode Screen LCD moni...

Страница 34: ...The white border appears around the image displayed when the function dial is set to Continued on Next Page 1 2 3 4 5 6 7 8 9 PLAY 1 25 X1 0 Use the or button on the back of the camera to move the bor...

Страница 35: ...currently set zoom magnification appears in the upper right corner of the LCD monitor see page 65 Press the or button until the desired magnification is displayed in the LCD monitor The zoom magnifica...

Страница 36: ...of Images taken In PLAY mode turn the Function dial to Press the MENU button The Auto Play Slide show menus will appear Continued on Next Page FULL size X1 0 Digital zoom magnification selected when...

Страница 37: ...and the DIRECTION settings in the Auto Play Slide show menus To Stop Auto Play Slide show While performing Auto Play Slide show press the MENU button The Auto Play Slide show menus will appear Press...

Страница 38: ...can be set between 3 60 seconds The interval time in this setting means the image display time before showing the next picture Press the display ENTER button The interval time you have highlighted at...

Страница 39: ...77 AUTO PLAY SLIDE SHOW CONT D 76 Press the display ENTER button The direction you have highlighted at the previous step will be selected and set to the camera DELETING IMAGES PLAY MODE...

Страница 40: ...the LCD monitor The button scrolls forward the button scrolls backward Move the lens cover slide to then press and hold the display ENTER button about 1 second After a short wait the last image record...

Страница 41: ...ed protected images cannot be removed from the CF card in the camera by using the Delete function LOCKING PROTECTING IMAGES Locked protected images will be removed when the FORMAT function see page 10...

Страница 42: ...ode menus See page 88 for details UNLOCKING UNPROTECTING IMAGES PLAY 8 16 1 0X Display the images for which lock write protect is to be cleared with steps to on pages 81 82 Press the exposure compensa...

Страница 43: ...nlock unprotect all images delete all images and select the printing method DPOF PLAY MODE MENU ITEMS AND EACH SETTING DELETE ALL NO YES LOCK ALL NO YES PRINT STD INDEX PLAY MODE MENUS LCD Monitor SET...

Страница 44: ...page 81 In PLAY mode turn the Function dial to or Press the MENU button The Play mode menus will appear Press the or button to highlight DELETE ALL Press the display ENTER button A confirmation screen...

Страница 45: ...MAT function see page 105 is performed In PLAY mode turn the Function dial to or Press the MENU button The Play mode menus will appear Press the or button to highlight LOCK ALL Press the display ENTER...

Страница 46: ...lay mode menus will appear Press the or button to highlight UNLOCK ALL Press the display ENTER button A confirmation screen will appear Press the or button to highlight YES To cancel this operation se...

Страница 47: ...printers The DPOF enables you to order prints of specific pictures from all the files on the camera s storage card such as CompactFlash SmartMedia and floppy disk The DPOF records the information for...

Страница 48: ...to be printed then press the display ENTER button A cursor appears under the selected thumbnail Pressing the display ENTER button again disappears a cursor to cancel the selection Thumbnail of the im...

Страница 49: ...A confirmation screen will appear Press the or button to highlight YES and press the display ENTER button The print order print all images will be confirmed and the LCD monitor will return to the pri...

Страница 50: ...he display ENTER button A confirmation screen will appear Press the or button to highlight YES and press the display ENTER button The print order cancel will be confirmed and the LCD monitor will retu...

Страница 51: ...LCD monitor time that an Auto Power Off feature will activate date and time SETUP MODE MENU ITEMS AND EACH SETTING LCD BRIGHT BRIGHT NORMAL DARK POWER SAVE 3MIN 5MIN TIME DATE STYLE DATE TIME DEFAULT...

Страница 52: ...The Setup mode menus will appear Set the brightness of the LCD monitor This setting is applicable both REC mode and PLAY mode Turn the Function dial to SETUP Move the lens cover slide to to open the...

Страница 53: ...to the Setup mode menus Formatting a compact flash card removes all protected and unprotected images from the card The standard accessory card is pre formatted Compact flash cards purchased separately...

Страница 54: ...wer off time time that an Auto power off feature will activate If no action is taken no buttons are pressed during the period you have set the camera power will be turned off automatically Turn the Fu...

Страница 55: ...ower off time shown above is available when using the camera with batteries When using the AC adapter auto power off time is 30 minutes and fixed 3MIN 3 minutes This camera records the date and time a...

Страница 56: ...een Press the display ENTER button The value for Year will be highlighted Skip to step 6 if the style does not need to be changed Press the display ENTER button as many times as required to highlight...

Страница 57: ...E at the step 3 and press the display ENTER button The value for Hour will be highlighted The following operations are as same as those from step 8 After replacing the batteries check that the clock i...

Страница 58: ...Save time P 107 3MIN 3 minutes Date Style P 110 MM DD YYYY Turn the Function dial to SETUP Move the lens cover slide to to open the lens cover Or move the lens cover slide to then press and hold the...

Страница 59: ...nput terminal on the television Turn the television on Turn the camera s Function dial to or Change the television to the video channel The camera s PLAY mode display will appear on the television scr...

Страница 60: ...us The subject has low contrast or other characteristic that is difficult for the autofocus system Use Focus Hold on another object that is similar distance to you as your subject P 32 Read Focus sect...

Страница 61: ...ed while the camera was accessing the card Never remove a compact flash card when the green focus lamp is blinking slowly after taking a picture Problem Cause Solution The camera will not function nor...

Страница 62: ...the pixels are dysfunctional Do not apply pressure on the surface of the LCD monitor Permanent damage may occur In low temperatures the LCD monitor will temporarily darken When the camera warms up nor...

Страница 63: ...era contact your local camera dealer or write to the Minolta distributor in you area Before shipping your camera for repair please contact a Minolta Service Facility for details Continued on Next Page...

Страница 64: ...Remote Control RC 3 Interface USB Universal Serial Bus for Windows 98 Macintosh Video output Composite video signal Power source Power AA sized alkaline battery x 4 AA sized Ni Cd or AA sized Ni MH b...

Страница 65: ...128 MEMO...

Страница 66: ...m b H Amalienstrasse 59 61 A 1131 Wien Austria Minolta Camera Benelux B V Zonnebaan 39 P O Box 6000 NL 3600 HA Maarssen The Netherlands Belgium Branch Prins Boudewijnlaan 1 B 2550 Kontich Belgium Mino...

Отзывы: