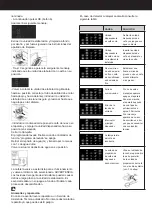
through the opening in the cup grate.
- Clean the drip tray with the cup grate (H) with warm
water and a mild washing-up liquid.
- Wipe the coffee bean container with a dry lint-free cloth.
- Emptying the waste container:
- The following appears on the display:
-As soon as you are prompted to empty the waste con-
tainer, no more coffee can be dispensed.
-This display appears after at least 6 or at the latest 14
coffees have been dispensed. The maximum permitted
number of dispensed coffees depends on various diffe-
rent settings (grinding fineness, ground coffee quantity,
single/double cup).
Push the coffee dispensing unit (C) into the uppermost
position.
Open the door with the coffee outlet unit by pulling it up
on the left side. Pull the coffee ground container out and
clean the container thoroughly to present formation of
mould. Insert the cleaned waste container back into the
machine and push it until it stops.
Close the door with the coffee outlet.
The coffee machine is now ready to dispense coffee
again.
Note:
Only empty waste container when the coffee machine
is switched on. The coffee machine can only detect
emptying when it is switched on. If you empty the waste
container with the coffee machine switched off, this will
not be detected. This may result in prompting to empty
after dispensing the first coffee when the coffee machine
is switched on again the next time.
-Generally, the waste container should be cleaned daily if
the coffee machine is used every day. You will be remin-
ded of this each time by the following display symbol:
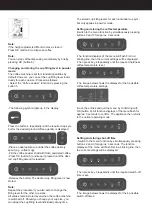
Removing and cleaning the coffee dispensing unit:
To clean the coffee dispensing unit, proceed as follow:
-Push the coffee dispensing unit (C) into the uppermost
position.
-Open the door with the coffee outlet unit by pulling it up
on the left side.
- The dispensing unit can now be removed and the
interior is easily accessible.
-Thoroughly clean the coffee dispensing unit from the
inside and outside with warm and a suitable brush to
remove any coffee residue and prevent mould from
forming.
-Reinsert the coffee dispensing unit.
Installing the coffee dispensing unit:
- Place the coffee dispensing unit in the upper position
back into the door and push the unit slightly so that it
audibly snaps in once.
- When closing the door, the dispenser should be located
at the upper position.
Cleaning the brewing unit:
-The brewing unit must be cleaned every week. If you do
not intend to use your coffee machine for a longer period
of time, it is necessary to empty the waste container (E)
and the water tank (G) and to clean the brewing unit
thoroughly
-To clean the brewing unit as follow:
-Push the coffee dispenser unit (C) into the uppermost
position.
-Open the door with the coffee outlet unit by pulling it up
on the left side.
-Remove the coffee grounds container by pulling it out of
the device.
-Grip the lower front part of the brewing unit and pull
it out to the front. Use your other hand to stop it from
falling out.
-Turn the brewing unit round. The brewing unit is open
and the ejector folded down. Two stainless steel screens
are now freely accessible.
Note:
If the brewing unit is closed, you can loosen it on the
back with the help of the tool function on the measuring
spoon (N). Push the toothed opening on the measuring
spoon onto the pin and loosen it by turning completely at
Содержание CM-4758
Страница 1: ...Cafetera automática CM 4758 ...
Страница 2: ...E F C D A B G Q O P M J K L N H I ...
Страница 16: ...Coffeemotion S L Josep Escaler S n E 25790 Oliana Spain Net weight Aprox 8 16 Kg Gross weight Aprox 9 45 Kg ...
Страница 17: ...Automatic coffee maker CM 4758 ...
Страница 18: ...E F C D A B G Q O P M J K L N H I ...
Страница 32: ...Coffeemotion S L Josep Escaler S n E 25790 Oliana Spain Net weight Aprox 8 16 Kg Gross weight Aprox 9 45 Kg ...


