background image

11

INDEX

1. Introduction

2. Contents

3. Safety instructions

4. Product characteristics

5. Usage instructions

6. Maintenance

7. Troubleshooting

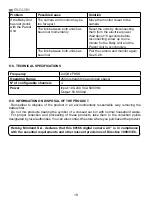
8. Technical specifications

9. Information about the disposal of the product

 1. INTRODUCTION

We congratulate you for having acquired the camera accessory for the digital baby monitor 

2.4 ˝plus, with a wireless colour monitor and a front touch panel, featuring the most advanced 

technology. We are certain you will be fully satisfied with the quality and features of this product, 

however we recommend you read these instructions carefully in order to guarantee the best 

results from your purchase. 

This equipment allows for 4 cameras to be attached to the same monitor, enabling you to choose 

the camera image you wish at any given time.

One of the main characteristics of this baby monitor is that it enables you to simultaneously view 

2 cameras using the Dual View feature, or, if you prefer, the monitor will show the image from 

each camera for a few seconds on a rotating basis.

NOTE:  The  characteristics  described  in  this  user  manual  are  subject  to  modifications 

without prior notice.

 2. CONTENTS

1 Camera (baby unit)

1 AC/DC Adapter

1 Tripod

User Manual and Guarantee Card

· If any of the aforementioned elements is missing, get in touch with your distributor

 3. SAFETY INSTRUCTIONS

Read this instruction manual carefully before using your baby monitor for the first time and keep 

it so you can use it for reference purposes in the future.

3.1. GENERAL SAFETY INSTRUCTIONS:

When electrical appliances are used, some basic safety precautions need to be followed at all 

times:

1. You must take great care when children or the elderly use any product or when it is used near 

them. Keep the appliance out of the reach of children when you are not using it.

2. This product must not be used as the sole means of surveillance and in no way is it a substitute 

for the responsible supervision of children, adults or properties by adults.

3. Only use the camera with the AC adapter supplied.

4. This product contains small parts. Exercise care when unpacking and assembling the product.

5. Do NOT allow children to play with the packaging materials such as, for example, plastic bags.

6. Do NOT use the appliance if the cable or plug has been damaged. If the operation of your 

baby monitor is not correct or has suffered any damage, get in touch with the Miniland authorised 

 ENGLISH 

Содержание Digital Camera 2.4"

Страница 1: ...digital camera minilandbaby com 2 4 Español English Português Français Deutsch Italiano Polski Русский 3 11 19 27 36 45 53 61 ...

Страница 2: ...MNLXX XXXXX ...

Страница 3: ...undos de forma cíclica NOTA Las características descritas en este manual del usuario están sujetas a modificaciones sin previo aviso 2 CONTENIDO 1 Cámara Unidad del Bebé 1 Adaptadores de CA CC 1 Trípode Manual del Usuario y Garantía Si faltara cualquiera de los elementos arriba indicados póngase en contacto con su distribuidor 3 INSTRUCCIONES DE SEGURIDAD Lea cuidadosamente este manual de instrucc...

Страница 4: ...édico y no debe confiarse a él el bienestar del bebé Es importante que visite periódicamente la habitación del bebé con el fin de asegurarse de que todo esté bien No utilice nunca este vigilabebés en aquellos casos en los que la vida o la salud del bebé u otras personas o la integridad de un inmueble dependan de su funcionamiento El fabricante no aceptará ninguna responsabilidad o reclamación algu...

Страница 5: ... podrían causar ruidos o incluso la aparición de sonidos e imágenes en el monitor Si esto ocurriera traslade la cámara a otro lugar 4 CARACTERÍSTICAS Y FUNCIONES DEL PRODUCTO 4 1 FUNCIONES Y CONTROLES DEL MONITOR MONITOR 1 LED de Carga 2 LED de Encendido 3 LEDS de Volumen 4 Pantalla LCD 5 Tecla de Menú Atrás 6 Tecla de Nav ARRIBA e Incremento de Vol 7 Tecla de Nav DERECHA y Zoom 8 Alerta de Tomas ...

Страница 6: ... cámara primero tendrá que emparejarla con su monitor como se indica en la sección 5 2 6 5 2 2 VISIÓN NOCTURNA INFRARROJA AUTOMÁTICA La función de visión nocturna infrarroja permite a la cámara captar imágenes de su bebé o del área monitorizada en condiciones de oscuridad o de poca luz En este modo sólo se mostrarán imágenes en blanco y negro en el monitor y sólo podrán verse los objetos situados ...

Страница 7: ...ecla Nota Si una de las cámaras está fuera de alcance o si no está encendida el monitor le avisará de ello y el Modo Scan se detendrá Nota 1 El modo Scan puede activarse o desactivarse pulsando mientras se visualiza la pantalla principal 5 2 5 MODO DUAL Esta función mostrará las imágenes de dos cámaras en la pantalla al mismo tiempo Esta función solo puede utilizarse cuando hay más de una unidad d...

Страница 8: ...jada el indicador LED dejará de parpadear y las imágenes de la cámara se mostrarán inmediatamente en la pantalla de la unidad de monitor 8 Si el emparejamiento no se hubiera efectuado correctamente repita los pasos arriba indicados La conexión entre el monitor y una cámara ya conectada podría perderse por diversas razones Si fuera así repita el proceso arriba indicado para conectar de nuevo la cám...

Страница 9: ...e corriente Monitor No se ha enchufado el adaptador de corriente Enchufe el adaptador de corriente El monitor está fuera de su campo de alcance Acerque el monitor a la cámara Se ha perdido la conexión entre el monitor y una cámara ya emparejada Empareje de nuevo la cámara con el monitor Consulte la sección 5 2 6 Se ha seleccionado una cámara que no es la correcta Cambie el número de cámara que est...

Страница 10: ... unidad del bebé y la unidad parental se sincronicen Se ha perdido la conexión entre las dos unidades Empareje de nuevo la cámara y el monitor Consulte la sección 5 2 6 8 ESPECIFICACIONES TÉCNICAS 9 INFORMACIÓN SOBRE LA ELIMINACIÓN DEL PRODUCTO Recuerde que es necesario eliminar el producto de manera responsable con el medio ambiente retirando antes la pila No mezcle los productos que lleven el sí...

Страница 11: ...ions without prior notice 2 CONTENTS 1 Camera baby unit 1 AC DC Adapter 1 Tripod User Manual and Guarantee Card If any of the aforementioned elements is missing get in touch with your distributor 3 SAFETY INSTRUCTIONS Read this instruction manual carefully before using your baby monitor for the first time and keep it so you can use it for reference purposes in the future 3 1 GENERAL SAFETY INSTRUC...

Страница 12: ...on its operation The manufacturer will not accept any responsibility or complaint owing to death personal injury or material damage resulting from the malfunctioning or misuse of the product Misuse of this wireless baby monitor could give rise to legal action Use this product responsibly IMPORTANT Bear in mind that any change or modification to the equipment not carried out by the Miniland technic...

Страница 13: ...nds or images to be broadcast on the monitor Should this occur move the camera somewhere else 4 PRODUCT FEATURES 4 1 MONITOR FUNCTIONS AND CONTROLS MONITOR 1 Charging LED 2 Power LED 3 Volume LEDs 4 LCD Screen 5 Menu Back key 6 Nav UP Vol up key 7 Nav RIGHT Zoom key 8 Feeding Alert 9 Nav LEFT Brightness key 10 Nav DOWN Vol Down key 11 Medicine Alert 12 Power button 13 Talk to the baby key 14 Confi...

Страница 14: ...s shown in section 5 2 6 5 2 2 INFRARED NIGHT VISION AUTOMATIC The infrared night vision function allows the camera to pick up images of your baby or the monitored area in dark or low light conditions In this mode only black and white images will be displayed on the monitor and only objects located less than 2 meters away can be seen The camera constantly monitors the light level and automatically...

Страница 15: ... when there is more than 1 camera unit paired 1 Press the Menu Back key and the menu will pop up 2 Press the UP key or DOWN key until the camera icon is highlighted then press RIGHT key to enter into the sub menu 3 Press UP or DOWN key to select VIEW camera icon then press RIGHT key enter into the sub menu 4 Press RIGHT LEFT UP DOWN key to select the dual view icon 5 Press key go to dual mode Note...

Страница 16: ...ss make sure that the camera and the monitor are close to each other Note 2 Each camera can be linked just with one monitor at a time Nota 3 If the monitor and the camera for some reason have left the factory without being paired you will have to do it manually adding the camera to channel 2 3 or 4 You won t be able to pair the camera again with channel 1 until you have paired it in another channe...

Страница 17: ...camera is in night vision infrared mode In order to view the images in colour increase the level of light in the room the camera is in or check there is nothing covering the camera s light sensor II The camera does not transmit The camera is not turned on Press and hold down button III for 2 seconds Camera the power adapter is not plugged in Plug in the power adapter VOX mode or Standby mode are a...

Страница 18: ...MATION ON DISPOSAL OF THE PRODUCT Remember to dispose of the product in an environmentally responsible way removing the battery first Do not mix products bearing the symbol of a crossed out bin with normal household waste For proper collection and processing of these products take them to the collection points designated by local authorities You can also contact the store where you purchased the p...

Страница 19: ...ara durante alguns segundos de forma cíclica NOTA as características descritas neste manual do utilizador podem estar sujeitas a alterações sem aviso prévio 2 CONTEÚDO 1 Câmara Unidade do bebé 1 Adaptadores AC DC 1 Tripé Manual do Utilizador e Garantia Se algum dos artigos acima mencionados estiver em falta contacte o seu agente 3 INSTRUÇÕES DE SEGURANÇA Ler este manual de instruções cuidadosament...

Страница 20: ...mantenha perto do monitor quando em utilização O intercomunicador vídeo para bebé não é um dispositivo médico e não deve confiar o bem estar do seu bebé ao aparelho É importante visitar regularmente o quarto de bebé em pessoa para se assegurar de que tudo está em ordem Nunca usar este intercomunicador vídeo para bebé nos casos em que a vida ou saúde do bebé ou outras pessoas ou a integridade de um...

Страница 21: ...os cantos de armários prateleiras etc Colocar o intercomunicador vídeo para bebé longe de fontes de calor como radiadores lareiras fogões e luz solar directa Afastar a câmara dos televisores repetidores e rádios Os intensos sinais de rádio gerados por estes elementos podem causar ruído ou mesmo o aparecimento de sons e imagens no monitor Se isto ocorrer mudar a câmara para outro local 4 CARACTERÍS...

Страница 22: ...gar desligar III pressionado durante dois segundos O LED de alimentação IX acender se á ou apagar se á conforme está a ligar ou desligar a câmara Quando tiver a câmara instalada e a ligar poderá ver imagens e ouvir os sons captados no quarto do seu bebé através do monitor Lembre se de que para ver a imagem desta câmara no seu monitor deve emparelhar previamente as unidades seguindo as instruções i...

Страница 23: ...elhada Para entrar neste modo 1 Carregar na tecla Menu Voltar e o menu aparecerá 2 Carregar na tecla P CIMA ou tecla P BAIXO até o ícone da câmara estar realçado e depois carregar na tecla DIREITA para entrar no submenu 3 Carregar na tecla P CIMA ou P BAIXO para seleccionar o ícone da câmara VER e depois carregar na tecla DIREITA para entrar no submenu 4 Carregar na tecla DIREITA ESQUERDA P CIMA P...

Страница 24: ... 3 Carregar na tecla P CIMA ou tecla P BAIXO para seleccionar o ícone de ADICIONAR câmara e depois carregar na tecla DIREITA para entrar no submenu 4 Carregar na tecla DIREITA ESQUERDA P CIMA P BAIXO para seleccionar a câmara que se deseja adicionar 5 Carregar na tecla para procurar uma unidade de câmara O indicador LED 2 começará a piscar a verde 6 Enquanto o indicador LED estiver a piscar carreg...

Страница 25: ...e limpeza ou solventes RESOLUÇÃO DE PROBLEMAS Problema Causa possível Solução Nenhuma recepção no monitor Câmara não está ligada Carregar e manter pressionado o botão III durante 2 segundos Câmara não ligada Carregar e manter carregado o botão ligar desligar 12 Câmara não ligada ao adaptador de alimentação Ligar o adaptador de alimentação Monitor O adaptador de alimentação não está ligado à tomada...

Страница 26: ...es desligando as da corrente eléctrica Espere cerca de 15 minutos antes de voltar a ligar Esperar um minuto para a Unidade do Bebé e Unidade dos Pais para sincronizar A ligação entre ambas as unidades perdeu se Emparelhar de novo a câmara e monitor Ver 5 2 6 8 ESPECIFICAÇÕES TÉCNICAS 9 INFORMAÇÕES SOBRE A ELIMINAÇÃO E DO PRODUTO Lembre se de eliminar o produto de uma maneira ambientalmente respons...

Страница 27: ...ant quelques secondes REMARQUE les caractéristiques décrites dans ce manuel d utilisation peuvent être sujettes à modifications sans préavis 2 CONTENU 1 Caméra Unité Bébé 1 adaptateurs AC DC 1 Trépied Manuel d utilisation et Garantie Si un des éléments listés ci dessus est manquant contactez votre revendeur 3 INSTRUCTIONS DE SÉCURITÉ Lisez ce manuel d utilisation avec attention avant d utiliser vo...

Страница 28: ... est nécessaire qu un parent reste à proximité du moniteur lorsqu il est en cours d utilisation Le moniteur de bébé n est pas un dispositif médical et vous ne devez pas faire confier à ce dernier le bien être de votre bébé Il est important que vous vous rendiez régulièrement en personne dans la chambre de votre bébé pour vous assurer que tout va bien Ne jamais utiliser ce moniteur de bébé dans les...

Страница 29: ...es que des couettes ou couvertures ou dans les angles de placards d étagères etc Placez le moniteur de bébé à l écart des sources de chaleur telles que les radiateurs les cheminées et la lumière directe du soleil Placez la caméra à l écart des postes de TV des stations relais et des radios Les intenses signaux radio générés par ces éléments peuvent provoquer des bruits ou même faire apparaître des...

Страница 30: ... secondes Le Voyant LED d alimentation IX va s allumer ou s éteindre selon que vous mettez l unité sur on ou sur off Lorsque vous avez installé la caméra et que vous l avez allumé vous pouvez voir les images et entendre les sons capturés dans la chambre de votre bébé via le moniteur Rappelez vous que pour voir l image de cette caméra sur votre écran vous devez synchroniser auparavant les unités en...

Страница 31: ...er dans ce mode 1 Appuyez sur la touche Menu Retour et le menu va s afficher 2 Appuyez sur la touche HAUT ou la touche BAS jusqu à ce que l icône de la caméra soit en surbrillance puis appuyez sur la touche DROITE pour entrer dans le sous menu 3 Appuyez sur la touche HAUT ou BAS pour sélectionner l icône VUE caméra puis appuyez sur la touche DROITE pour entrer dans le sous menu 4 Appuyez sur la to...

Страница 32: ...a touche DROITE pour entrer dans le sous menu 3 Appuyez sur la touche HAUT ou la touche BAS pour sélectionner l icône AJOUTER une caméra puis appuyez sur la touche DROITE pour entrer dans le sous menu 4 Appuyez sur la touche DROITE GAUCHE HAUT BAS pour sélectionner la caméra que vous souhaitez ajouter 5 Appuyez sur la touche pour rechercher une unité caméra L indicateur LED 2 va clignoter en vert ...

Страница 33: ...caméra avec un chiffon doux et exempt de peluches Si l unité es sale utilisez un chiffon légèrement humide pour nettoyer les surfaces en prenant soin de ne pas laisser de l eau s infiltrer dans les ouvertures Ne jamais utiliser de produits détergents ou de solvants DÉPANNAGE Problème Cause possible Solution Pas de réception sur le moniteur La caméra n est pas allumée Appuyez et maintenez enfoncé l...

Страница 34: ...erniers à une distance suffisamment éloignée de l appareil Il est possible que la caméra et le moniteur soient trop éloignés l un de l autre Déplacez le moniteur plus près de la caméra Il est possible que l énergie de la batterie soit trop faible Branchez l adaptateur d alimentation Il est possible que la caméra ou le moniteur soient placés trop près d un certain nombre d objets métalliques Placez...

Страница 35: ...n traitement appropriés de ces produits apportez les dans un des points de collecte indiqués par les autorités locales Vous pouvez également contacter le magasin dans lequel vous avez acheté le produit Fréquence 2 4GHz FHSS Portée de fonctionnement 250m en ligne droite et sur un espace ouvert Nombre de canaux configurables 4 Puissance Entrée 100 240 VCA 50 60 Hz Sortie 5 V 800 mA FRANÇAIS Par la p...

Страница 36: ...gt werden können Sie können die Bilder beider Kameras aber auch zyklisch für einige Sekunden auf dem Bildschirm betrachten HINWEIS die in dieser Bedienungsanleitung beschriebenen Funktionen können jederzeit ohne vorherige Ankündigung geändert werden 2 INHALT 1 Kamera Baby Einheit 1 AC DC Netzteile 1 Dreifuß Bedienungsanleitung und Garantie Wenn eines der oben genannten Teile fehlen sollte kontakti...

Страница 37: ...uhigt sein können wenn sie nicht im Zimmer des Baby sein können Dieses Produkt ist kein Ersatz für die Aufsicht durch Erwachsene Es ist notwendig dass ein Elternteil in der Nähe des Monitors bleibt wenn das Gerät im Einsatz ist Der Baby Monitor ist kein medizinisches Gerät und Sie sollten nicht das Wohlergehen Ihres Babys dem Produkt anvertrauen Es ist wichtig dass Sie regelmäßig das Kinderzimmer ...

Страница 38: ...hn nicht auf weichen Kissen oder Decken oder in den Ecken von Schränken Regalen etc auf Halten Sie den Baby Monitor von Wärmequellen wie Heizkörper Kocher und von direkter Sonneneinstrahlung fern Stellen Sie die Kamera von Fernsehgeräten Repeatern und Radios entfernt auf Die intensiven Funksignale die von diesen Elementen erzeugt werden könnten dazu führen dass unerwünschter Lärm oder sogar Töne u...

Страница 39: ...unden gedrückt Die Power LED IX wird entweder aufleuchten oder ausgehen je nachdem ob Sie das Gerät ein oder ausschalten Wenn Sie die Kamera installiert und eingeschaltet haben können Sie die Bilder sehen und die Geräusche aus dem Zimmer ihres Kindes über den Monitor hören Hinweis Um das Bild dieser Kamera auf Ihrem Monitor zu sehen müssen Sie zuerst beide Geräte miteinander verknüpfen siehe enspr...

Страница 40: ...ie die AUF oder AB Taste bis das Kamera Symbol hervorgehoben wird Betätigen Sie dann die RECHTS Taste um in das Untermenü zu gelangen 3 Betätigen Sie die AUF oder AB Taste um das VIEW Ansicht Kamera Symbol zu wählen und betätigen Sie dann die RECHTS Taste um in das Untermenü zu springen 4 Betätigen Sie RECHTS LINKS AUF AB Taste um das Kamera Symbol zu wählen 5 Betätigen Sie die Taste Hinweis Wenn ...

Страница 41: ...etätigen Sie die AUF oder AB Taste um das ADD Hinzufügen Symbol zu wählen und betätigen Sie dann die RECHTS Taste um in das Untermenü zu springen 4 Betätigen Sie RECHTS LINKS AUF AB Taste um die gewünschte hinzuzufügende Kamera auszuwählen 5 Betätigen Sie die Taste um die Kamera zu suchen Die LED Anzeige 2 beginnt grün zu blinken 6 Während die LED Anzeige blinkt drücken Sie die Link Taste an der K...

Страница 42: ...die Oberflächen der Kamera und des Monitors mit einem weichen fusselfreien Tuch Verwenden Sie wenn die Geräte verschmutzt sind ein leicht angefeuchtetes Tuch um Oberflächen abzuwischen wobei darauf zu achten ist dass kein Wasser in Öffnungen eintreten darf Benutzen Sie nie Reinigungs oder Lösungsmittel FEHLERBEHEBUNG Problem Mögliche Ursache Lösung Kein Empfang am Monitor Kamera nicht eingeschalte...

Страница 43: ...te können das Signal stören Bewegen Sie sie vom Gerät weg Die Kamera und der Monitor zu weit voneinander entfernt Bewegen Sie den Monitor näher an der Kamera heran Die Batterie ist möglicherweise zu schwach Stecken Sie das Netzteil ein Die Kamera oder Monitor könnten zu nahe an einigen metallischen Gegenständen aufgestellt sein Bewegen Sie sie vom Gerät weg Wenn die Baby Einheit ihre Verbindung mi...

Страница 44: ...u einer Sammelstelle die Ihnen von Ihrer örtlichen Verwaltung angegeben wurde Sie können auch das Geschäft kontaktieren in dem Sie das Produkt gekauft haben Frequenz 2 4GHz FHSS Reichweite 250m direkte Verbindung und offener Bereich Anzahl der konfigurierbaren Kanäle 4 Stromversorgung Eingang 100 240 VCA 50 60Hz Ausgang 5V 800mA DEUTSCH Hiermit erklärt Miniland S A dass sich das Gerät 89166 digita...

Страница 45: ...ni di ciascuna videocamera NOTA le caratteristiche descritte in questo manuale possono essere soggette a cambiamenti senza preavviso 2 INDICE 1 Videocamera Unità bebè 1 Adattatori AC DC 1 Treppiede Manuale utilizzatore e Garanzia Se uno qualsiasi degli elementi qui elencati fosse mancante rivolgersi al proprio rivenditore 3 ISTRUZIONI DI SICUREZZA Leggere attentamente questo manuale di istruzioni ...

Страница 46: ...te di persona la camera del bebè per assicurarvi che tutto sia in ordine Non usare mai questo baby monitor in quei casi in cui la vita o la salute del bebè o di altre persone o l integrità di un edificio dipendono dal suo funzionamento Il fabbricante non accetta responsabilità o rivendicazioni per decessi lesioni a persone o danni alle proprietà risultanti dal malfunzionamento o dall uso improprio...

Страница 47: ...uò essere collocato su tavolo usando il supporto per tavolo retrattile sul retro del monitor Quando non è in uso ripiegare semplicemente il supporto da tavolo sul retro del monitor fino a sentire un clic 4 CARATTERISTICHE PRODOTTO 4 1 FUNZIONI E CONTROLLI MONITOR MONITOR 1 LED di carica 2 LED di accensione 3 LED di volume 4 Display LED 5 Tasto Menu Back menù indietro 6 Tasto Nav SU e Vol 7 Tasto N...

Страница 48: ... di riprendere immagini del bebè o dell area monitorata anche in condizioni di buio o di scarsa illuminazione In questa modalità solo immagini in bianco e nero verranno visualizzate sullo schermo e si potranno vedere solo oggetti situati a meno di 2 metri di distanza La videocamera effettua il monitoraggio costante del livello di luce e passa automaticamente alla modalità infrarossa quando la luce...

Страница 49: ...ndo vi è più di una unità videocamera abbinata 1 Premere il tasto Menu Back e il menù verrà visualizzato 2 Premere il tasto SU o GIÙ per selezionare l icona videocamera e poi premere il tasto DESTRA per entrare nel sottomenù 3 Premere il tasto SU o GIÙ per selezionare l icona VEDI videocamera e poi premere il tasto DESTRA per entrare nel sottomenù 4 Premere i tasti DESTRA SINISTRA SU GIÙ per selez...

Страница 50: ...tor siano l una vicino all altro Nota 2 Ciascuna videocamera può essere collegata solo con un monitor per volta Nota 3 Se il monitor e la videocamera per qualche ragione hanno lasciato la fabbrica senza essere abbinati lo si dovrà fare manualmente aggiungendo la videocamera al canale 2 3 o 4 Non sarà possibile abbinare la videocamera di nuovo con il canale 1 finché non si abbina in un altro canale...

Страница 51: ...a è in modalità visione notturna infrarosso Per vedere le immagini a colori aumentare il livello di luminosità nel luogo in cui si trova la videocamera o controllare che nulla stia coprendo il sensore di luce della videocamera II La videocamera non trasmette La videocamera non è accesa Premere e mantenere premuto il pulsante III per 2 secondi Videocamera l adattatore di corrente non è inserito Ins...

Страница 52: ...INFORMAZIONI SULLO SMALTIMENTO DEL PRODOTTO Ricordare di smaltire il prodotto in modo responsabile dal punto di vista ambientale rimuovendo prima la batteria Non mescolare prodotti che recano il simbolo di un bidone dei rifiuti barrato con i normali rifiuti domestici Per un adeguata raccolta ed elaborazione di questi prodotti conferirli ai punti di raccolta designati dalle autorità locali Si può a...

Страница 53: ...alszych powiadomień 2 ZAWARTOŚĆ 1 Kamera urządzenie dla dziecka 1 Zasilacze AC DC 1 Statyw Instrukcja i gwarancja Jeśli brakuje któregokolwiek z wymienionych elementów prosimy skontaktować się z dostawcą 3 ZASADY BEZPIECZNEGO UŻYTKOWANIA Przed rozpoczęciem użytkowania niani elektronicznej należy dokładnie zapoznać się z niniejszą instrukcją i zachować ją aby móc do niej zajrzeć w przyszłości 3 1 O...

Страница 54: ... Koniecznie należy regularnie zaglądać do pokoju dziecka aby sprawdzić czy wszystko jest w porządku Nie należy używać niani elektronicznej w sytuacji gdy życie i zdrowie dziecka lub innych osób lub stan budynku zależą od jego pracy Producent nie bierze na siebie odpowiedzialności ani nie może uznawać roszczeń z tytułu śmierci uszkodzenia ciała i szkód materialnych wynikających z nieprawidłowej pra...

Страница 55: ...ejniki kominki kuchenki i chronić przed bezpośrednim działaniem promieni słonecznych Umieścić kamerę daleko od telewizorów przekaźników i radioodbiorników Silny sygnał radiowy emitowany przez te urządzenia może powodować powstawanie szumów i dźwięków a nawet zakłócenia w obrazie widocznym na monitorze Jeśli to nastąpi należy przenieść kamerę w inne miejsce 4 CECHY PRODUKTU 4 1 FUNKCJE I ELEMENTY S...

Страница 56: ...ZIAŁANIE 5 2 1 WŁĄCZANIE i WYŁĄCZANIE KAMERA Aby włączyć lub wyłączyć kamerę należy nacisnąć i przytrzymać przez dwie sekundy przycisk zasilania III Dioda zasilania IX zaświeci się lub zgaśnie w zależności od tego czy urządzenie zostanie włączone czy wyłączone Po umieszczeniu i włączeniu kamery można w monitorze zobaczyć obraz i usłyszeć dźwięk z pokoju dziecinnego Należy pamiętać iż aby móc ogląd...

Страница 57: ...kamer Aby przejść do tego trybu należy 1 Nacisnąć przycisk Menu powrót a wówczas pojawi się menu 2 Przyciskiem W GÓRĘ lub W DÓŁ podświetlić ikonę kamery a następnie przyciskiem W PRAWO przejść do podmenu 3 Przyciskiem W GÓRĘ lub W DÓŁ wybrać ikonę WIDOK z kamery a następnie przyciskiem W PRAWO przejść do podmenu 4 Za pomocą przycisków W PRAWO W LEWO W GÓRĘ W DÓŁ wybrać ikonę skanowania kamery 5 Na...

Страница 58: ...DÓŁ podświetlić ikonę kamery a następnie przyciskiem W PRAWO przejść do podmenu 3 Przyciskiem W GÓRĘ lub W DÓŁ wybrać ikonę DODANIE kamery a następnie przyciskiem W PRAWO przejść do podmenu 4 Za pomocą przycisków W PRAWO W LEWO W GÓRĘ W DÓŁ wybrać kamerę którą chce się dodać 5 Nacisnąć przycisk aby wyszukać kamerę Dioda 2 zacznie mrugać na zielono 6 Kiedy dioda mruga należy nacisnąć w kamerze VI p...

Страница 59: ...e jest włączona Nacisnąć i przytrzymać przez 2 sekundy przycisk III Monitor nie jest włączony Nacisnąć i przytrzymać przycisk zasilania 12 Kamera Nie jest podłączona do zasilacza Podłączyć zasilacz Monitor Zasilacz nie jest podłączony Podłączyć zasilacz Monitor poza zasięgiem Przenieść monitor bliżej kamery Utracono połączenie między powiązanym monitorem a kamerą Ponownie powiązać kamerę z monitor...

Страница 60: ...do jednej minuty na zsynchronizowanie urządzenia dla dziecka i urządzenia dla rodziców Nastąpiła chwilowa utrata połączenia między urządzeniami Ponownie powiązać kamerę i monitor Patrz punkt 5 2 6 8 PARAMETRY TECHNICZNE 9 INFORMACJE NA TEMAT UTYLIZACJI PRODUKTU Należy pamiętać o wyrzucaniu produktu w sposób przyjazny dla środowiska po wyjęciu baterii Nie mieszać produktów opatrzonych symbolem prze...

Страница 61: ...нд Примечание Некоторые свойства изделия описанные в данном руководстве могут быть изменены без предварительного уведомления 2 КОМПЛЕКТАЦИЯ 1 Камера устройство в комнате ребенка 1 Блока питания 1 штатив Руководство по эксплуатации и гарантия В случае отсутствия любого из перечисленных выше компонентов обратитесь к продавцу изделия 3 ИНСТРУКЦИИ ПО ТЕХНИКЕ БЕЗОПАСНОСТИ Перед началом использования ра...

Страница 62: ...она не может полностью заменить собой наблюдение за ребенком со стороны взрослых Во время работы устройства один из родителей должен находиться возле монитора Радионяня это не медицинский прибор и Вы не должны доверять ему здоровье своего ребенка Необходимо регулярно заходить в комнату ребенка чтобы проверять его состояние Запрещается использовать радионяню в тех случаях когда от его работы зависи...

Страница 63: ... на нее прямых солнечных лучей Камеру следует держать вдали от телевизоров радиоприемников или ретрансляторов Мощные сигналы генерируемые этими устройствами могут привести к появлению шумов или даже звуков и изображений на мониторе В таких ситуациях следует перенести камеру в другое место 4 ТЕХНИЧЕСКИЕ ХАРАКТЕРИСТИКИ ИЗДЕЛИЯ 4 1 ОРГАНЫ УПРАВЛЕНИЯ И ФУНКЦИИ МОНИТОРА МОНИТОРА 1 Светодиодный индикато...

Страница 64: ...ключения или выключения камеры нажмите кнопку включения питания III и удерживайте в течение двух секунд Индикатор питания IX загорится или погаснет в зависимости от того включаете Вы устройство или выключаете После установки и включения камеры Вы можете на мониторе видеть изображение и слышать звуки происходящего в комнате Вашего ребенка Напоминаем что для передачи изображения этой камеры на монит...

Страница 65: ...в этот режим 1 Нажмите клавишу Меню Назад появится символ меню 2 Нажимайте клавиши ВВЕРХ или ВНИЗ чтобы выделить символ камеры затем нажмите клавишу ВПРАВО чтобы войти в подменю 3 Нажимайте клавиши ВВЕРХ или ВНИЗ чтобы выбрать символ ПРОСМОТРА камер затем нажмите клавишу ВПРАВО чтобы войти в подменю 4 Нажимайте клавишу ВПРАВО ВЛЕВО ВВЕРХ ВНИЗ чтобы выбрать символ сканирования 5 Нажмите клавишу При...

Страница 66: ...ВЕРХ или ВНИЗ чтобы выделить символ камеры затем нажмите клавишу ВПРАВО чтобы войти в подменю 3 Нажимайте клавиши ВВЕРХ или ВНИЗ чтобы выбрать символ ДОБАВИТЬ камеру затем нажмите клавишу ВПРАВО чтобы войти в подменю 4 Нажимайте клавишу ВПРАВО ВЛЕВО ВВЕРХ ВНИЗ чтобы выбрать камеру которую Вы хотите добавить 5 Нажмите клавишу чтобы начать поиск камеры Индикатор 2 начнет мигать зеленым светом 6 Пока...

Страница 67: ...ю следя чтобы вода не попала в отверстия Запрещается применять чистящие средства или растворители 7 ПОИСК И УСТРАНЕНИЕ НЕИСПРАВНОСТЕЙ Проблема Возможная причина Решение Монитор не получает сигнал Камера не включена Нажмите и удерживайте кнопку II в течение 2 секунд Монитор не включен Нажмите и удерживайте кнопку включения питания 12 Камера не подключена к блоку питания Подключить блок питания Мони...

Страница 68: ...ожно рядом с камерой или монитором находится слишком много металлических предметов Уберите их подальше от устройства Потеряна связь устройства в комнате ребенка с устройством в комнате родителей Камера и монитор находятся слишком далеко друг от друга Переместить монитор ближе к камере Временная потеря связи между устройствами Перезагрузите устройства отключив питание Подождите приблизительно 15 се...

Страница 69: ...ьно извлеченной батареей Изделия с нанесенным на них символом перечеркнутого мусорного контейнера нельзя выбрасывать с обычными бытовыми отходами Для надлежащего сбора и переработки этих изделий их следует сдавать в специальные пункты сбора установленные органами властями Вы также можете обратиться за информацией в магазин в котором Вы покупали изделие PУССКИЙ ...

Страница 70: ...300 GHz EN 55022 2010 AC 2011 Information technology equipment Radio disturbance cha racteristics Limits and methods of measurement EN 55024 2010 Information technology equipment Immunity characteristics Limits and methods of measurement EN 61000 3 2 2006 A1 2009 A2 2009 Electromagnetic compatibility EMC Part 3 2 Limits Limits for harmonic current emissions equipment input current 16 A per phase E...

Страница 71: ......

Страница 72: ...ormations Hergestellt in China Bewahren Sie diese Angaben auf Wyprodukowano w Chinach Zachowaj instrukcję Сделано в Китае Сохраните эту информацию Recogida selectiva Cuida el medio ambiente Selective pick up Protect the environment Tri sélectif Prend soin de l environnement Bitte gesondert entsorgen Schützen Sie die Umwelt Raccolta differenziata Rispetta l ambiente Recolha selectiva Conserve o Mei...

Отзывы: